
$15 - $20 (based on 2016 prices)
Makes one ornament
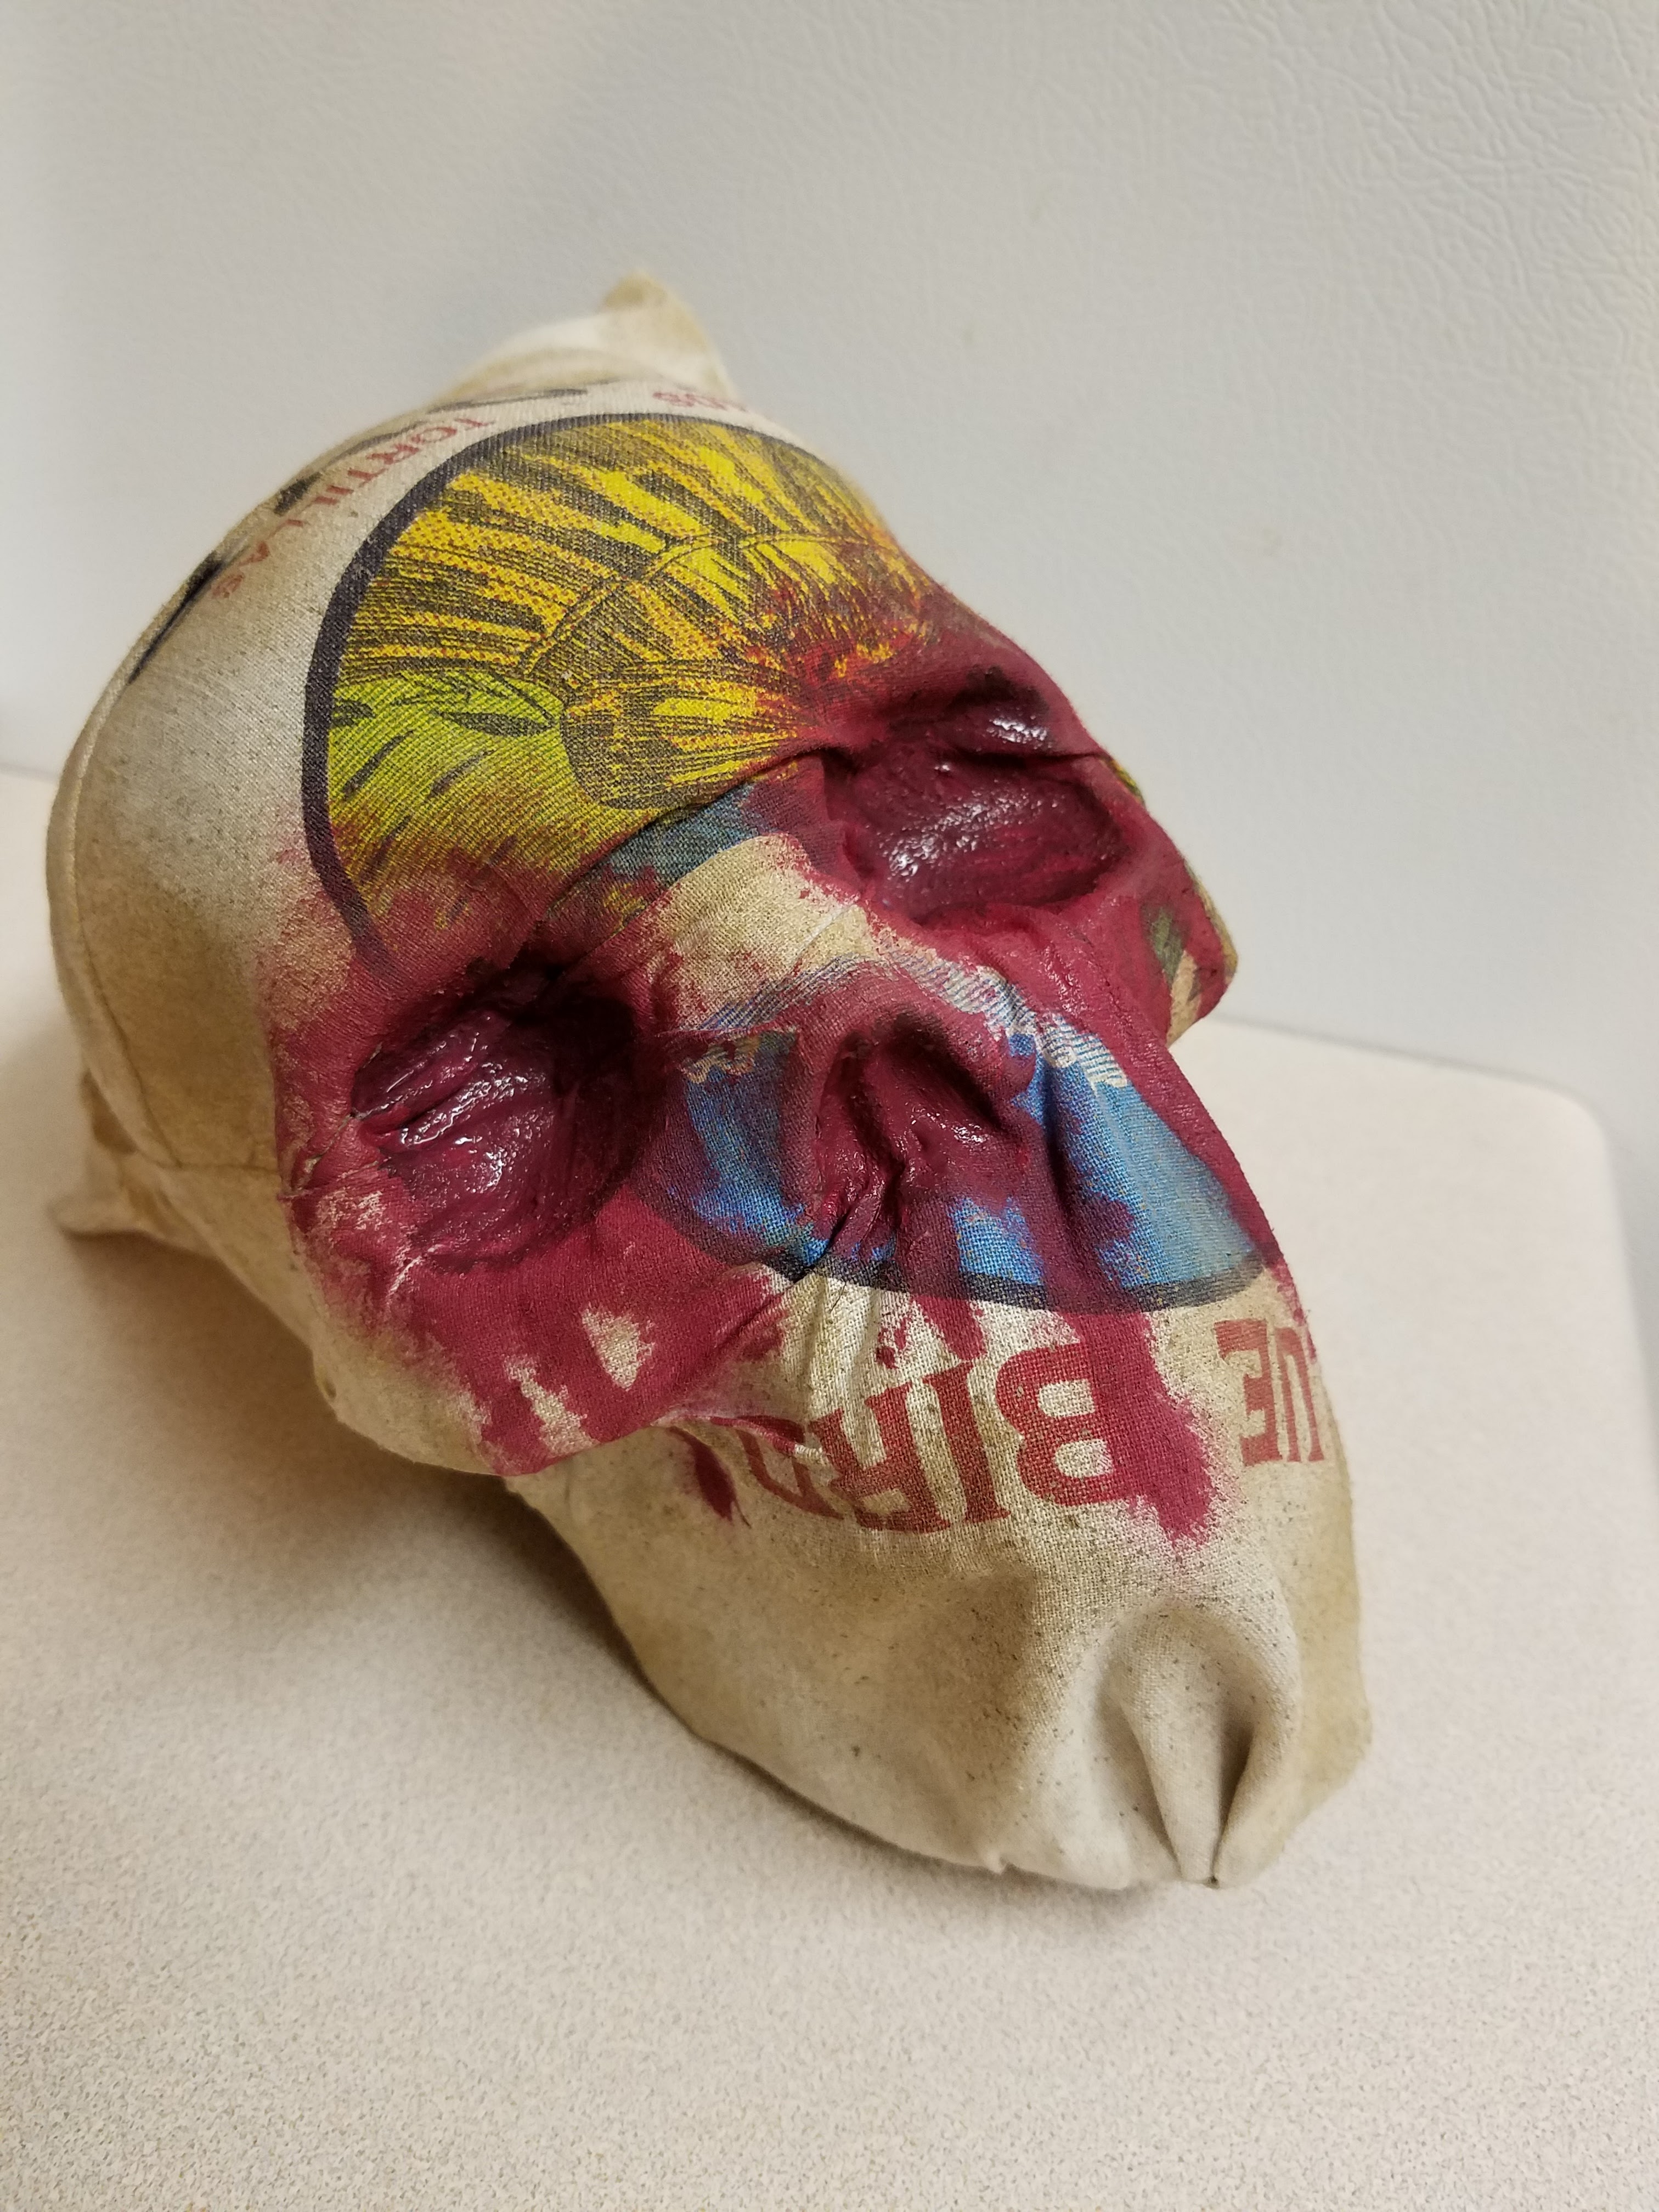
This prop was meant to be an alternate head for the scarecrow, since I did not care for the version I made; however, during the haunt, I decided to use a lighted steer skull for the scarecrow’s head, which meant this prop found a new home hanging from the side of the house. Although it was relegated to a spot not widely seen by visitors, it was (and continues to be) my favorite build, which is why it is the profile picture for Haunted Hill’s Instagram and the title card for the YouTube videos.- One human-size plastic skull
- One five-pound flour sack
- At least four tablespoons of dark roasted coffee grounds
- One pan large enough to soak the flour sack
- One 2 oz. bag of spider webbing
- One 4 oz. bottle of all-purpose tacky glue
- One 10 oz. cans of interior/exterior, fast-drying spray paint in flat brown
- One 10 oz. cans of interior/exterior, fast-drying spray paint in metallic silver
- Two plastic sickles
- One 2 oz. bottle of acrylic paint in flat black*
- One 2 oz. bottle of acrylic paint in flat brown*
- One 2 oz. bottle of acrylic paint in flat red*
- One 2 oz. bottle of acrylic paint in flat white*
- One 0.44 oz. bottle of clear nail polish*
- One newspaper
- One 4 oz. bottle of wood glue
- Once yard of brown twine
- One foot of steel wire

2. Once the sack has dried, use a seam ripper to open one side of the sack. This will create a larger opening for the skull and make the process in step five much easier.

3. Remove the mandible from the skull and hot glue it agape to create a screaming face. To aid the process, use a sturdy object – a glass jar or tin can – to support the skull as the glue dries. You may need to apply multiple coats to ensure a firm hold.

4. Use the spider webbing (or cotton padding) to stuff the corner of the sack and give it extra girth. This will prevent the corner from folding over after the skull has been inserted and add to the prop’s overall visual appeal.

5. Starting at the front of the skull, glue the sack to the prop. I found that this step works best if you move in stages: apply a layer of glue to one section, hold the fabric down until it sticks, and then repeat the process. You may need to apply ample amounts of glue in the eye sockets and nasal cavities to get the fabric to hold their forms.

6. Once the glue has fully dried, give the burlap a light dusting of brown spray paint to simulate dirt. To achieve this, hold the can roughly twelve inches away from the surface and make quick flicking motions.

7. Use red paint to give the illusion of blood seeping from the eyes and nose. It works best to fill in the deepest recesses first and then spread the paint outward, following the course that the flow would naturally take as it drips downward.
8. After the paint has dried, give it a coat or two of clear nail polish to make it appear wet. Akin to step seven, start with the depressions made by the eyes and nose and move outward.

9. On a newspaper-lined surface in a well-ventilated area, give the sickles a few even coats of metallic spray paint. I used two, but you may apply more or less. To achieve a nice coverage, select a paint which adheres to plastic.

10. After the metallic paint has dried, give the blades a rusted patina. Begin by dabbing red paint onto their surfaces. As you do so, concentrate your application on areas where rust would naturally form, particularly along the edges of the blades. Once the red has dried, repeat the process with brown paint. During this application, be careful not to cover too much of the red paint. Lastly, apply a slight flecking of black paint. You can do this by either quickly flicking a paintbrush or using an old toothbrush and strumming your finger across the bristles. Since this process flings paint everywhere, it’s best to perform it outside.

11. Make the papier mache paste by mixing ½ cup of glue and ½ cup of water in a bowl. Try to use a sealable container. This gives you the ability to store the mixture for a day or two between applications. Also, to give the paste added support, use a combination of all-purpose glue and wood glue (stay away from school glue because it is washable and will dissolve in the water).

12. Cut the newspaper into strips, soak them in the paste, and apply them to the handles. To make the process more manageable, keep the strips at a reasonable size (mine were roughly six inches long and two inches wide). Similarly, only apply a few layers at a time and allow each layer to completely dry before adding more (I did two layers during each application and let them dry for twenty-four hours).

13. Give the handles a few even coats of white paint. This covers the newspaper’s print and gives the prop a blank canvas for the painting process. You could bypass this step by using white copy paper rather than newspaper for the papier mache.

14. To give the handles a grimy appearance, water down brown paint and brush it over their surfaces, ensuring the liquid settles into all the cracks and fissures (you can also use a spray bottle for the application). Allow the mixture to sit for a few minutes and then wipe it clean. Once you have achieved the look you desire, repeat this process with black paint to add further detail. You may want to experiment with the consistency prior to doing all of this: the more water you add, the fainter/lighter the wash; the less water you add, the deeper/darker the wash. For additional detail, wrap twine around the handles and glue it in place.

15. Position the sickles so their handles form an X and their blades face opposite each other. Then, glue them together. Although I used hot glue, you might consider superglue, especially if you plan to display the prop outdoors in windy conditions.

16. Use the steel wire to create a hanging loop on the back of the sickles. For a more rustic look, you can use the same twine wrapped around the sickles’ handles.

17. Rest the skull in the juncture between the two handles and glue it in place, as with step fifteen, use superglue for a sturdier hold, particularly if the prop will be exposed to the elements.

18. The prop can be embellished with additional details to cater it to your haunt’s theme, such as cockroaches crawling across its surface or a few severed ears and fingers dangling from the blades.


*You will not use the entire bottle’s content for this project.
No comments:
Post a Comment