Friday, June 30, 2017

The Mystery of Roanoke: A Mini-Essay

     On August 27, 1587, over one-hundred individuals watched as the three ships which had brought them to an abandoned English fort disappeared into the horizon. For weeks, these men, women, and children – the first English colonists in America – had repaired the fort’s derelict buildings and constructed new cottages out of brick and tile. During the construction, Elizabeth and Ananias Dare welcomed the arrival a baby girl and, a few days later, Dyonis and Margery Harvie delivered a boy.[1] Their celebrations were cut short as their governor, John White (Elizabeth Dare’s father), and the three ships were summoned back to England. As he parted ways with his daughter and new-born granddaughter, White promised to return with needed supplies within a few months. The promise went unkept and, when White finally returned in August of 1590, the fort was abandoned and only a cryptic CROATOAN etched into the entrance posts hinted at the colonists’ fate.[2] For centuries, what occurred during White’s three-year absence has been – and continues to be – the fodder for legends and fiction. From alien abductions and cannibal tribes to ancient curses and bloodthirsty monsters, theories abound regarding the destiny of those deserted settlers. Although extraterrestrials and curses make for great storytelling, serious scholarship reveals that Roanoke’s tale was far more tragic than supernatural.
     The colony began in 1585 when Sir Walter Ralegh, one of Queen Elizabeth’s pets, sent about one-hundred men to settle a small island on the North Carolina coast.[3] As summer gave way to winter, the colonists quickly strained their relationship with the Algonquian tribe, which had benevolently supported the men with their own surplus of food. When Sir Ralph Lane killed their chief in retaliation, the fort was quickly abandoned.[4] 
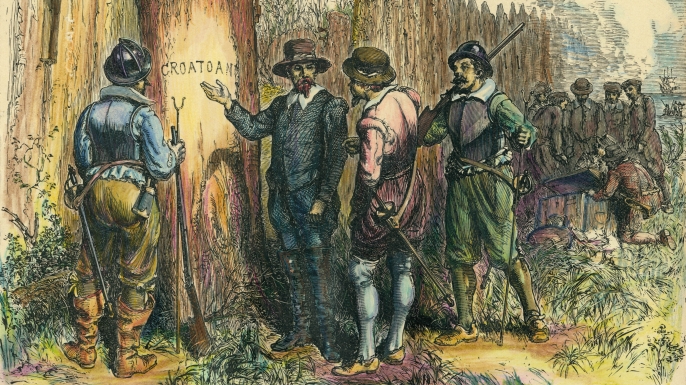
Irked, Ralegh attempted to settle the area again with White’s expedition and, again, misfortune ensued, this time involving the mysterious disappearance of several families. So, aliens and monsters aside, what really happened? Although historians degree slightly, they have proposed several credible scenarios.
     In North Carolina, local legend maintains that the colonists intermarried with the Lumbee tribe of Robeson County and their descendants still exist today. Historian Karen Ordahl Kupperman argues that this may be the most plausible explanation, with the settlers melting into the native populations akin to the three men abandoned by Lane and the fifteen men deserted by Sir Richard Grenville’s expedition in 1586.[5] Alan Taylor agrees with the fable to an extent. Drawing upon documentation from a group of English colonists who encountered a native tribe at Chesapeake Bay in 1607, the scholar contends that the refugees joined a local village and, shortly following this, the village’s members provoked the powerful Powhatan chieftain and were viciously killed.[6] Anthropologist Lee Miller takes a more intriguing stance and asserts that political deceit in Queen Elizabeth’s court – with Sir Francis Walsingham at the helm – purposefully intervened in Raleigh’s expedition in an effort to dismantle his credibility and remove him from the queen’s favor.[7] The plan, Miller contends, worked too well, with Raleigh condemned to the Tower of London and his colonists abandoned as hapless victims in a political game of jealously.[8] In desperation, the neglected settlers moved west into the interior of North Carolina and stumble upon a conflict between native nations, where they were either slaughtered in battle or taken as slaves.[9] Another possible outcome involves the Dare Stones housed at Brenau University. The first, found by a tourist along the Chowan River in 1937, held a bleak inscription: “Ananias and Virginia Dare went hence unto Heaven 1591.”[10] Between 1937 and 1940, over forty stones were found detailing the tragic tale of the settlers’ sad, death-riddled venture into the interior of North Carolina. Although most have been proven counterfeit, the original stone has maintained some semblance of credibility, with the spelling conforming to Elizabethan orthography and the inscription etched with tools likely possessed by the colonists.[11]

Works Referenced

Coleman, R.V. The First Frontier. 1948. Edison, NJ: Castle Books, 2005.

Kupperman, Karen Ordahl. Roanoke: The Abandoned Colony. Lanaham, MD: Rowman and Littlefield Publishers, Inc., 1984.

Miller, Lee. Roanoke: Solving the Mystery of the Lost Colony. New York: Arcade Publishing, 2000.

Taylor, Alan. American Colonies. New York: Viking Press, 2001.

[1] Miller, 3. 
[2] Miller, 14. 
[3] Taylor, 123. 
[4] Taylor, 124. 
[5] Kupperman, 141. 
[6] Alan, 124. 
[7] Miller, 190-191. 
[8] Miller, 203-204. 
[9] Miller, 234-236. 
[10] Coleman, 61. 
[11] Coleman, 60-61.

Friday, June 23, 2017

Rusted Sickles

$10 - $15 (based on 2016 prices)
Makes three sickles

No haunted farm is complete without a collection of rusty tools. While many of these items came from my grandmother’s shed (you cannot argue with free and there is no competing with Nature’s process for weathering steel and wood), I elected to give the few props that came in contact with either myself or others a rusted patina. For this, I simply re-purposed cheap weapons bought at a party store with some paint and papier mache handles.
  • Three plastic sickles
  • One 10 oz. cans of interior/exterior, fast-drying spray paint in metallic silver
  • One 2 oz. bottle of acrylic paint in flat black*
  • One 2 oz. bottle of acrylic paint in flat brown*
  • One 2 oz. bottle of acrylic paint in flat maroon*
  • One 2 oz. bottle of acrylic paint in flat white*
  • One newspaper
  • One 4 oz. bottle of all-purpose tacky glue
  • One 4 oz. bottle of wood glue
  • Once yard of dark-brown twine
1. On a newspaper-lined surface in a well-ventilated area, give the sickles a few even coats of metallic spray paint. I used two, but you may apply more or less. To achieve a nice coverage, select a paint which adheres to plastic.
2. After the metallic paint has dried, dab maroon paint onto the sickles. I used an old paintbrush with splayed bristles; however, a sponge or paper towels will work well. Concentrate your application on areas where rust would naturally form, particularly along the edges of the blades.
3. Once the maroon paint has dried, repeat the process with brown paint. During this application, be careful not to cover too much of the maroon paint.
4. Apply a slight flecking of black paint. You can do this by either quickly flicking a paintbrush or using an old toothbrush and strumming your finger across the bristles. Since this process flings paint everywhere, it’s best to perform it outside.
5. Make the papier mache paste by mixing ½ cup of glue and ½ cup of water in a bowl. Try to use a sealable container. This gives you the ability to store the mixture for a day or two between applications. Also, to give the paste added support, use a combination of all-purpose glue and wood glue (stray away from school glue because it is washable and will dissolve in the water).
6. Cut the newspaper into strips, soak them in the paste, and apply them to the handles. To make the process more manageable, keep the strips at a reasonable size (mine were roughly six inches long and two inches wide). Similarly, only apply a few layers at a time and allow each layer to completely dry before adding more (I did two layers during each application and let them dry for twenty-four hours). If you plan to use these props as weapons, you want the handles as sturdy as possible; therefore, more layers are best.
7. Give the handles a few even coats of white paint. This covers the newspaper’s print and gives the prop a blank canvas for the painting process. You could bypass this step by using white copy paper rather than newspaper for the papier mache
8. To give the handles a grimy appearance, water down brown paint and brush it over their surfaces, ensuring the liquid settles into all the cracks and fissures (you can also use a spray bottle for the application). Allow the mixture to sit for a few minutes and then wipe it clean. Once you have achieved the look you desire, repeat this process with black paint to add further detail. You may want to experiment with the consistency prior to doing all of this: the more water you add, the fainter/lighter the wash; the less water you add, the deeper/darker the wash.
9. For additional detail, wrap twine around the handles and glue it into place. You could also add bones or feathers to cater the prop to your haunt’s specific theme.

*You will not use the entire bottle’s content for this project.

Friday, June 16, 2017

Yarn Spider Webs

$3 - $5 (based on 2016 prices)
Makes four massive webs (roughly 8’ x 8’ each)

These can be rather time consuming, especially if you decide to make an enormous web or, in my case, multiple pieces. The beauty of this project, though, is that you can make the web as large or small as you desire. For a dramatic effect, create one massive web that consumes the entire wall or a series of smaller, interlacing webs.
  • One 3 ½ oz. bundle of gray yarn (roughly 190 yards)
  • One 0.8 oz. bag of plastic spiders (roughly 72 spiders per bag)
  • One package of clear push pins (roughly 100 pins per pack)
  • One 0.8 oz. bag of foam spider silhouettes (roughly 20 silhouettes per bag)
1. Find an area on your wall large enough to accommodate your web and clear it of any decorations and pictures.
2. Locate the center of your selected area and, as close to the ceiling as possible, push a pin into the wall. Tie one end of the yarn to the pin, stretch it vertically, and fasten the other end with a pin (if you are not worried about damaging the wall, use a staple gun). Repeat this process for each strand, fanning them out as you proceed.
3. Alternate horizontal lines between each row. For taunt strings, I found the following method works best: tie one end of the horizontal strand to one line in the vertical row, pull the other line in the vertical row inward, and tie the second end of the horizontal strand to the other line in the vertical row.
4. Trim the excess yarn. You could perform this task as you progress or wait until the entire web is crafted.
5. Hot glue small plastic spiders to the webbing. Try not to over think your application (a random pattern produces the best results).
6. For additional detail, adhere foam spider silhouettes to the wall. For this, I used tape, but you could use command strips or (as with step two) a staple gun.

Friday, June 9, 2017

"Zigeunerlid" (A Poem)

Published in 1771, Johann Wolfgang von Goethe’s poem “Zigeunerlid” recounts a fictional tale of one man's interaction with the supernatural. The concept is not unique to the author (read his "Der Erlkönig" here). In fact, as John Cooper highlights, several of Goethe’s works – including “Türkisches Schenkenlied,” “Suleika,” and Die erste Walpurgisnacht – explore humanity’s confrontation with the other side.[1] In the case of “Zigeunerlid,” the altercation occurs after the narrator kills a witch’s black cat and is tormented by seven female werewolves.

In the drizzling mist, with the snow high-piled, 
In the winter night, in the forest wild, 
I heard the wolves with their ravenous howl, 
I heard the screaming not of the owl: 
Wille wau wau wau! 
Wille wow o wo! 
Wito hu! 

I shot, one day, a cat in the ditch – 
The dear black cat of Anna the witch; 
Upon me, at night, seven were-wolves came down,
Seven women they were, from out of the town.
Wille wau wau wau!
Wille wow o wo!
Wito hu! 

I knew them all; ay, I knew them straight; 
First, Anna, then Ursula, Eve, and Kate, 
And Barbara, Lizzy, and Bet as well;
And forming a ring, they began to yell: 
Wille wau wau wau! 
Wille wow o wo! 
Wito hu! 

Then called I their names with angry threat: 
“What wouldst thou, Anna? What wouldst thou, Bet?” 
At hearing my voice, themselves they shook, 
And howling and yelling, to flight they took. 
Wille wau wau wau! 
Wille wow o wo! 
Wito hu!

Works Referenced 

Cooper, John Michael. Mendelssohn, Goethe, and the Walpurgis Night: The Heathen Muse on European Culture, 1700-1850. Rochester, NY: University of Rochester Press, 2007. 

Von Goethe, Johann Wolfgang. “Zigeunerlid.” 1771. The Poems of Goethe. New York: Lovell Coryell and Company, 1882. 67-68.
__________________________________
[1] Cooper, 37-38.

Friday, June 2, 2017

“Double Double” Banner

$3 - $5 (based on 2016 prices)
Makes one sign

I have never cared for Shakespeare (feelings probably spawned by years of literary scholarship for my Master’s degree). The incantation sung by the three witches in Macbeth, though, is a rare exception to that disdain. I wanted to create a banner showcasing the opening couplet from their famous chant and, outside of almost setting the kitchen on fire, this project proved rather quick and simple to make.
  • Twelve sheets of gray cardstock
  • One standard lighter
  • One hole punch
  • Three to four yards of dark-brown twine
  • One 4 oz. bottle of all-purpose tacky glue*
1. Print your message onto the cardstock. I chose to print two words per sheet (making each pennant 8 ½ x 5 ½”), but you can make them smaller or larger based on your personal preferences.
2. Cut out each pennant. If you want to give them more visual interest, try using pinking shears or scallop edgers to create fancier boarders.
3. Use a lighter to burn the edges of the pennants. I found that a Butane gas lighter, because of its length, makes the process easier and safer. Likewise, perform this step in a well-ventilated area and near either a sink or pan of water. Don’t be discouraged if you accidentally ignite a pennant or two (you can always reprint the letters you burned).
4. Punch holes into both sides of the pennants. If you want the banner to have a haphazard look, stagger the holes’ placement; otherwise, keep them relatively uniform.
5. Tie the pennants together with twine, knot the ends, trim the excess, and glue the knots for reinforcement. To make hanging easier, leave about a foot of twine on both ends of the banner.
6. You can embellish the banner with additional details, such as aged bones, feathers, severed fingers, or stick figures.

*You will not use the entire bottle’s content for this project.