Friday, May 27, 2022

The Adventures of Elmer McCurdy’s Body: A Mini-Essay

     In December of 1976, while filming an episode of the television show The Million Dollar Man at the Nu-Pike Amusement Park, the crew moved what they believed to be a wax-covered dummy coated with red phosphorescent paint from a funhouse display. During the relocation, the figure’s arm detached and revealed bone and preserved muscle. Startled, the workers transferred the body to the Los Angeles Medical Examiner’s Office, where an autopsy exposed it as a well-preserved corpse embalmed with large amounts of arsenic, a process common throughout the United States until its illegalization in the 1920s.[1] As forensic anthropologists Dr. Clyde Snow and Dr. Judy Suchey attempted to identify the deceased man, a peculiar string of events pieced themselves together and formed a bizarre story.[2] In the fall of 1911, Elmer McCurdy was shot to death in a standoff after he and a band of criminals robbed a train en route to Texas and separated with their shares.[3] Taken to a funeral parlor in Pawhuska, Oklahoma, McCurdy’s body went unclaimed, so the undertaker preserved the corpse and displayed it as a novelty that visitors paid five cents to view.[4] In 1916, two con artists convinced the undertaker McCurdy was their brother and took his body to California, where it was covered in wax and pass around varying amusement parks and circuses for decades until its discovery by the television crew.[5] In the spring of 1977, after the full story of McCurdy’s fate was learned, his body was laid to rest at Summit View Cemetery in Guthrie, Oklahoma, under a layer of concrete to prevent future disinterment.[6]

Works Referenced

Ferllini, Roxana. Silent Witness: How Forensic Anthropology is Used to Solve the World’s Toughest Crimes. Buffalo, NY: Firefly Books, 2002.
____________________
[1] Ferllini, 43
[2] Ferllini, 43.
[3] Ferllini, 42.
[4] Ferllini, 42-43.
[5] Ferllini, 43.
[6] Ferllini, 43.

Friday, May 20, 2022

Monkey’s Paw Sign

$20 - $30 (based on 2019 prices)
Makes one sign
 
Part of 2019’s twisted carnival theme included an assortment of poster-size signs meant to resemble the attraction advertisements customary in turn-of-the-century travelling shows. Although they had the same basic attributes to maintain a uniform appearance when they were hung on the sides of the tent, I wanted each to have their own unique look. For this one, I used a second monkey’s paw to create an advertisement for the item displayed in Dr. Victor’s Oddity Museum.
  • One 20” x 30” foam board
  • One yard of burlap
  • One monkey's paw (learn how to make it here)
  • One 10 oz. can of interior/exterior, fast-drying spray paint in flat black
  • One 10 oz. can of interior/exterior, fast-drying spray paint in flat brown*
  • One 2 oz. bottle of acrylic paint in brown*
  • One 2 oz. bottle of acrylic paint in gray*
  • One 2 oz. bottle of acrylic paint in red*
  • One 2 oz. bottle of acrylic paint in white*
  • One 4 oz. bottle of all-purpose tacky glue*
  • Three to four yards of dark brown twine
  • One package of two-inch letterboard letters
1. Trim the burlap to 22” x 32”, stretch it across the foam board, and glue it in place. I found it works best to glue one side to serve as an anchor and then work the fabric from there, ensuring the surface is as smooth as possible. Although I gave myself a one-inch border to work with, you may want to leave additional fabric to give you more leeway.
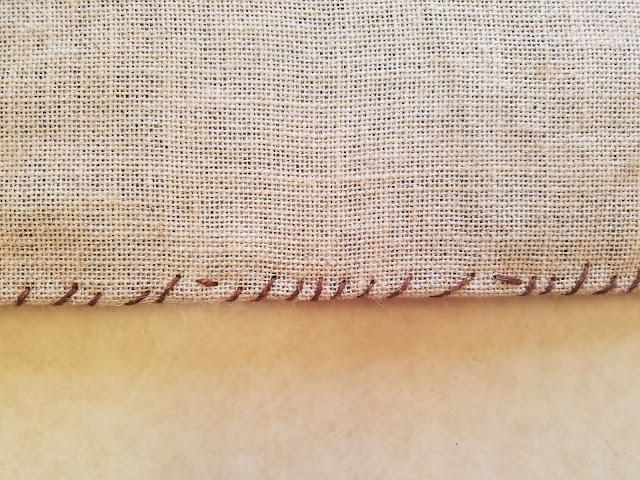
2. Using a darning needle, thread the twine along the outer edges of the board. Since the fabric is already attached to the foam, this will give the illusion that it is haphazardly sewn on. You want the needlework to look messy and uneven, giving the sign a disheveled appearance.

3. On a newspaper-lined surface in a well-ventilated area, dust the sign’s surface with black and brown spray paint to give it a cohesive level of age. You want to create the illusion of dirt, so a random application is best. I found that holding the can roughly twelve inches away from the sign and making quick passes produced the finest results.
4. Position the paw on the board and glue it in place. Depending on how large you plan to make the sign’s lettering, you may need to play with its placement beforehand.
5. For added support and aesthetics, lash the paw to the board with twine. A large darning needle will be strong enough to feed the thread through the burlap and foam. Try to focus on wrapping the twine around the wrist to prevent it from obscuring most of the prop.
6. On a newspaper-lined surface in a well-ventilated area, give the letterboard letters an even coat of black spray paint. Although I only used one coat, you may want more depending on your desired coverage. Keep in mind, though, this is the base coat and much of the paint will be covered up by other colors. Once the paint has dried, give the letters an aged patina by gently brushing brown, gray, and white paint over their surfaces. Try not to overthink your application. A random pattern is ideal.
7. Arrange the letters on the board and glue them in place. Akin to step four, it might work best to pre-position everything on the board to determine their desired placement before permanently affixing them.
8. For additional detail, do not use the letterboard letters to spell out every word or all words in full. Rather, emphasize certain words or parts of words by using red paint to write these elements. For this step, you want the wording to be haphazard. To achieve this, exaggerate curves, create sharp points, and elongate certain aspects. You could also write letters backwards and deliberately misspell words. Keep in mind that the sign needs to be readable, so try not to overdo your artistic flairs.
9. Use steel wire to create a hanging loop and attach it to the back of the sign. You can further enhance the prop with strings of aged bones or voodoo beads
*You will not use the entire bottle’s content for this project.

Friday, May 13, 2022

"The Fairy Nurse" (A Poem)

Irish folklore maintains fairies are no strangers to kidnapping mortals, with the ethereal beings often replacing mortal infants with changelings and snatching human women to serve as nurses for their fairy babies.[1] In his poem, “The Fairy Nurse,” Edward Walsh explores the myth of these abducted nannies.
 
Sweet babe! a golden cradle holds thee,
And soft the snow-white fleece enfolds thee;
In airy bower I’ll watch thy sleeping,
Where branchy trees to the breeze are sweeping.
Shuheen, sho, lulo lo!
 
When mothers languish broken-hearted,
When young wives are from husbands parted,
Ah! little think the keeners lonely,
They weep some time-worn fairy only.
Shuheen, sho, lulo lo!
 
Within our magic halls of brightness,
Trips many a foot of snowy whiteness;
Stolen maidens, queens of fairy -
And kings and chiefs a sluagh-shee airy.
Shuheen, sho, lulo lo!
 
Rest thee, babe! I love thee dearly,
And as thy mortal mother nearly;
Ours is the swiftest steed and proudest,
That moves where the tramp of the host is loudest.
Shuheen, sho, lulo lo!
 
Rest thee, babe! for soon thy slumbers
Shall flee at the magic koelshie’s numbers
In airy bower I’ll watch thy sleeping,
Where branchy trees to the breeze are sweeping.
Shuheen, sho, lulo lo![2]
 
Works Referenced
 
“Changelings, Fairy-Men, and Fairy-Women.” Haverty’s Irish-American Illustrated Almanac. New York: P.M. Haverty, 1892. 93-97.
 
Walsh, Edward. “The Fairy Nurse.” The Popular Poets and Poetry of Ireland and Choice Selections in Prose from the Works of Famous Irish Writers and Orators. Ed. Richard Nagle. Boston, MA: Richard Nagle, 1887. 408-409. 
____________________
[1] Changelings, Fairy-Men, and Fairy-Women, 94.
[2] Walsh, 408-409.

Friday, May 6, 2022

Toxic Waste Containers

$20 - $30 (based on 2020 prices)
Makes five canisters
 
To complement the toxic waste skeleton and add some radioactive material to 2020’s laboratory, I created these containers to spread throughout the haunt. Originally, I used the recipe for the blood glue to fashion the waste; however, it did not achieve the desired effects (you can still see parts of it dripping down the sides of the tins). I finally settled on expanding foam, which yielded a more impressive result.
  • Five 3.8” square tea tins
  • One 10 oz. can of interior/exterior, fast-drying spray paint in flat black
  • One 10 oz. can of interior/exterior, fast-drying spray paint in metallic silver
  • One sheet of cardboard large enough to trace the outlines of the tins’ openings
  • One 10 oz. can of interior/exterior, fast-drying spray paint in glossy hunter green
  • Two pieces of 8” x 11.5” copy paper with biohazard labels printed on them
  • At least four tablespoons of dark roasted coffee grounds
  • One pan large enough to soak the copy paper
  • One 4 oz. bottle of all-purpose tacky glue*
  • One 12 oz. can of insulating foam
  • One 10 oz. can of interior/exterior, fast-drying spray paint in glossy apple
  • One 10 oz. can of interior/exterior, fast-drying spray paint in glossy eden
  • One 2 oz. bottle of acrylic paint in grasshopper*
  • One 2 oz. bottle of acrylic paint in hunter green*
1. Thoroughly wash and dry the tins. If there is any sticker residue, use rubbing alcohol to remove it (soak a paper towel in the solution, let it sit over the area for a few minutes, and wipe away the remaining glue). Then, on a newspaper-lined surface in a well-ventilated area, build up layers of black and metallic silver spray paint to give the containers the look of steel. I found it works best to apply a base coat of black to the entire prop and then add the sliver, working in quick bursts to allow parts of the black to remain visible. You can also touch up portions with additional blasts of black if the silver becomes too heavy.
2. Trace the outlines of the tins’ openings on a sheet of cardboard and cut them out. To give the illusion that the containers are full, the cardboard will sit near the top and create a base for you to adhere the foam. You will need to gradually trim the squares until they sit as low within the tins as you would like. After, that, glue them in place. Do not worry too much if your glue job is not pretty, it will be covered by the foam in step six.
3. Give the interiors of the canisters a coat of glossy hunter green spray paint. Although this act is optional, it makes the painting stage in step seven easier, since it can be difficult to get between the foam once it has expanded in the openings.
4. Boil enough water to completely submerge the copy paper and pour it into the pan. Add the coffee. The longer you allow the coffee to brew, the darker the stain will become. Likewise, greater amounts of coffee will produce a richer stain. Submerge the paper in the coffee mixture and soak it until it reaches the color you desire. I soaked mine for eight hours and scattered the coffee grounds over the top of the paper to add spots. Remove the paper from the water and allow it to dry. After the paper dries, cut out the labels, leaving a small border around their edges, and roughen their surface with sandpaper.
5. Once you have achieved your desired level of distress, glue the labels to the fronts of the containers. You can also use olive or vegetable oil to add further stains. Likewise, a dusting of brown spray paint can be applied at the end of this step to give the tins a layer of dirt.
6. Spray the insulating foam into the openings of the tins to create the waste. Try not to overthink your application. A random pattern produces the best results. Also, keep in mind that the foam will expand as it dries, so do not apply excessive amounts which will overtake the containers.
7. After the foam has thoroughly dried, cover the tins in plastic bags and tape off any gaps with painter’s tape. Then, on a newspaper-lined surface in a well-ventilated area, give everything a base coat of hunter green spray paint before building up layers of apple, black, and eden. Akin to step one, you can always apply bursts of hunter green to the prop if the other colors become too overpowering.
8. After the paint had dried, remove the painter’s tape and plastic bags from the tins and use grasshopper and hunter green acrylic paint to blend the unpainted foam, stipple the surfaces, and accent the labels. If the tape removed part of the silver paint, you can cover that up with the green paints.
*You will not use the entire bottle’s content for this project.