Friday, May 31, 2019

Zozo and Spiritual Communication: A Mini-Essay

     The 2012 low-budget film I am ZoZo brought into popular culture the century-old premise of Zozo, an ancient demon that purportedly attacks novice mediums and ill-informed dabblers in the occult who attempt to commune with the netherworld through automatic writing, seances, ands spirit boards.[1] A parasitic being which attaches itself to individuals and causes physical and psychological harm, Zozo announces its presence through breaking glass, marking the skin, throwing objects, and spelling its name repeatedly in an infinity sign across spirit boards.[2] Since the movie’s release, personal claims of encounters with Zozo have flooded the internet and several texts have been published exploring the legend, with Celina Summers and Tim Wood conducting an experiment into the validity of the myth by contacting the entity every night for a month and Darren Evans and Rosemary Ellen Guiley delving into the history of the folklore by drawing connections to everything from ancient religions to extraterrestrials. Although the origins of Zozo and the legitimacy of its involvement in communications between this world and the next – particularly the recent renditions following the film – are debatable, the being’s longstanding presence in the supernatural community can be validated as far back as 1818, when Jacques Auguste Simon Collin de Plancy’s book on demonology, Dictionnaire infernal, recounted the exorcism of a pregnant young woman two years prior who was possessed by three demons: Crapoulet, Mimi, and Zozo.[3] Controlled by the entities, the Frenchwoman walked contorted throughout the streets of Teilly and terrorized fellow villagers until her exorcism in the local church, where Zozo broke a window as it escaped the body of its host, ceased the behaviors, sent the woman to a hospital, and forbade the exorcist from practicing further ceremonies without police intervention and arrest.[4]

Works Referenced

Bagans, Zak and Kelly Crigger. I am Haunted: Living Life Through the Dead. Las Vegas, NV: Victory Belt Publishing, 2015.

Collin de Plancy, Jacques Auguste Simon. Dictionnaire infernal. 1818. France: Maxtor, 2011.

Evans, Darren and Rosemary Ellen Guiley. The Zozo Phenomenon. New Milford, CT: Visionary Living, 2016.

Summers, Celina and Tim Wood. Stalked by the Zozo Demon: Real Life Paranormal Experiment. Los Gatos, CA: SmashWords, 2017.
____________________ 
[1] Bagans and Crigger, 170-175.
[2] Bagans and Crigger, 170-175.
[3] Collin de Plancy, 420-421.
[4] Collin de Plancy, 420-421.

Friday, May 24, 2019

Skull Flower Vase

$15 - $20 (based on 2017 prices)
Makes one vase

The Dia de Los Muertos portion of 2017’s haunted house required dozens of wreaths and flowers for an intricate funeral scene. Although some, like the funeral vase, were simple pieces used to fill space and add bright flowers to highlight the theme’s use of vibrant colors, others, such as this prop, incorporated eerie elements to amplify the creepiness. I was lucky enough to find this skull-shaped vase at a second-hand store; however, you can accomplish the same results by cutting the top off a cheap plastic skull and painting the item to look like stone (use the methods described in the stigmata statue’s directions to achieve this).
  • One twenty-four-inch skull-shaped vase
  • One 3” x 4” block of floral craft foam
  • Artificial flowers in multiple colors and sizes (e.g. irises, lilies, petunias, poppies)
  • Three gnarled tree sticks
1. Cut a block of floral craft foam to fit inside the vase. Depending on the depth and width of your chosen container, it might be more beneficial to cut the block in half and stack the pieces to provide needed height for the floral arrangement.
2. Arrange the flowers in the vase. For visual interest, use flowers in varying colors and shapes. Begin with the larger blooms and fill gaps with smaller counterparts. For more permanency, glue the stems to the foam.
3. Complete the arrangement by adding the sticks. You could cluster them together in the center or strategically place them in various spots and at alternating heights.
4. You can enhance the prop’s eerie appearance by adding creepy details: drape Spanish moss on the sticks and the edge of the vase, glue plastic insects to the vase and flowers, or string cobwebs between the sticks.

Friday, May 17, 2019

Demonic Monks

$70 - $80 (based on 2017 prices)
Makes two monks

The final room in 2017’s haunted house featured La Llorona as Our Lady of Guadalupe with a halo of bones and a throne of bodies. These demonic monks flanked the figure and guarded the room. Because the three elements were the only items housed in this particular portion, they needed to be massive in scale, with each monk standing seven feet tall. Your final products do not need to be this large. You can reduce the size of the PVC sections to create smaller versions with more human-like dimensions.
  • Four 2” x 10’ PVC pipes
  • Sixteen two-inch PVC ninety-degree elbow joints
  • Four two-inch PVC tee joints
  • Two two-inch PVC cross joints
  • Two two-inch PVC forty-five-degree elbow joints
  • Three fifty-two-inch foam pool noodles
  • Two extra-large monk costumes
  • Two wooden crosses
  • Two foam heads
  • Two yards of white fabric
  • One 4 oz. bottle of all-purpose tacky glue*
  • One 2 oz. bottle of acrylic paint in flat black*
  • One 2 oz. bottle of acrylic paint in flat gray*
  • One 2 oz. bottle of acrylic paint in steel gray*
  • One 10 oz. can of interior/exterior, fast-drying spray paint in flat black
1. Using a hacksaw or pipe cutter, chop the pipes into the following sections and use sandpaper to clean their edges: six six-inch pieces, eight eight-inch pieces, four nine-inch pieces, four twelve-inch pieces, four eighteen-inch pieces, two fifty-two-inch pieces, and two sixty-inch pieces.
2. Begin the bases’ assembly by creating four units of two eight-inch pipe sections connected with a cross joint (eight eight-inch pieces and four cross joints total). Using eight ninety-degree elbow joints, attach the units to four twelve-inch sections to form two squares. If you plan to display these props in windy conditions, consider gluing the pieces together with water-resistant PVC cement. Once the props are assembled and ready for the haunt, you can fill the bases with water or sand to add stabilizing weight.
3. Construct the figures’ armature by using the two sixty-inch pipes to form the length of the legs and torso. Cap both with the cross joint and attach a six-inch section to both ends to construct the shoulders. The arms will comprise of one eighteen-inch section as the upper arm and one nine-inch section as the forearm connected by a ninety-degree elbow joint. These, in turn, will be linked to the shoulders with another ninety-degree elbow joint. For the back portion, which will give the prop its depth, use the two fifty-two-inch sections and attach the remaining two six-inch-sections to their tops with the two forty-five-degree elbow joints to form humps. Again, if you plan to display these props in windy conditions, consider gluing the pieces together with water-resistant PVC cement.
4. To give the props additional bulk, cut the foam noodles into the following sections and attach them to their corresponding locations on the arms, humps, and shoulders: two six-inch pieces, four nine-inch pieces, two twelve-inch pieces (with a hole in the center to accommodate the top opening of the cross joint), and four eighteen-inch pieces.
5. Dress the armatures in the monk costumes. The size of the robes will be determined by how large you make the frames. Since I elected for an overall height of seven feet, I used an extra-large size. To enhance the prop’s creepiness, consider aging the costumes with black and brown paint and fraying their fabric with sandpaper.
6. Locate the waists of the figures and determine how the rope cinctures would naturally hang. Once you have accomplished this, sew them in place and tie their knots. If it helps, have someone of a similar size to your props wear the robes as you perform this task to make the final placement appear more natural. Here, too, you could weather the ropes to create a worn appearance for the props.
7. Since the crosses that came with the costumes were rather small and looked disproportionate on the figures, I superglued larger versions to complement their massive stature. Although I kept mine a basic wooden design, you could use a more elaborate item to give the props more character.
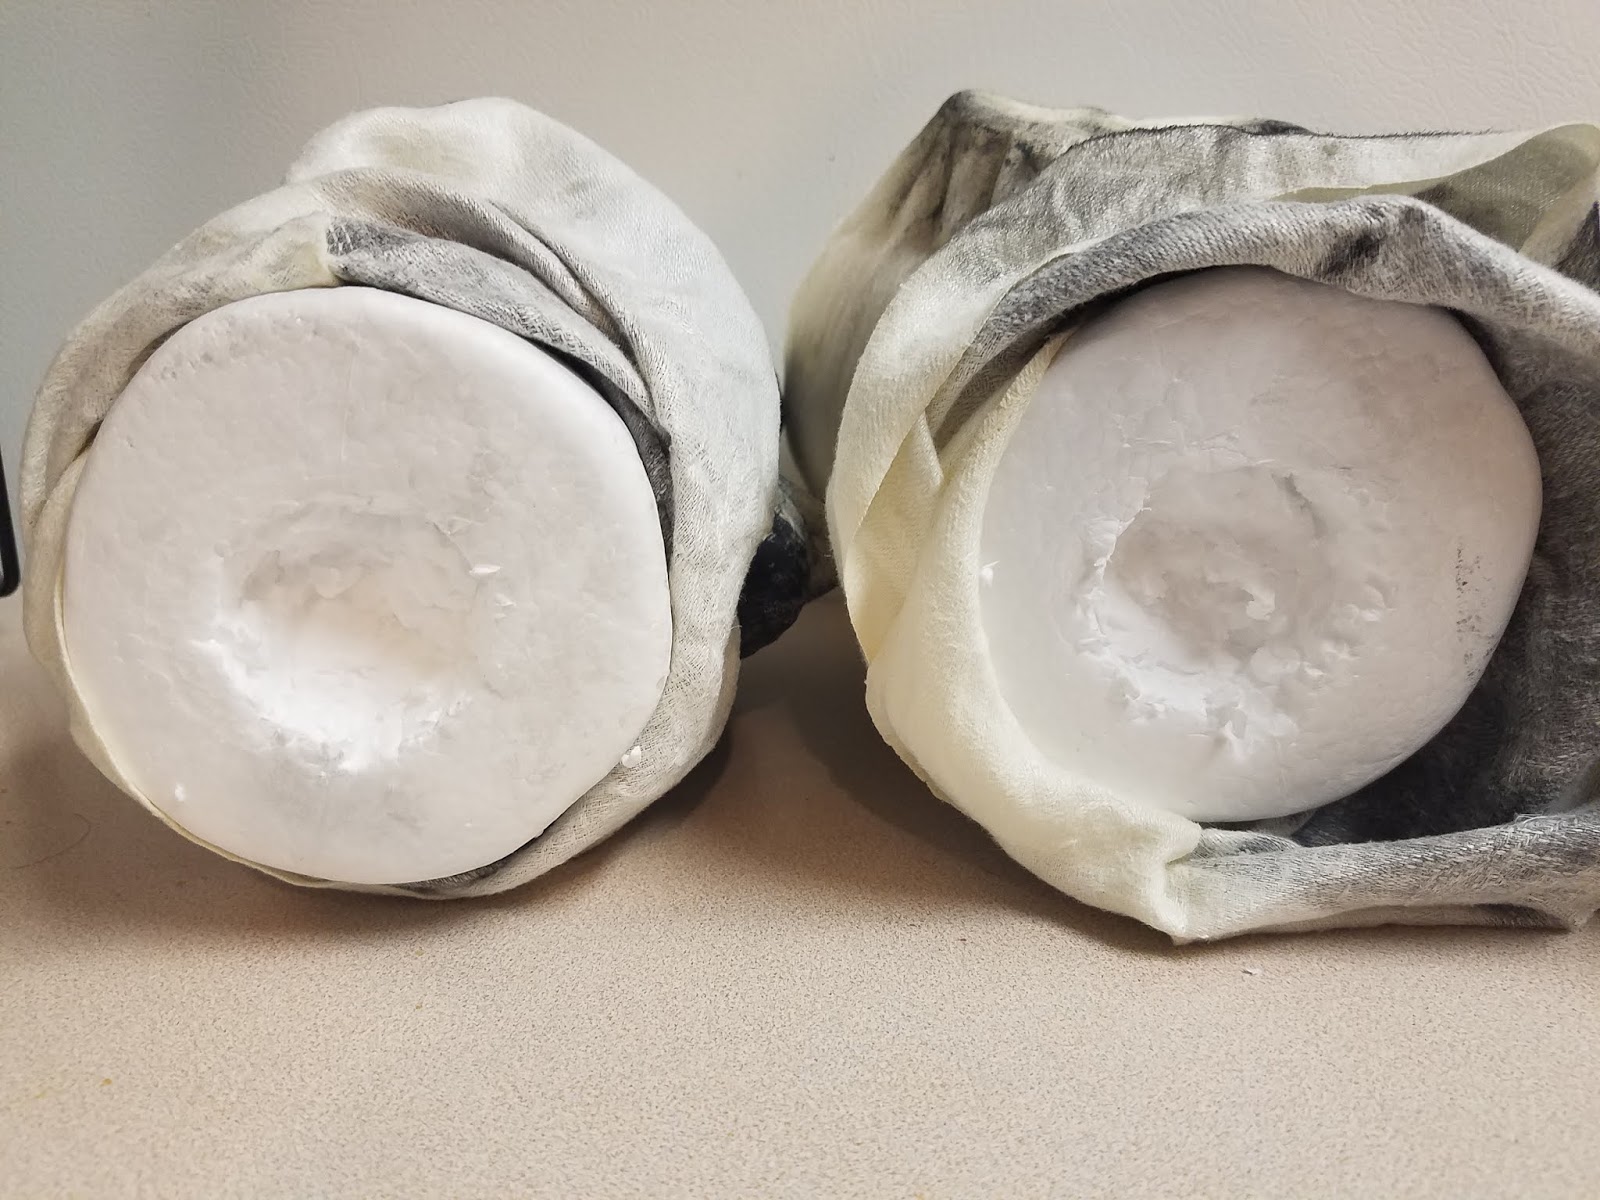
8. Use a sharp knife to cut out the mouths of the foam heads. Focus your attention around the area occupied by the jaws. You want to give the faces a skull-like appearance while still maintaining their human attributes.
9. Starting at the front of the heads, glue fabric to the props. I found that this step works best if you move in stages: apply a layer of glue to one section, hold the fabric down until it sticks, and then repeat the process. You may need to apply ample amounts of glue in the eye sockets and nasal cavities to get the fabric to hold their forms.
10. Detail the heads by building up layers of smudged gray and black around the eyes, mouth, nose, and along the edges of the wrinkles. To enhance the faces’ visual impact, move from light to dark and accentuate the features with black paint.
11. Cut holes in the bases of the necks to attach the heads to the frames. For a sturdy hold, cut two six-inch sections of PVC pipe and glue them into the openings. These can be used to connect the heads to the top of the cross joint.
12. To help the prop blend into the darkened confines of the haunt, I spray painted the base and any other visible PVC pipes with black paint. This step is entirely optional; however, it greatly improves the props’ overall appearance and prevents any possible distractions the white piping will create in dim, atmospheric lighting.
13. The monks’ appearance can be enhanced further to cater to your haunt’s specific needs. Creepy cloth would make an excellent finishing touch if you chose to age and distress the costumes and splatters of blood will accentuate the faces if you elect for a gorier theme.
*You will not use the entire bottle’s content for this project.

Friday, May 10, 2019

“Song of the Ghost” (A Poem)

Originally published in 1880, Alfred Perceval Graves’ poem “Song of the Ghost,” like many of the writer’s works, draws on the folklore of old Ireland, an attribute which became a defining quality in the author’s literary career.[1] In this particular text, the spirit of a maiden’s beloved returns in the middle of the night to visit her one final time before passing into the other world at daybreak. Fearing his inevitable departure, the maiden pleads with the cockerels to cease their crowing and the coming of dawn that they announce.

When all were dreaming
But Pastheen Power,
A light came streaming

Beneath her bower:
A heavy foot

At her door delayed,
A heavy hand

On the latch was laid.

“Now who dare venture,
At this dark hour,
Unbid to enter

My maiden bower?”
“Dear Pastheen, open

The door to me,
And your true lover

You’ll surely see.”

“My own true lover,
So tall and brave,
Lives exiled over

The angry wave.”
“Your true love’s body

Lies on the bier,
His faithful spirit

Is with you here.”

“His look was cheerful,
His voice was gay;
Your speech is fearful,

Your voice is gray;
And sad and sunken

Your eye of blue,
But Patrick, Patrick,

Alas ’tis you!”

Ere dawn was breaking
She heard below
The two cocks shaking

Their wings to crow.
“Oh, hush you, hush you,

Both red and gray,
Or you will hurry

My love away.”

“Oh, hush your crowing,
Both gray and red,
Or he’ll be going

To join the dead;
Or, cease from calling

His ghost to the mould,
And I’ll come crowning

Your combs with gold.”

When all were dreaming
But Pastheen Power,
A light went streaming

From out her bower;
And on the morrow,

When they awoke,
They knew that sorrow

Her heart had broke.[2]

Works Referenced

Graves, Alfred Perceval. “Song of the Ghost.” Anthology of Irish Verse. Ed. Padraic Colum. New York: Boni and Liveright, 1922. 62-63.

“Obituary: Mr. Alfred Percival Graves.” The Spectator, January 2, 1932.
____________________ 
[1] “Obituary,” 19.
[2] Graves, 62-63.

Friday, May 3, 2019

Dracula Wreath

$15 - $20 (based on 2017 prices)
Makes one wreath

The Dia de Los Muertos portion of 2017’s haunted house required dozens of wreaths and flowers for an intricate funeral scene. Because these projects became rather daunting, I elected to take a few days and create an entirely different wreath to give my muses a creative outlet that did not involve flowers and sugar skulls. Using one of the many wreaths purchased for the haunt and two items – the ram mask and sword – bought years ago for a costume that never developed, I crafted this Dracula wreath to hang on my office’s front door.
  • One twelve-inch willow wreath
  • One 10 oz. can of interior/exterior, fast-drying spray paint in flat black
  • One twenty-four-inch plastic sword
  • Twenty small rubber bats
  • One 0.7 oz. bottle of super glue
  • One foam ram mask
  • One 2 oz. bottle of acrylic paint in cherry cobbler*
1. On a newspaper-lined surface in a well-ventilated area, give the wreath two even coats of black spray paint. Depending on how loosely the twigs are clustered, you may need to apply extra coats to ensure their surfaces have been adequately covered.
2. Once the paint has fully dried, glue the plastic sword to the center of the wreath (for a sturdier hold, use superglue). How low you want the blade to hang is based entirely on your artistic preferences. For my version, the top of the wreath met with the base of the blade. Also, the sword’s level of age and distress can be altered to suit your specific needs: you could leave the metal with a shiny glint or weather it with brown and red paint to simulate rust (follow the steps outlined in the directions for the rusted sickles to accomplish this).
3. Cover the remaining portions of the wreath with the bats and glue them in place. For visual interest, I spiraled them outward, but you could attach them vertically. You may want to play with the pattern before finally adhering them. NOTE: The particular bats I used were made with a slick rubber which did not cling to craft glue or hot glue. As a result, I used superglue gel to affix them to the prop.
4. Center the mask on the wreath and glue it into place (for a sturdier hold, use superglue). Its location rests entirely on your chosen aesthetics for the final prop. I elected to position mine higher on the wreath near the juncture between the sword’s blade and handle.
5. Use cherry cobbler paint to write Dracula across the mask’s forehead. You want the wording to be haphazard. To achieve this, exaggerate curves, create sharp points, and elongate certain aspects. You could also write letters backwards and deliberately misspell the word. Keep in mind, though, that the word needs to be readable, so try not to overdo your artistic flairs.
6. You can create a hanging loop by repurposing the mask’s elastic band (or use steel wire for added support).
*You will not use the entire bottle’s content for this project.