$70 - $80 (based on 2017 prices)
Makes two monks
The final room in 2017’s haunted house featured La Llorona as Our Lady of Guadalupe with a halo of bones and a throne of bodies. These demonic monks flanked the figure and guarded the room. Because the three elements were the only items housed in this particular portion, they needed to be massive in scale, with each monk standing seven feet tall. Your final products do not need to be this large. You can reduce the size of the PVC sections to create smaller versions with more human-like dimensions.
- Four 2” x 10’ PVC pipes
- Sixteen two-inch PVC ninety-degree elbow joints
- Four two-inch PVC tee joints
- Two two-inch PVC cross joints
- Two two-inch PVC forty-five-degree elbow joints
- Three fifty-two-inch foam pool noodles
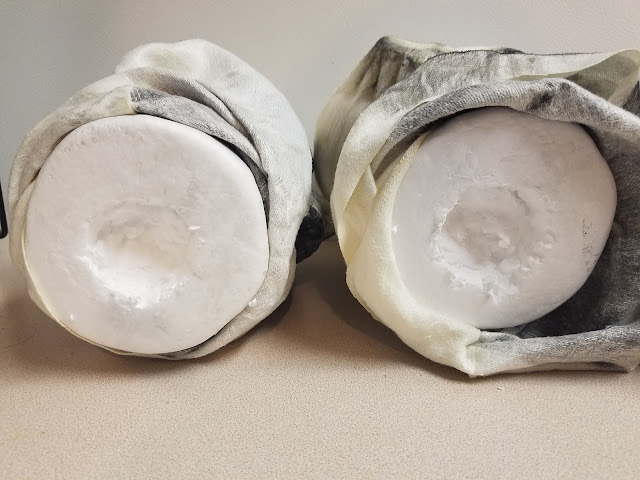
- Two extra-large monk costumes
- Two wooden crosses
- Two foam heads
- Two yards of white fabric
- One 4 oz. bottle of all-purpose tacky glue*
- One 2 oz. bottle of acrylic paint in flat black*
- One 2 oz. bottle of acrylic paint in flat gray*
- One 2 oz. bottle of acrylic paint in steel gray*
- One 10 oz. can of interior/exterior, fast-drying spray paint in flat black
2. Begin the bases’ assembly by creating four units of two eight-inch pipe sections connected with a cross joint (eight eight-inch pieces and four cross joints total). Using eight ninety-degree elbow joints, attach the units to four twelve-inch sections to form two squares. If you plan to display these props in windy conditions, consider gluing the pieces together with water-resistant PVC cement. Once the props are assembled and ready for the haunt, you can fill the bases with water or sand to add stabilizing weight.
3. Construct the figures’ armature by using the two sixty-inch pipes to form the length of the legs and torso. Cap both with the cross joint and attach a six-inch section to both ends to construct the shoulders. The arms will comprise of one eighteen-inch section as the upper arm and one nine-inch section as the forearm connected by a ninety-degree elbow joint. These, in turn, will be linked to the shoulders with another ninety-degree elbow joint. For the back portion, which will give the prop its depth, use the two fifty-two-inch sections and attach the remaining two six-inch-sections to their tops with the two forty-five-degree elbow joints to form humps. Again, if you plan to display these props in windy conditions, consider gluing the pieces together with water-resistant PVC cement.
4. To give the props additional bulk, cut the foam noodles into the following sections and attach them to their corresponding locations on the arms, humps, and shoulders: two six-inch pieces, four nine-inch pieces, two twelve-inch pieces (with a hole in the center to accommodate the top opening of the cross joint), and four eighteen-inch pieces.
5. Dress the armatures in the monk costumes. The size of the robes will be determined by how large you make the frames. Since I elected for an overall height of seven feet, I used an extra-large size. To enhance the prop’s creepiness, consider aging the costumes with black and brown paint and fraying their fabric with sandpaper.
6. Locate the waists of the figures and determine how the rope cinctures would naturally hang. Once you have accomplished this, sew them in place and tie their knots. If it helps, have someone of a similar size to your props wear the robes as you perform this task to make the final placement appear more natural. Here, too, you could weather the ropes to create a worn appearance for the props.
7. Since the crosses that came with the costumes were rather small and looked disproportionate on the figures, I superglued larger versions to complement their massive stature. Although I kept mine a basic wooden design, you could use a more elaborate item to give the props more character.
8. Use a sharp knife to cut out the mouths of the foam heads. Focus your attention around the area occupied by the jaws. You want to give the faces a skull-like appearance while still maintaining their human attributes.
9. Starting at the front of the heads, glue fabric to the props. I found that this step works best if you move in stages: apply a layer of glue to one section, hold the fabric down until it sticks, and then repeat the process. You may need to apply ample amounts of glue in the eye sockets and nasal cavities to get the fabric to hold their forms.
10. Detail the heads by building up layers of smudged gray and black around the eyes, mouth, nose, and along the edges of the wrinkles. To enhance the faces’ visual impact, move from light to dark and accentuate the features with black paint.
11. Cut holes in the bases of the necks to attach the heads to the frames. For a sturdy hold, cut two six-inch sections of PVC pipe and glue them into the openings. These can be used to connect the heads to the top of the cross joint.
12. To help the prop blend into the darkened confines of the haunt, I spray painted the base and any other visible PVC pipes with black paint. This step is entirely optional; however, it greatly improves the props’ overall appearance and prevents any possible distractions the white piping will create in dim, atmospheric lighting.
13. The monks’ appearance can be enhanced further to cater to your haunt’s specific needs. Creepy cloth would make an excellent finishing touch if you chose to age and distress the costumes and splatters of blood will accentuate the faces if you elect for a gorier theme.
*You will not use the entire bottle’s content for this project.


No comments:
Post a Comment