$15 - $20 (based on 2019 prices)
Makes one display
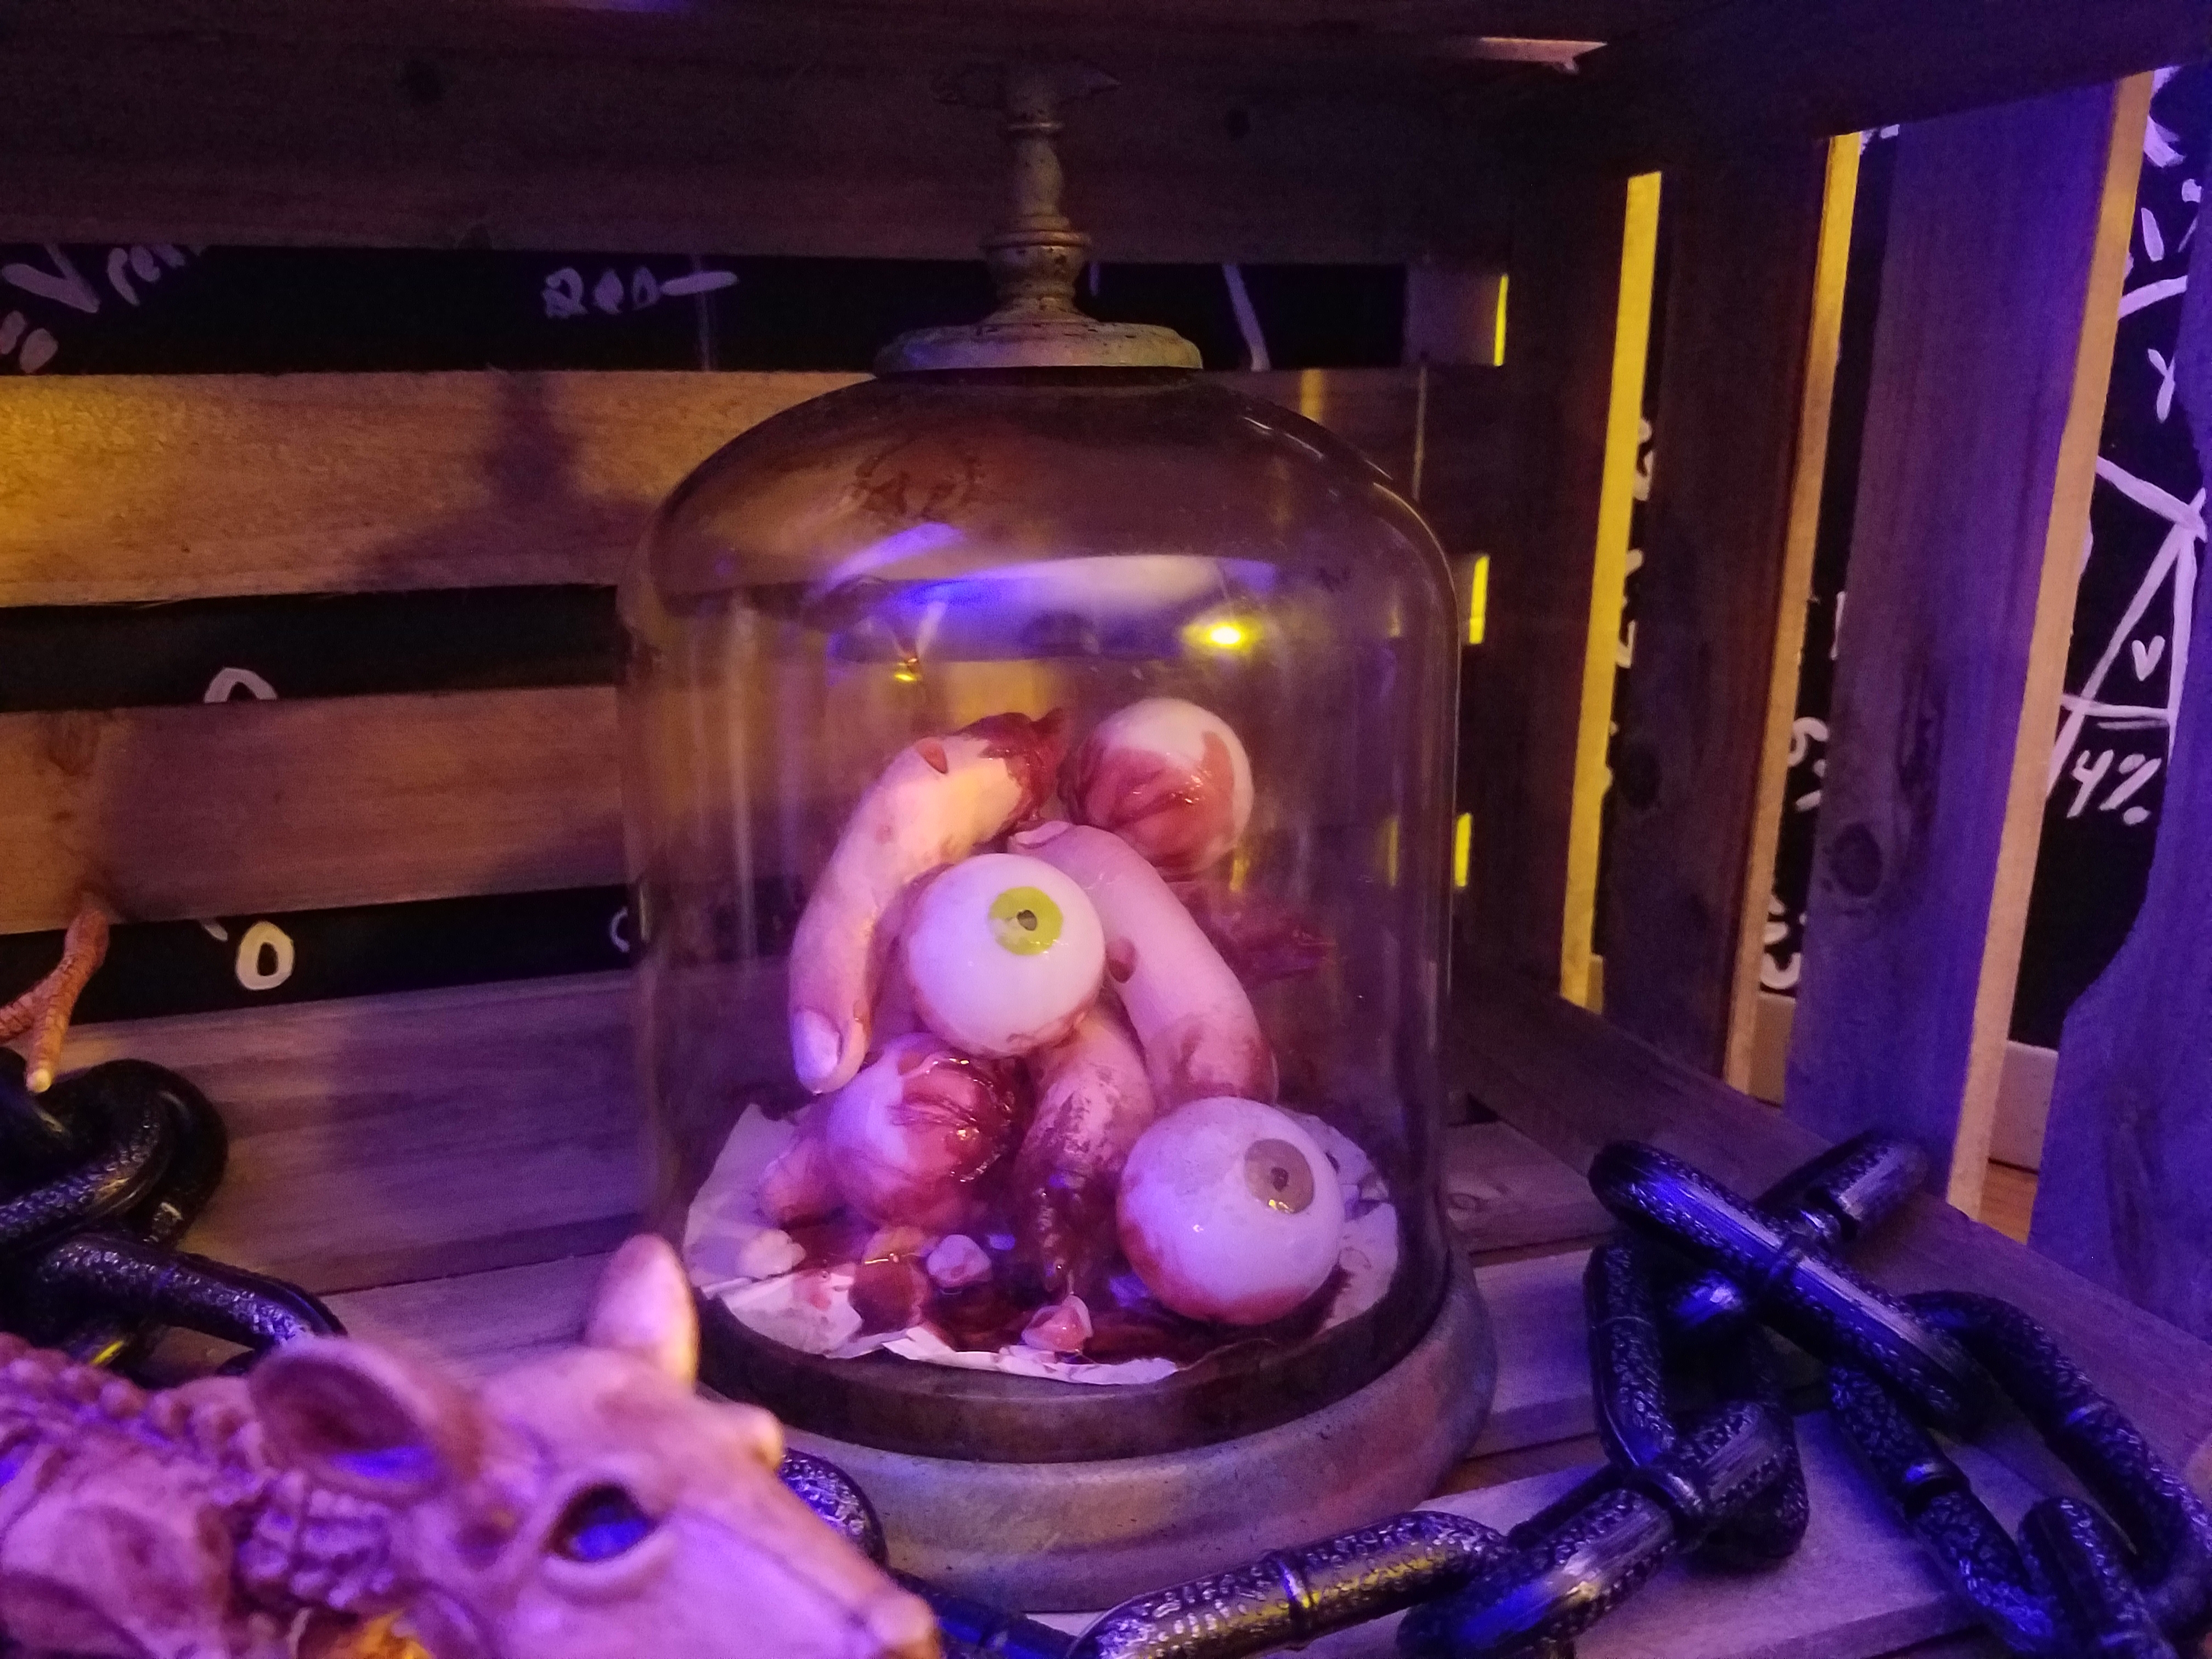
To accompany builds like the heart cloche, I decided to create a cloche that contained just a random assortment of eyes, fingers, and teeth to sit among the laboratory’s towers of equipment. Although it was a simple prop, it can be easily modified to fit the needs of your haunt by simply changing which parts are enclosed behind the glass and even adhering a label attesting to their discarded nature.
- One plastic cloche with detachable base and handle (roughly eight inches tall)
- One 10 oz. can of interior/exterior, fast-drying spray paint in metallic copper
- One 2 oz. bottle of acrylic paint in flat black*
- One 2 oz. bottle of acrylic paint in flat grasshopper*
- One 2 oz. bottle of acrylic paint in flat hunter green*
- One 2 oz. bottle of acrylic paint in flat olive*
- One 2 oz. bottle of acrylic paint in flat orange*
- One 2 oz. bottle of acrylic paint in flat tortoise*
- One blank piece of 8” x 11.5” copy paper
- At least four tablespoons of black tea (e.g. Darjeeling, Earl Gary, English Breakfast, etc.)
- One pan large enough to soak the copy paper
- One 4 oz. bottle of all-purpose tacky glue*
- Five severed fingers (learn how to make them here)
- Six severed eyeballs (learn how to make them here)
- One 0.3 fluid ounce bottle of red food coloring*
- One 4 oz. bottle of clear, all-purpose tacky glue gel*
- One set of resin false teeth
- One 8 oz. can of oil-based interior wood stain in Jacobean*

2. Begin the aged patina by building up layers of green paint: grasshopper, hunter green, and olive. You want the metal to appear oxidized, so focus your application on the areas that would be exposed to the elements and work from dark to light. I found that applying small amounts of paint to a stippling sponge and patting it lightly on the surface works best. You may want to practice on a piece of cardboard first, though.

3. Complete the aged patina by applying a light speckling of orange and turquoise to the surface. Akin to step two, use a stippling sponge for this application and keep its coverage to a minimum. You want the colors to accent the oxidization and not be too overpowering. Also, give the base and handle a flecking of black paint. You can do this by either quickly flicking a paintbrush or using an old toothbrush and strumming your finger across the bristles. Since this process flings paint everywhere, it’s best to perform it outside.

4. Boil enough water to completely submerge the copy paper and pour it into the pan. Add the tea. The longer you allow the tea to brew, the darker the stain will become. Likewise, greater amounts of tea will produce a richer stain. I found that a combination of English and Irish Breakfast brewed for over ten minutes produces a nice, deep brown. Submerge the paper into the tea mixture and soak it until it reaches the color you desire. I soaked mine for eight hours and scattered the loose-leaf tea over the top of the paper to add spots. Remove the paper from the water and allow it to dry.

5. Once the paper has dried, trace the outline of the base onto the sheet, cut it out, and glue it in place. To make the paper appear even more decrepit, crinkle it and create holes before adhering it to the base.

6. Arrange the severed eyes and fingers on the base to form a mound and glue them in place. You do not want them to look neatly arranged. In fact, an uneven and leaning tower will look best.

7. In a plastic container (because the food coloring will stain, use something disposable or that you won’t mind dying), pour in your desired amount of clear glue gel and slowly add red food coloring to the solution until it achieves the sanguine hue you desire. To give the blood further density, add blue food coloring and mix well.

8. Apply the blood glue to the tower, using an old spoon or plastic utensil to smear the liquid into the spaces between the eyes and fingers and create puddles along the base. For addition detail, randomly add the false teeth to the sanguine pools.

9. On a newspaper-lined surface in a well-ventilated area, paint the cloche with the wood stain. I discovered that applying a thin coat and patting it with paper towels produces a hazed appearance. Likewise, brushing the rim with a swift downward motion creates the illusion of grime buildup. If there is any remaining blood glue, you can also smear it along the sides.

10. Reattach the handle to the cloche and then reattach the cloche to its base. If you plan for a more permanent display, you can glue the item down. Also, details like a specimen label or biohazard sign can be added to cater the prop to your haunt’s theme.

*You will not use the entire bottle’s content for this project.
No comments:
Post a Comment