
$25 - $30 (based on 2019 prices)
Makes one sign
In 2016, I incorporated a sign into the haunt that both catered to the theme and featured the company’s name: Haunted Pumpkin Hill Farm. I was thrilled with the results and wanted to replicate it in future displays. I had the chance again in 2019 with the creepy carnival: Haunted Big Hill CarnEvil.
- One 20” x 30” foam board
- One 10 oz. can of interior/exterior, fast-drying spray paint in flat black*
- One 10 oz. can of interior/exterior, fast-drying spray paint in flat brown*
- One 10 oz. can of interior/exterior, fast-drying spray paint in metallic silver*
- One 10 oz. can of interior/exterior, fast-drying spray paint in flat white*
- One roll of colorful wrapping paper (roughly seventeen square feet)
- One 4 oz. bottle of all-purpose tacky glue*
- Nine clear plastic Christmas ornaments (two inches in diameter)
- One plastic skull mask
- One deck of standard-size playing cards
- One package of two-inch letterboard letters
- One 2 oz. bottle of acrylic paint in flat black*
- One 2 oz. bottle of acrylic paint in flat blue*
- One 2 oz. bottle of acrylic paint in flat brown*
- One 2 oz. bottle of acrylic paint in flat gray*
- One 2 oz. bottle of acrylic paint in flat purple*
- One 2 oz. bottle of acrylic paint in flat white*
1. Trim one-inch strips from all four sides of the board to form a border and, on a newspaper-lined surface in a well-ventilated area, give each one an even coat of silver spray paint. Although I used a metallic color to match other props in the haunt, you can use an alternate hue to correspond with your haunt’s color scheme.

2. Brush a light layer of glue onto the sign and cover it with wrapping paper. To make the paper appear worn, crumple it up prior to adhering it to the board and tear holes into it.

3. Glue the borders to the sign. To assist in this process, consider marking their backs during step one to note which side the strips belong to.

4. Remove the hanging hoops from the backs of eight ornaments and glue them to the border of the sign to imitate light bulbs. Their positioning depends entirely on your chosen appearance for the props. You can also use smaller bulbs for an alternate look.

5. After removing the mask’s elastic band and any other accessories, give it two coats of white spray paint. I used two coats, but you may want more or less depending on your desired coverage. Likewise, you could select a different base color or a variation of hues to cater the item to your haunt’s needs.


6. Detail the mask with a variety of colors to create a clown-like face. Based on your haunt, you can fabricate a fanciful expression for a whimsical theme or something more maniacal. Once the paint has dried, outline the patterns in black to help accentuate the colors.

7. Remove the hanging hoop from the back of the remaining ornament and, on a newspaper-lined surface in a well-ventilated area, give it two even coats of spray paint. For visual interest, use a color that corresponds with the tones of the mask.

8. Glue the portion of the ornament where the hanging hoop once was to the mask to fashion a nose. For a sturdier hold, use superglue.

9. Position the mask on the board and glue it in place. Depending on how large you plan to make the sign’s lettering, you may need to play with its placement beforehand.

10. Darken the openings of the eyes with a few bursts of black spray paint. You can also drybrush black along the surface of the sign where the outer edges of the mask rest to create a smoky appearance.

11. Glue the playing cards to the sign. You will want each card to represent one letter in the words you would like displayed. It helps to plan this out ahead of time and play with their positioning beforehand. For added aesthetics, do not center each card on the sign and switch between using the fronts and backs.

12. To add a uniform level of additional age and distress, dust the sign with a light coat of black and brown spray paint. You can also apply a flecking of black paint and smears of brown to enhance the weathered appearance.

13. On a newspaper-lined surface in a well-ventilated area, give the letterboard letters an even coat of black spray paint. Although I only used one coat, you may want more depending on your desired coverage. Keep in mind, though, this is the base coat and much of the paint will be covered up by other colors. Once the paint has dried, give the letters an aged patina by gently brushing brown, gray, and white paint over their surfaces. Try not to overthink your application. A random pattern will produce the best results.
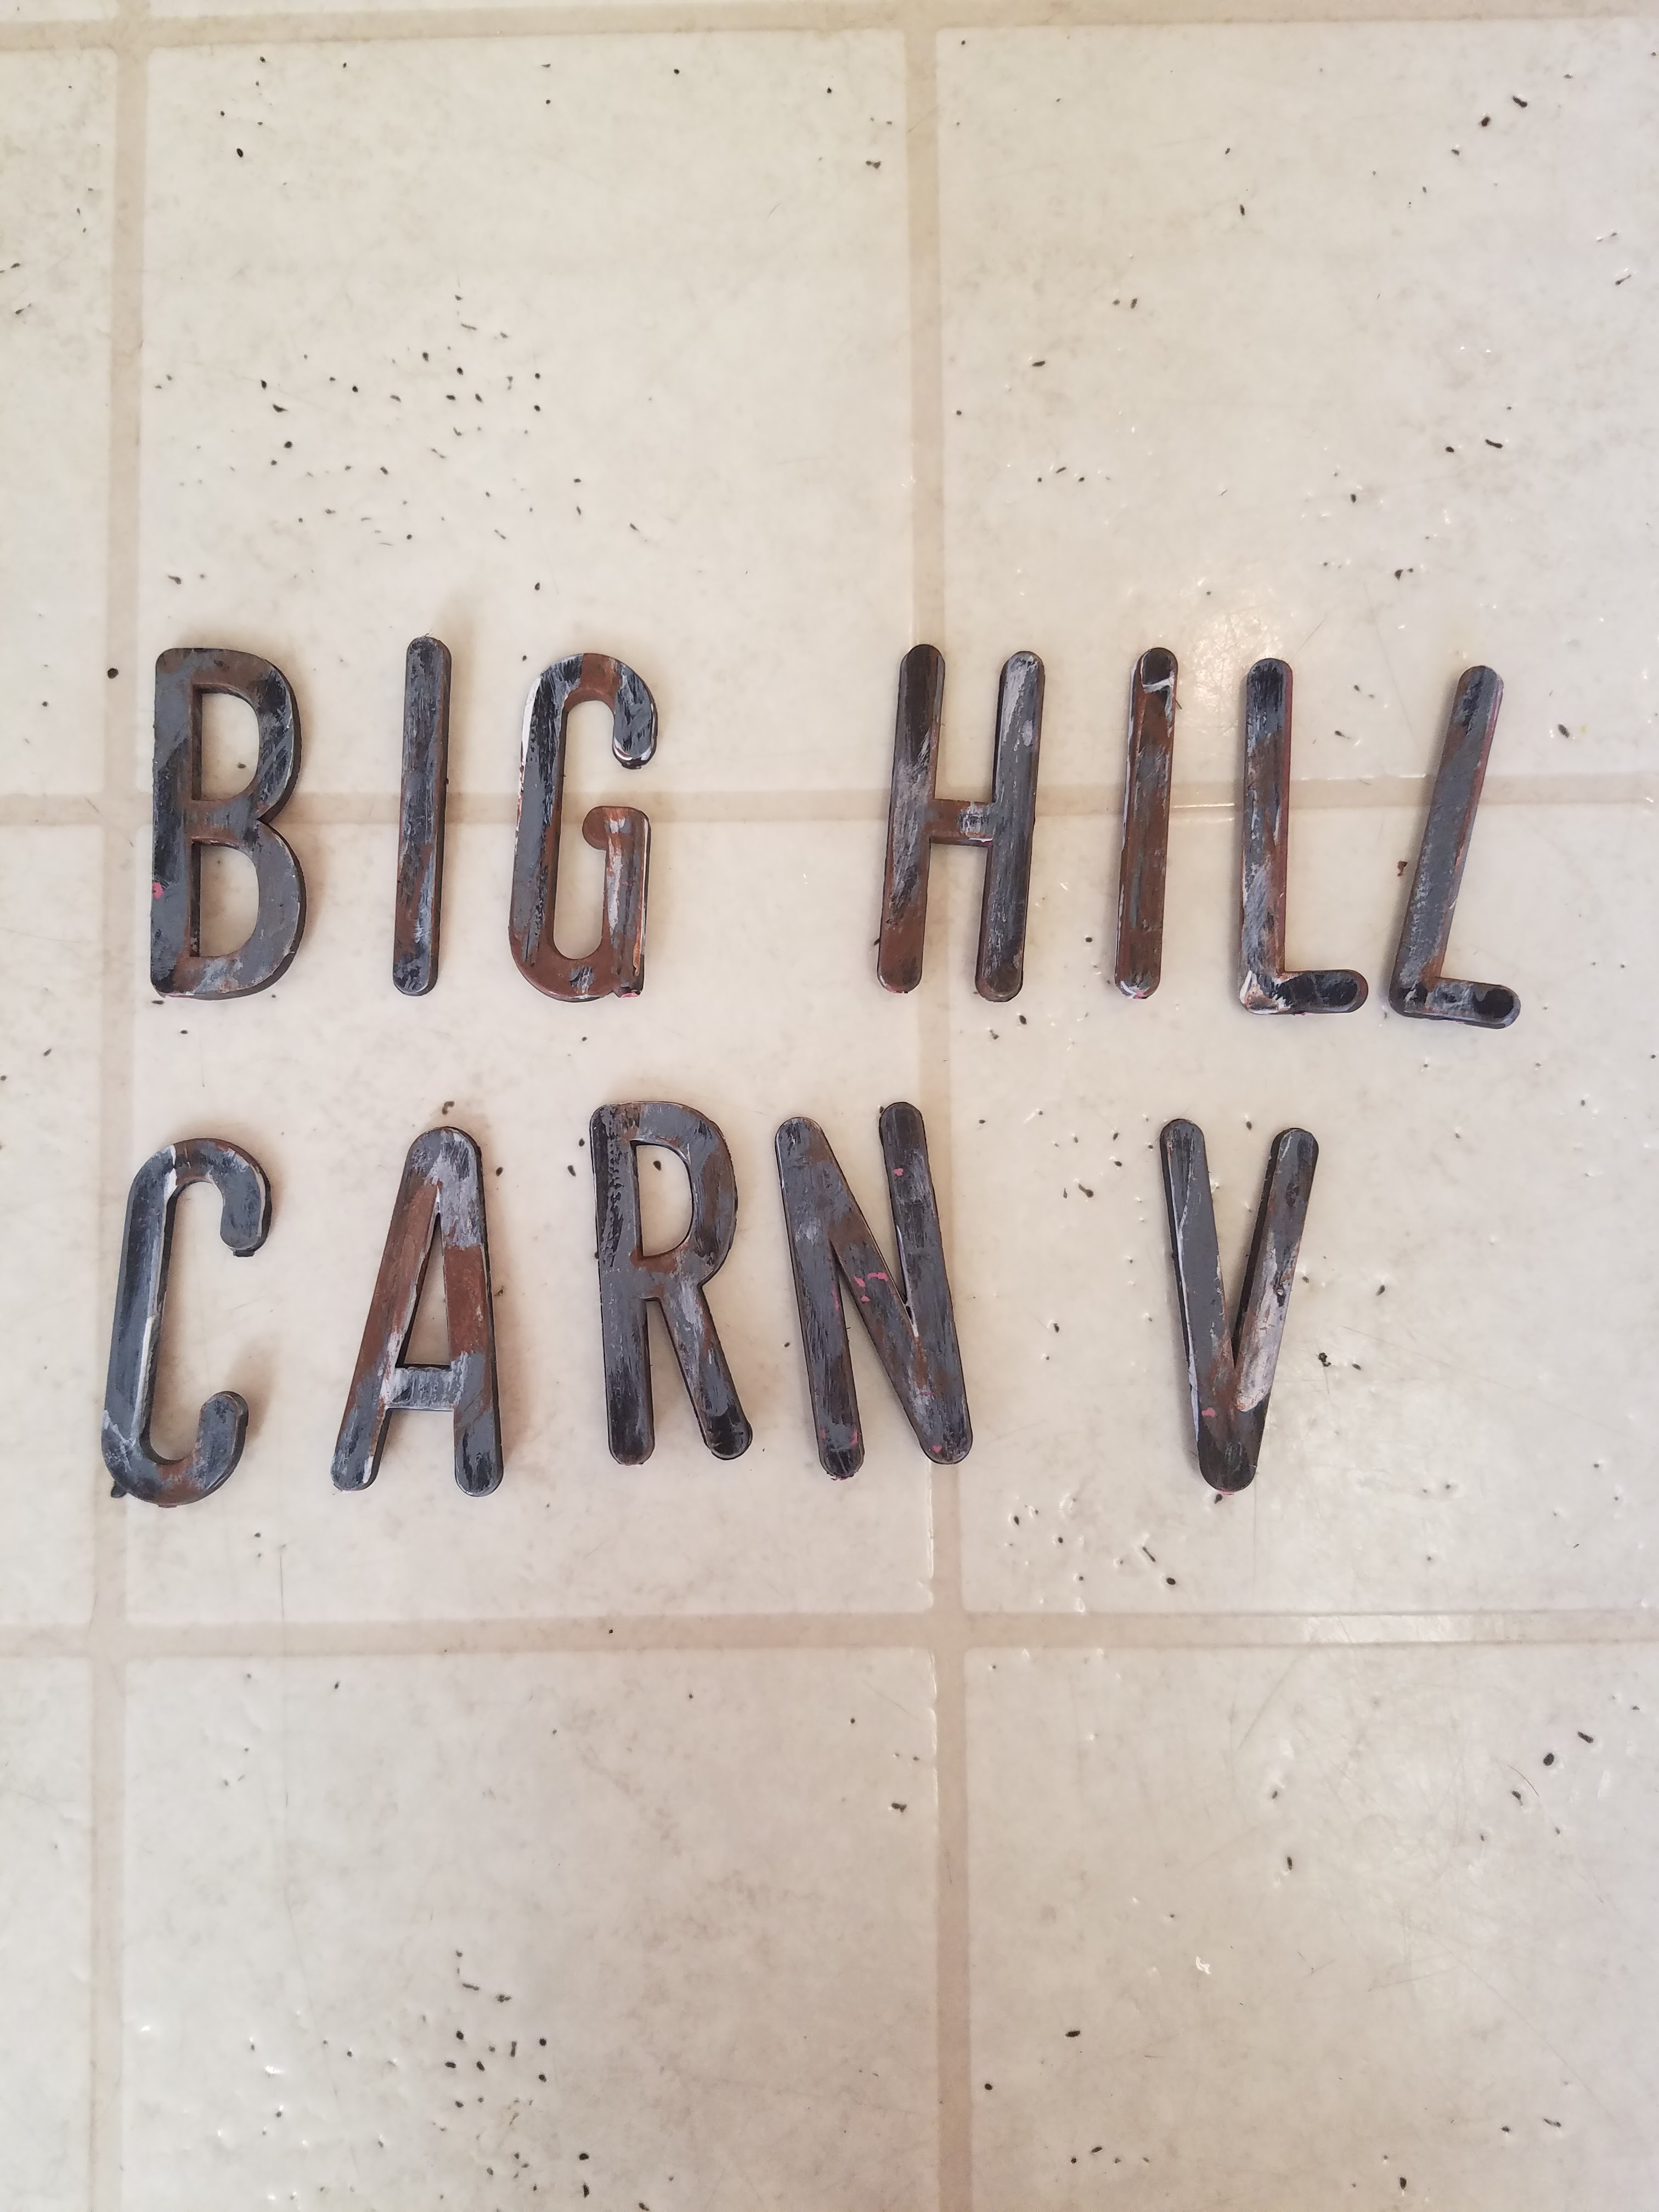
14. Arrange the letters on the cards and glue them in place. It might work best to pre-position everything on the sign to determine their placement before permanently affixing them.

15. For additional detail, do not use the letterboard letters to spell out every word or all words in full. Rather, emphasize certain words or parts of words by using red paint to write these elements, such as the evil in the misspelled carnival.

16. Use black paint to scrawl haunted above the lettering of the sign. As you do so, exaggerate curves, create sharp points, and elongate certain aspect; however, keep in mind the sign needs to be readable, so do not overdo your artistic flairs.

17. If you plan to display the prop on a wall or other surface, consider making a hanging loop with steel wire on its back. You can also embellish the prop further with clusters of insects crawling across its surface.

*You will not use the entire bottle’s content for this project.
No comments:
Post a Comment