$30 - $40 (based on 2020 prices)
Makes one book
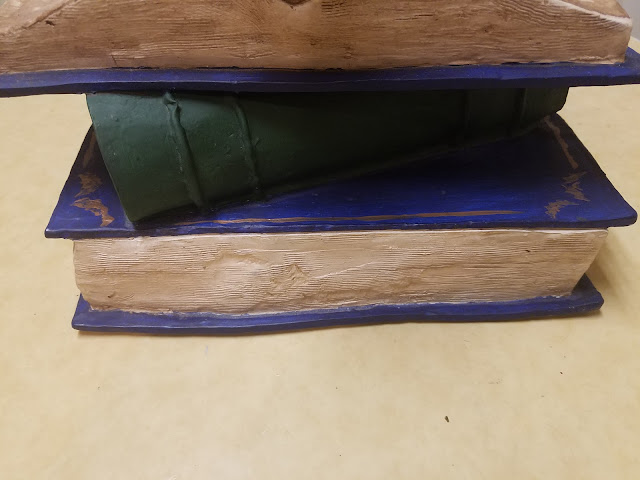
I purchased this prop several years ago on clearance during an after-Halloween sale and was never too impressed with its appearance, so, for 2020’s mad scientist theme, I decided to give it a makeover to fit in with the stacks of books and papers littering the doctor’s laboratory. You do not need this exact prop to achieve the same results. In fact, the entire build can be accomplished with three fake books purchased from a home decor store and a cheap skull.
- One cheap Halloween prop
- One 8 oz. bottle of wood glue
- One 8 oz. bottle of all-purpose tacky glue
- One newspaper (roughly twenty pages)
- One 2 oz. bottle of acrylic paint in flat black*
- One 2 oz. bottle of acrylic paint in flat blue*
- One 2 oz. bottle of acrylic paint in flat brown*
- One 2 oz. bottle of acrylic paint in flat green*
- One 2 oz. bottle of acrylic paint in flat white
- One 2 oz. bottle of acrylic paint in metallic gold*
- One sheet of 8” x 11.5” white copy paper with incantations printed on it
1. Make the papier mache paste by mixing ½ cup of glue and ½ cup of water in a bowl. Try to use a sealable container. This gives you the ability to store the mixture for a day or two between applications. Also, to give the paste added support, use a combination of all-purpose glue and wood glue (stay away from school glue because it is washable and will dissolve in the water).
2. Cut the newspaper into strips, soak them in the paste, and apply them to the skull. To make the process more manageable, keep the strips at a reasonable size (mine were roughly six inches long and two inches wide). Similarly, only apply a few layers at a time and allow each layer to fully dry before adding more (I did one layer during each application and let it dry for twenty-four hours). As you do so, build up the facial features, adding mangled flesh around the mouth and nose, creating eyelids, fashioning a wound or two along the cranium, and thickening the jawline and neck.
3. Once the final layer dries, give the newspaper two to three even coats of white paint. This will cover the print and give the prop a uniform base coat. Although I used acrylic paint for this process, the time-pressed haunted can utilize white spray paint for a quicker application.
4. To make the skin appear mummified, begin with three washes of brown paint, slowly increasing the tint until you reach the colorization you desire. You may want to experiment with the consistency prior to doing this: the more water you add, the fainter/lighter the wash; the less water you add, the deeper/darker the wash.
5. Continue the process in step four by using two washes of black paint to darken the skin, ensuring the liquid settles into all the cracks and fissures (you can also use a spray bottle for the application).
6. Paint the insides of the eyes and nose black. As you do so, refrain from painting the perpendicular plate and vomer bone, since you want these portions of the anatomy to remain visible.
7. Apply a light wash of brown to the teeth and, once that has dried, paint the gums brown and the deeper recesses of the mouth black. For added emphasis, you can detail the space between the teeth with a thin line of black paint.
8. Use lines of hot glue to create raised bands on the spines of the books. You want them to look like old, leather-bound tomes, so it might be beneficial to keep one in front of you as a reference to mimic its appearance.
9. Give the entire stack of books two to three even coats of white paint. Akin to step three, this will provide the prop with a uniform base coat. For the time-pressed haunter, a few quick coats of white spray paint can help reduce the amount of effort and time.
10. Paint the books’ covers blue and green (or alternate hues to cater the prop to your haunt’s specific color scheme).
11. Trim the incantations printout to fit the open book. Then, apply a light coat of glue to the prop and affix the paper. You want it as smooth as possible, so use a firm piece of plastic like a credit card to remove any bubbles and wrinkles.
12. After the glue dries, use a wash or two of brown paint to age the printout and the other pages of the book. As with steps four and five, you wan to slowly increase the tint with each layer to prevent it from overpowering the prop.
13. Accent the covers’ edges and spines with designs drawn in metallic gold paint. Here, too, you can cater the embellishments to your haunt’s scheme by using different colors and titles that correspond with your theme.
14. The prop can be enhanced further with additional details, such as cloth bookmarks sticking out of the pages or a couple of bookworms gnawing through the covers.
*You will not use the entire bottle’s content for this project.


No comments:
Post a Comment