Friday, April 29, 2022

Highgate Cemetery: A Mini-Essay

      Opened in 1839, Highgate Cemetery, positioned on twenty acres near London’s Waterlow Park, instantly became the most sought-after burial location for trendy Victorians, including novelist George Eliot and philosopher Herbert Spencer, and a showcase for a heated competition among the London elite to create the most elaborate gravestones, with classical pianist William Henry Thornton’s life-size grand piano being among the most extravagant; however, after the close of World War II, the cemetery fell out of favor and, by the 1960s, its nearly 53,000 derelict graves were left to weather away unattended.[1] Between the 1960s and the 1980s, the deserted cemetery became the fodder for ghostly rumors as a flood of letters poured into the Hampstead and Highgate Express relating sinister experiences on and around the dilapidated grounds, from apparitions glaring at passersby from the rusted gates to attacks by demonic forces.[2] The tales drew droves of curious camera crews, journalists, and occultists to the area and sparked a revived interest in the once-famed cemetery, prompting the creation of the Friends of Highgate Cemetery preservation society in 1975 and their efforts to restore the graveyard to its previous glory.[3]
 
Works Referenced
 
Jones, Richard. Haunted Britain and Ireland. New York: Barnes and Noble, 2002. 
____________________
[1] Jones, 46.
[2] Jones, 46-48.
[3] Jones, 48.

Friday, April 22, 2022

Framed Anatomical Drawings

$15 - $20 (based on 2020 prices)
Makes four frames
 
One of the things I have learned over the years is that little details have the greatest impact on reinforcing the theme of a haunt. Due to this factor, I make it a point every year to build a series of simple props to help set the stage. These framed anatomical illustrations were some of those items created for 2020’s mad scientist theme. While they were not as impressive as props like the toxic waste skeleton, they served a vital role in establishing and reinforcing the haunt’s story.
  • Four 8” x 10” picture frames
  • One 10 oz. can of interior/exterior, fast-drying spray paint in flat black*
  • One 2 oz. bottle of acrylic paint in flat black*
  • One 2 oz. bottle of acrylic paint in flat brown*
  • One 2 oz. bottle of acrylic paint in flat maroon*
  • One 2 oz. bottle of acrylic paint in metallic silver*
  • Four pieces of copy paper with vintage anatomical illustrations printed on them
  • At least four tablespoons of black tea (e.g. Darjeeling, Earl Gary, English Breakfast, etc.)
  • One pan large enough to soak the paper
  • One 4 oz. bottle of all-purpose tacky glue*
  • One plastic centipede
1. Remove the backing and glass from the frames and, on a newspaper-lined surface in a well-ventilated area, give them an even coat of black spray paint. Although I only used one coat, you may want more depending on your desired coverage. Keep in mind, though, this is the base coat and much of the paint will be covered up by the rust patina.
2. Gently dry brush metallic silver over the raised areas of the frames to create the look of aged metal. If this aesthetic complements the theme of your haunt, you can stop at this stage; however, for a more weathered appearance, you can apply the techniques in step three.
3. Begin the rust patina by dabbing maroon paint onto the frames. I used an old paintbrush with splayed bristles; however, a sponge or paper towels will work well. As you do so, concentrate your application on areas where rust would naturally form, particularly along the edges. Once the maroon paint has dried, repeat the process with brown paint. During this application, be careful not to cover too much of the maroon paint. To complete the patina, apply a slight flecking of black paint. You can do this by either quickly flicking a paintbrush or using an old toothbrush and strumming your finger across the bristles. Since this process flings paint everywhere, it’s best to perform it outside.
4. Boil enough water to completely submerge the paper and pour it into the pan. Add the tea. The longer you allow the tea to brew, the darker the stain will become. Likewise, greater amounts of tea will produce a richer stain. I found that a combination of English and Irish Breakfast brewed for over ten minutes produces a nice, deep brown. Submerge the paper into the tea mixture and soak it until it reaches the color you desire. I soaked mine for eight hours and scattered the loose-leaf tea over the top of the paper to add spots. Remove the paper from the water and allow it to dry. Although it can be time consuming, this process works best if you stain each sheet of paper individually.
5. After the paper has dried, roughen it with sandpaper to create holes and crumple it to produce creases. Once you have achieved your desired level of distress, glue the paper to the backings. You can use olive or vegetable oil to add further stains. I discovered that applying a small amount of oil to your index finger and patting it on the paper works well.
6. For an additional level of grime, create a wash of brown paint and allow it to run down the images. The shade of dirt depends on your ratio of paint to water: less water will produce a darker brown; more water will yield a fainter hue.
7. Accentuate the props further with little details like insects crawling across their surfaces to cater the items to your haunt’s specific theme.
8. Reattach the backing to the frame. If you plan to display the prop outside in windy conditions, consider gluing the backing in place for additional support. You can also fabricate a loop with steel wire or utilize a store-bought version to hang the props on a wall.
*You will not use the entire bottle’s content for this project.

Friday, April 15, 2022

Gumball Machine

$50 - $60 (based on 2019 prices)
Makes one machine
 
This was the most complex and expensive prop built for 2019’s twisted carnival theme. Although it was not a difficult build, it required a lot of steps, which all culminated into a fun and impressive piece. Unfortunately, the prop never made it into the haunt, since concerns over unstable flooring and the glass container prompted the venue to remove it rather than risk it breaking and hurting guests.
  • One human-size plastic skull
  • One 1” x 4’ PVC pipe
  • One fifteen-inch circular board
  • Three one-inch PVC pipe couplings
  • One twelve-inch wooden sign
  • One six-inch glass globe (for enhanced safety, use a plastic version)
  • One 10 oz. can of interior/exterior, fast-drying spray paint in flat black*
  • One 10 oz. can of interior/exterior, fast-drying spray paint in flat brown*
  • One 10 oz. can of interior/exterior, fast-drying spray paint in metallic silver*
  • One to two rolls of colorful wrapping paper (roughly seventeen square feet)
  • One 2 oz. bottle of acrylic paint in flat black*
  • One 2 oz. bottle of acrylic paint in flat brown*
  • One 2 oz. bottle of acrylic paint in flat gray*
  • One 2 oz. bottle of acrylic paint in flat white*
  • One 4 oz. bottle of all-purpose tacky glue
  • One package of two-inch letterboard letters
  • One yard of brown twine
  • Seven severed eyes (learn how to make them here)
  • One 0.3 fluid ounce bottle of red food coloring*
  • One 4 oz. bottle of clear, all-purpose tacky glue gel*
1. Measure and mark the center of the circular board and, using a 1 3/8” spade bit, drill a hole into the item. I accidentally went all the way through; however, I would recommend only drilling half way, since this will make step two much easier.
2. Glue one of the couplings into the hole. This will serve as a juncture to attach the pole to the stand. I used wood glue for added support, but you can use an alternative adhesive like hot glue or superglue.
3. Use a sharp knife to cut a hole in the top of the skull large enough to accommodate the glass bowl. If it helps, measure and mark your cut first. Also, purchase a skull made of thin plastic. This will make it easier to cut.
4. Cut a one-inch hole in the base of the skull, insert the second coupling, and glue it in place. This will provide a connection point for the skull and the post.
5. On a newspaper-lined surface in a well-ventilated area, give the inside of the skull a coat or two of black spray paint. Although I used one coat, you can apply more to give the interior a darker hue.
6. Reattach the skull’s mandible and hot glue it agape to create a screaming face. To aid the process, use a sturdy object – a glass jar or tin can – to support the skull as the glue dries. You may need to apply multiple coats to ensure a firm hold.
7. Cut or tear apart the wrapping paper. You can either isolate distinct images or use random sections (as I did). Cover the entire surface of the skull with the cuttings. This process works best if you move in stages: apply a layer of glue to one section, press the paper down until it sticks, and repeat the process.
8. On a newspaper-lined surface in a well-ventilated area, dust the skull with a light coat of black and brown spray paint to add age and distress. To give the appearance of dirt, hold the can over twelve inches away from the skull’s surface and make quick flicking motions. You can also apply a flecking of black paint and smears of brown paint to enhance the weathered appearance.
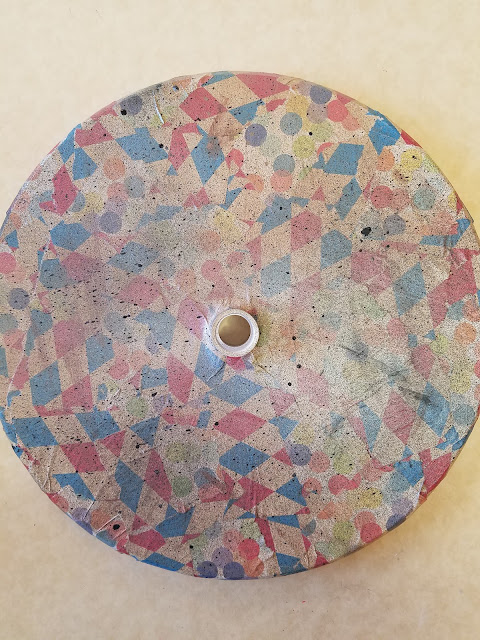
9. Repeat steps seven and eight with the circular base. You can use the same wrapping paper for uniformity or a different pattern for a more varied appearance. Alternatively, you can use layers of black and silver spray paint for a metallic look.
10. Measure, mark, and cut the PVC pipe into two two-foot sections and, on a newspaper-lined surface in a well-ventilated area, give the sections and the third coupling two coats of metallic silver spray paint. Then, use a light dusting of black and brown spray paint to add age and distress.
11. Repeat steps seven and eight with the wooden sign. Akin to step nine, you can use the same pattern, an alternate design, or black and silver paint for a steel patina.
12. On a newspaper-lined surface in a well-ventilated area, give the letterboard letters an even coat of black spray paint. Although I only used one coat, you may want more depending on your desired coverage. Keep in mind, though, this is the base coat and much of the paint will be covered up by other colors. Once the paint has dried, give the letters an aged patina by gently brushing brown, gray, and white paint over their surfaces. Try not to overthink your application. A random pattern is ideal.
13. Arrange the letters on the sign and glue them in place. It might work best to pre-position everything to determine their desired placement before permanently affixing them.
14. Glue the sign to the upper portion of one of the PVC pipe sections and wrap twine around the sign to give the illusion it is lashed to the pole.
15. Glue the eyeballs in the globe. This process works best if you apply a small dab of glue to their surface, press it against the glass, and hold it for a few minutes until it sticks. Depending on the width of the globe’s mouth, you may need to use a long pair of tweezers or kitchen tongs to position the items if you cannot fit your hand through the opening.
16. In a plastic container (because the food coloring will stain, use something disposable or that you won’t mind dying), pour in your desired amount of clear glue gel and slowly add red food coloring to the solution until it achieves the sanguine hue you desire. To give the blood further density, add blue food coloring and mix well.
17. On a newspaper-lined surface, pour the blood glue into the globe and rotate it to spread the blood across its surface. It is best to move slowly with this, since it can easily overtake the glass and make it impossible to see the eyeballs.
18. Nestle the globe into the skull’s cavity and glue it in place. If it it does not fit snugly, you can use crumpled pieces of black paper to pad the opening.
19. Assemble the entire prop and, on a newspaper-lined surface, apply more blood glue. You can use an old spoon or plastic utensil to dribble it along chosen areas (e.g. around the openings of the eyes and nose and along the areas where the globe protrudes from the skull) or pour it haphazardly for a gory mess.
20. The prop can be enhanced in a variety of ways to cater the prop to your haunt’s specific needs. For instance, you can include severed ears and fingers inside the globe for a gorier theme or remove the blood and fill the globe with Halloween-themed toys for something more whimsical.
*You will not use the entire bottle’s content for this project.

Friday, April 8, 2022

"The Dark Angel" (A Poem)

Depression and suicidal ideation are common plights to artists and, although Lionel Johnson parodied the idea in his 1896 satirical poem “Incurable,” he tackles it with a more somber tone in “The Dark Angel,” partially because, as literary critic and historian Jerome Hamilton Buckley highlights, the author was no stranger to the concept himself.[1] 
 
Dark Angel, with thine aching lust
To rid the world of penitence:
Malicious Angel, who still dost
My soul such subtile violence!
 
Because of thee, no thought, no thing,
Abides for me undesecrate:
Dark Angel, ever on the wing,
Who never reachest me too late!
 
When music sounds, then changest thou
Its silvery to a sultry fire:
Nor will thine envious heart allow
Delight untortured by desire.
 
Through thee, the gracious Muses turn,
To Furies, O mine Enemy!
And all the things of beauty burn
With flames of evil ecstasy.
 
Because of thee, the land of dreams
Becomes a gathering place of fears:
Until tormented slumber seems
One vehemence of useless tears.
 
When sunlight glows upon the flowers,
Or ripples down the dancing sea:
Thou, with thy troop of passionate powers,
Beleaguerest, bewilderest, me.
 
Within the breath of autumn woods,
Within the winter silences:
Thy venomous spirit stirs and broods,
O Master of impieties!
 
The ardour of red flame is thine,
And thine the steely soul of ice:
Thou poisonest the fair design
Of nature, with unfair device.
 
Apples of ashes, golden bright;
Waters of bitterness, how sweet!
O banquet of a foul delight,
Prepared by thee, dark Paraclete!
 
Thou art the whisper in the gloom,
The hinting tone, the haunting laugh:
Thou art the adorner of my tomb,
The minstrel of mine epitaph.
 
I fight thee, in the Holy Name!
Yet, what thou dost, is what God saith:
Tempter! should I escape thy flame,
Thou wilt have helped my soul from Death:
 
The second Death, that never dies,
That cannot die, when time is dead:
Live Death, wherein the lost soul cries,
Eternally uncomforted.
 
Dark Angel, with thine aching lust!
Of two defeats, of two despairs:
Less dread, a change to drifting dust,
Than thine eternity of cares.
 
Do what thou wilt, thou shalt not so,
Dark Angel! triumph over me:
Lonely, unto the Lone I go;
Divine, to the Divinity.[2]
 
Works Referenced
 
Buckley, Jerome Hamilton. The Victorian Temper: A Study in Literary Culture. New York: Cambridge University Press, 1951.
 
Johnson, Lionel. “The Dark Angel.” The Poems of Lionel Johnson. London: Elkin Mathews, 1908. 40-42.
____________________
[1] Buckley, 237.
[2] Johnson, 40-42.

Friday, April 1, 2022

Decomposing Fingers

$10 - $15 (based on 2020 prices)
Makes five fingers
 
When my little brother and I began yard haunting, it was easy to find realistic-looking body parts at local party shops. Over the years, though, the appearance of fake limbs has become more and more pathetic. Now, to acquire something believable, you have to make your own or buy it at an expensive special-effects store. Since the latter option is impracticable (no one has the money for those stores), this project developed from my own attempts at self fabrication.
  • Five vinyl fingers
  • One 2 oz. bottle of acrylic paint in black*
  • One 2 oz. bottle of acrylic paint in brown*
  • One 2 oz. bottle of acrylic paint in gray*
  • One 2 oz. bottle of acrylic paint in khaki*
  • One 2 oz. bottle of acrylic paint in umber*
  • One 2 oz. bottle of acrylic paint in white*
1. On a newspaper-lined surface, apply three even coats of khaki paint to the fingers. Although I used three, you may want more or less based on your desired coverage.
2. Give the fingers a smudging of brown paint, focusing primarily on the tips and around the knuckles. I discovered that applying a small amount of paint to your thumb and index finger and rubbing it onto the prop works well.
3. Once the brown paint has dried, repeat the process with umber. During this application, be careful not to cover too much of the brown paint.
4. Begin detailing the nails with a coat of white paint then, after that dries, dab gray paint onto the nails, building up layers until they look decrepit. To complete the process, smudge black around the tips of the fingers and along their cuticles.
5. Cover the severed ends of the fingers with several even coats of black paint. I used two; however, you may want more or less depending on your coverage preferences.
6. Using a brush with splayed bristles, apply a stippling of black paint along the surfaces of the fingers. Do not overthink your application, since a random pattern will look more natural.
7. The fingers work well by themselves or you can use them to build other props: create holes around the stumps and thread twine through them to fashion a necklace; place them in a monster’s gnarled mouth; or allow them to take center stage in a specimen display.
*You will not use the entire bottle’s content for this project.