$20 - $25 (based on 2017 prices)
Makes four dolls
The farm theme for 2016’s haunt left me with numerous pumpkins and I have spent the last few years finding ways to repurpose them. For this prop, I decided to fabricate dolls out of the mini-pumpkins purchased to accentuate portions of the display. Creepy dolls are always a nice addition to several yard-haunt themes, especially since many people find them unnerving.
- Four twelve-inch dolls with vinyl limbs and heads
- Four stout mini-pumpkins
- Four tall mini-pumpkins
- One 8 oz. bottle of wood glue*
- One 2 oz. bottle of acrylic paint in au natural*
- One 2 oz. bottle of acrylic paint in flat black*
- One 2 oz. bottle of acrylic paint in hot cocoa*
- One 2 oz. bottle of acrylic paint in spice brown*
- One package of white pipe cleaners (one dozen per package)
- One ten-yard roll of brown duct tape
- One 10 oz. cans of interior/exterior, fast-drying spray paint in nutmeg
1. Dismember the dolls and remove their clothing. On a newspaper-lined surface in a well-ventilated area, paint their limbs and heads black. Although I only used one coat, you may want more depending on your desired coverage. Keep in mind, though, that this is the base coat for the crackle paint and much of it will be covered up by the second layer. While I chose black, you can use a different color to tailor the props for your specific needs.
2. Once the paint has dried, use a thick brush to apply a smattering of wood glue to the prop. Try not to over think your application (a random pattern produces the best results). Also, it may be easier to work with one limb at a time rather than attempting to glue and paint all the pieces at once.
3. Let the glue sit for a minute to become tacky and then cover the limbs with hot cocoa paint. Here, too, I only used one coat; however, you may want more. As the glue and paint dry, they will form cracks, making the base coat visible.
4. Once the glue and paint have fully dried, brush a light coat of au natural and spice brown paint onto the pieces to simulate dirt. During this process, try to focus on areas where dust and grime would normally accumulate: in the lines between fingers and toes, along the creases of elbows and knees, and inside ears and mouths. NOTE: reserve the hands for another project.
5. Detail the faces with various elements: fashion eyes with buttons, seam mouths closed with safety pins, draw astrological symbols across surfaces, and create a dripping effect with black paint. You can make each doll unique or give them a unified appearance.
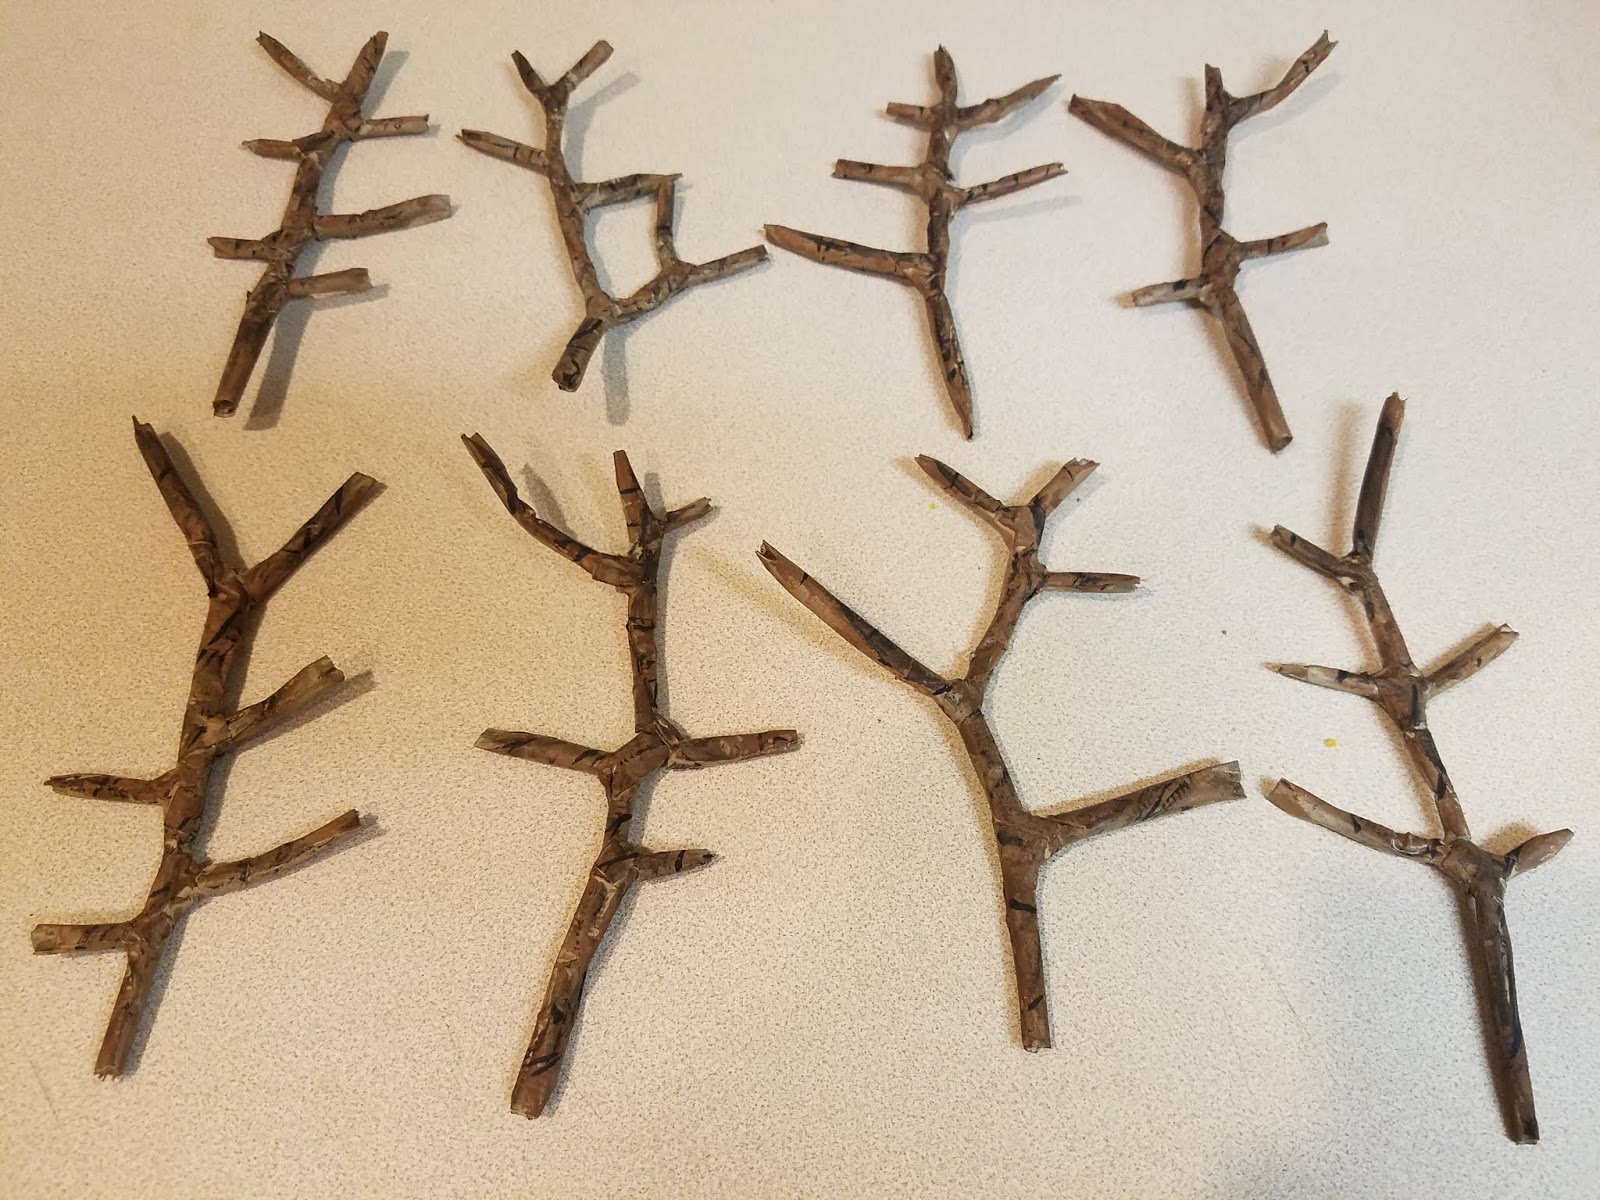
6. Use pipe cleaners to create the armature for eight sticks. You will use one long piece to form the main staff and attach smaller strands to fabricate twigs. To save time, you can use real sticks and skip steps six through eight.
7. On a newspaper-lined surface in a well-ventilated area, give the sticks an even coat of nutmeg spray paint. Although I only used one coat, you may want more depending on your desired coverage. Keep in mind, though, that this is the base coat and much of the paint will be covered by darker colors.
8. Give the sticks a smudging of au natural, hot cocoa, and spice brown to replicate the look of natural sticks. Depending on your chosen appearance, you can work from either light to dark or dark to light. Once the paint has dried, accentuate the sticks with brushings of black lines.
9. Cut the stems off of the stout mini-pumpkins to form a base and either hot glue or superglue the tall mini-pumpkins to them to construct torsos. If you plan to display these props outdoors in windy conditions, give them additional weight by hollowing out the stout mini-pumpkins and pouring sand or rocks into them.
10. On a newspaper-lined surface in a well-ventilated area, give the pumpkin bodies a dusting of nutmeg and a splattering of brown to replicate dirt. You could also apply a flecking of black to enhance the appearance.
11. Attach the heads to the bodies with either hot glue or super glue. Depending on how small these items are, you may have to remove the stems from the tall mini-pumpkins as well.
12. Punch holes into the torsos and glue the sticks in place. Their positioning depends on your chosen appearance of the prop. Use the wire armature inside the sticks to bend them into your desired shapes. If possible, try to make them appear as though they are reaching menacingly outward.
13. You could embellish the props with additional elements – chicken feathers or dried corn husks – to amplify their frightening appearance.
*You will not use the entire bottle’s content for this project.


No comments:
Post a Comment