
$25 - $30 (based on 2019 prices)
Makes one wreath
After the dozens of wreaths created for 2017’s haunt, I swore it would be a long time before I made another one; however, the mood struck me in 2019 to build a carnival-themed version to adorn a wall in the circus tent. It was one of the last props made for the building season (partially due to my reluctance).
- One plastic skull mask
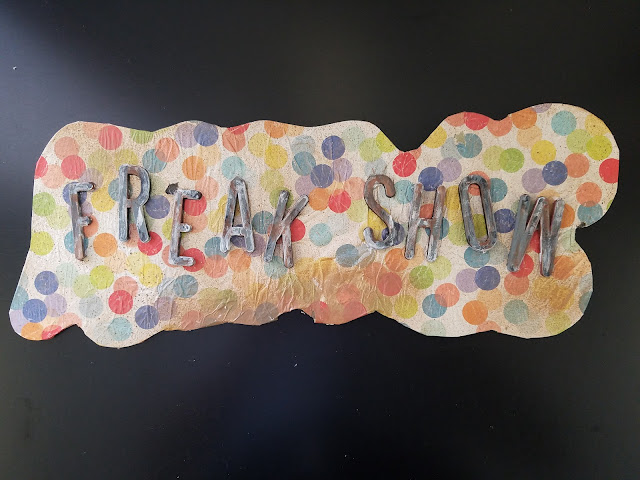
- One twelve-inch wooden sign
- One fourteen-inch metal wreath frame
- One roll of colorful wrapping paper (roughly seventeen square feet)
- One 10 oz. can of interior/exterior, fast-drying spray paint in flat black*
- One 10 oz. can of interior/exterior, fast-drying spray paint in flat brown*
- One 10 oz. can of interior/exterior, fast-drying spray paint in flat white*
- One 2 oz. bottle of acrylic paint in flat black*
- One 2 oz. bottle of acrylic paint in flat brown*
- One 2 oz. bottle of acrylic paint in flat gray*
- One 2 oz. bottle of acrylic paint in flat green*
- One 2 oz. bottle of acrylic paint in flat orange*
- One 2 oz. bottle of acrylic paint in flat purple*
- One 2 oz. bottle of acrylic paint in flat white*
- One 4 oz. bottle of all-purpose tacky glue*
- One clear plastic Christmas ornament (two inches in diameter)
- One package of two-inch letterboard letters
- Two skeleton hands
- Five yards of deco mesh in green
- Five yards of deco mesh in orange
- One package of red chenille stems (ten twelve-inch pieces)
- Two large bows
- Six Halloween-themed ornaments
- Twelve yards of purple mesh tubing
- One large party hat
1. Remove the mask’s elastic band and any other accessories and, on a newspaper-lined surface in a well-ventilated area, give it two coats of white spray paint. I used two coats, but you may want more or less depending on your desired coverage. Likewise, you could select a different base color to cater the item to your haunt’s needs.
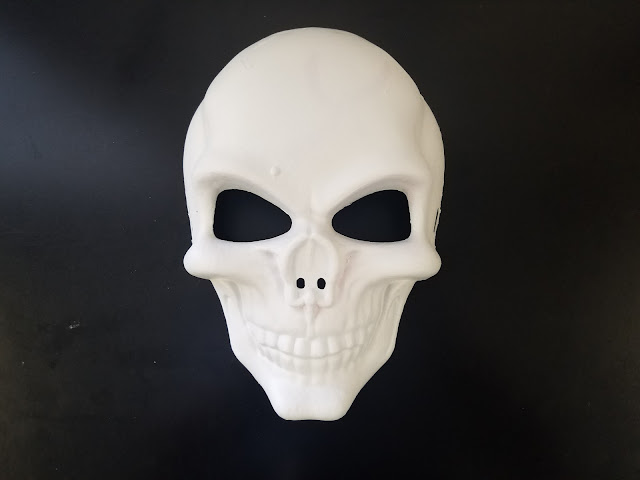
2. Detail the mask with a variety of colors to create a clown-like face. Based on your haunt, you can fabricate fanciful expressions for a whimsical theme or something more maniacal. Once the paint has dried, outline the pattern in black to accentuate the colors and then, using a hue that complements the main colors, write smile across the forehead. This, too, can be altered to fit your theme, with remarks like laugh written in bright colors to convey a happier tone or commands like scream penned in blood-red paint to amplify the scariness.

3. Remove the hanging hoop from the back of the ornament and, on a newspaper-lined surface in a well-ventilated area, give it a coat of black spray paint. Akin to the previous step, select a color that corresponds with the tones of the mask.

4. Glue the portion of the ornament where the hanging hoop once was to the mask to fashion a nose. For a sturdier hold, use superglue.

5. Glue the mask to the wreath. For visual interest, tilt it slightly at an angle and do not center it on the frame.

6. Brush a light layer of glue onto the sign and cover it with wrapping paper. To make the paper appear worn, crumple it up prior to adhering it to the board and tear holes into it.

7. Add additional age and distress by dusting the sign with a light coat of brown spray paint. To give the appearance of dirt, hold the can over twelve inches away from the sign’s surface and make quick flicking motions. You can also apply a flecking of black paint and smears of brown paint to enhance the weathered appearance.

8. On a newspaper-lined surface in a well-ventilated area, give the letterboard letters an even coat of black spray paint. Although I only used one coat, you may want more depending on your desired coverage. Keep in mind, though, this is the base coat and much of the paint will be covered up by other colors. Once the paint has dried, give the letters an aged patina by gently brushing brown, gray, and white paint over their surfaces. Try not to overthink your application. A random pattern is ideal.

9. Arrange the letters on the sign and glue them in place. It might work best to pre-position everything to determine their desired placement before permanently affixing them.
10. On a newspaper-lined surface in a well-ventilated area, give one skeleton hand a coat or two of white spray paint and the other a coat or two of black. As with step two, you can use alternate colors to make the prop fit your chosen aesthetic.

11. Affix the sign to the lower portion of the wreath and position the hands on either side of it to make it appear as though they are holding the object.

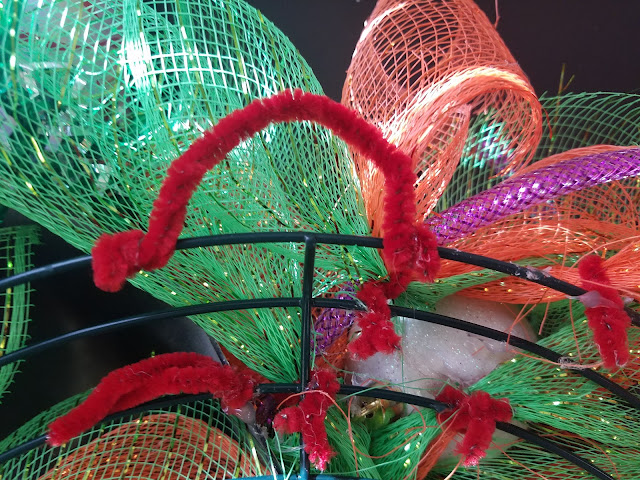
12. Cut the green and orange deco mesh into twenty eight-inch sections and twenty six-inch sections and bind them together with a two-inch piece of chenille stem.

13. Using three-inch sections of chenille stems, attach the mesh bundles to the wreath by wrapping the stems around the mental frame. As you do so, try to vary the colors and sizes.

14. Fill empty spaces and add further detail by adhering bows, Halloween-themed ornaments, and purple mesh tubing to the wreath. Akin to steps two and ten, these items and their colors can be modified to fit the theme of your haunt.

15. Crown the mask with a party hat, ensuring its placement does not cover the word written on its forehead. For an alternate look, you can use a wig.

16. If the wreath did not come with a hanging loop, you can fashion one out of the chenille stems or, for a sturdier version, steel wire.
17. Because of its versatility, the wreath can be embellished with a variety of items, from playing card and foam dice to rolls of tickets and popcorn bags, to achieve a multitude of themes.

*You will not use the entire bottle’s content for this project.
No comments:
Post a Comment