
$10 - $15 (based on 2018 prices)
Makes three jars
For 2018’s ghost theme, which was part of my office’s annual decorating competition, I incorporated dozens of old photographs with cryptic numbers into the décor and, using a few of these items, created ghost jars to amplify the motif. Also known as spirit jars, ghost jars are implemented in many hoodoo and voodoo practices, where images or personal belongings of an individual are placed within a container which is then used to trap their spirit or soul. Although I made three to decorate the altar, the ambitious haunter can make dozens to line a walkway or scatter throughout a graveyard.
- Three glass jars (roughly eight inches tall and four inches in diameter)
- One 8 oz. can of oil-based interior wood stain in Jacobean*
- One 4 oz. bottle of all-purpose tacky glue*
- One 33 oz. bag of Spanish moss
- Three LED tealights
- Hot glue gun and glue sticks
- One 0.44 oz. bottle of glossy white nail polish
- Three ghost photographs (learn how to make them here)
- Two to three yards of twine
- One 2 oz. bottle of acrylic paint in flat black*
1. Thoroughly wash and dry the jars. If there is any sticker residue, use rubbing alcohol to remove it (soak a paper towel in the solution, let it sit over the area for a few minutes, and wipe away the remaining glue). After cleaning the jars, roughen their surfaces with coarse sandpaper to help the stain adhere. Then, on a newspaper-lined surface in a well-ventilated area, paint the jars with the stain. I discovered that applying a thin coat and patting it with paper towels produces a hazed appearance. Likewise, brushing the rims and base with a swift downward motion creates the illusion of grime buildup.

2. Once the stain has dried, coat the bottoms of the jars with a generous amount of glue and affix clusters of Spanish moss. You want enough to remain highly visible after adding the candles and photographs, but not so much that it dominates the prop. It may help to work in stages: insert the moss, place the other props on top of it, and add or subtract moss as needed.

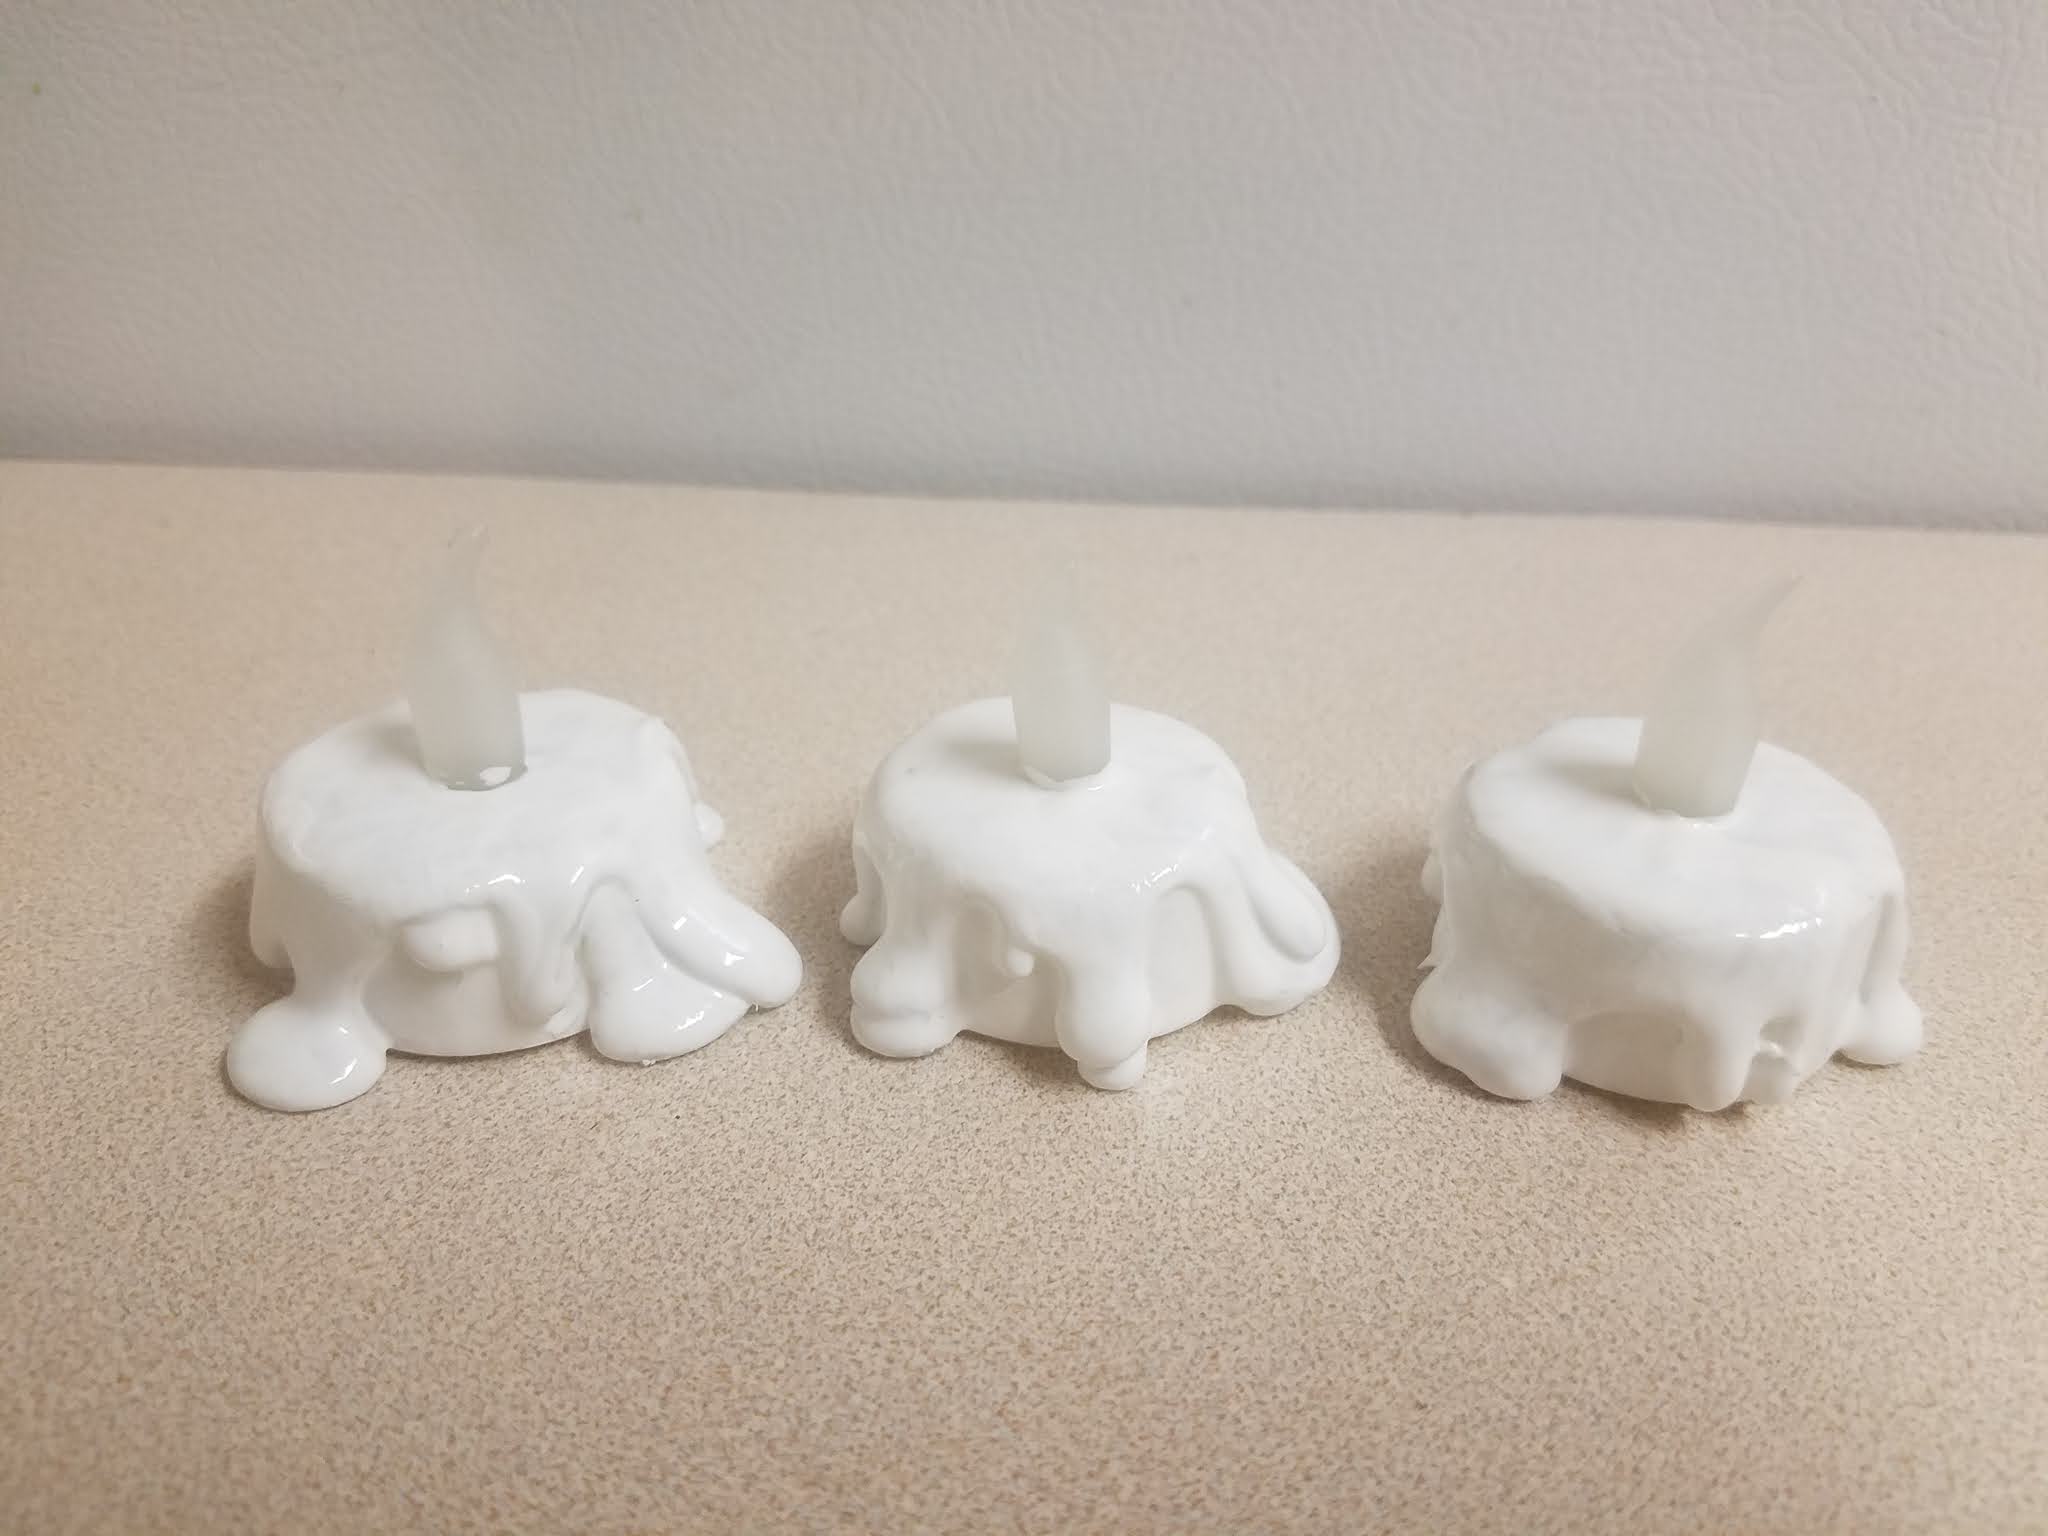
3. On a wax-paper-lined surface, use hot glue to give the candles extra girth (the paper will make it easier to release the candles). This process works best if you move in stages, applying one layer at a time and allowing the glue to dry between each application. Also, I found that pumping the glue along the top of the candles and allowing it to naturally run downward creates the best results.

4. To make the candles look waxy, cover them in two or more coats of glossy white nail polish. I elected to use white to provide a clear contrast with the dull hues of the jars and moss; however, you can utilize another color.
5. Insert the photographs into the jars and allow them to spread across the back of the containers. Then, place the candles in the moss. Depending on the width of the jars’ mouths, you may need to use a long pair of tweezers of kitchen tongs to position the items if you cannot fit your hand through the openings.

6. Wrap the necks of the jars with twine. Do not overthink your application, since a haphazard pattern will look spookier. Also, coat the necks with a light brushing of glue prior to applying the twine to help it adhere to the glass and remain in place.

7. To give the cork lids a grimy appearance, water down black acrylic paint and brush it over their surfaces, ensuring the liquid settles into all the cracks and fissures (you can also use a spray bottle for the application). Allow the mixture to sit for a few minutes and then wipe it clean. You may want to experiment with the consistency prior to doing this: the more water you add, the fainter/lighter the wash; the less water you add, the deeper/darker the wash.

8. The props can be enhanced further with additional details to cater them to your haunt’s specific needs. For instance, you can accompany the candles and photographs with aged bones or personal trinkets or decorate the jars with strands of voodoo beads or clusters of chicken feathers.

*You will not use the entire bottle’s content for this project.
No comments:
Post a Comment