$20 - $30 (based on 2019 prices)
Makes one sign
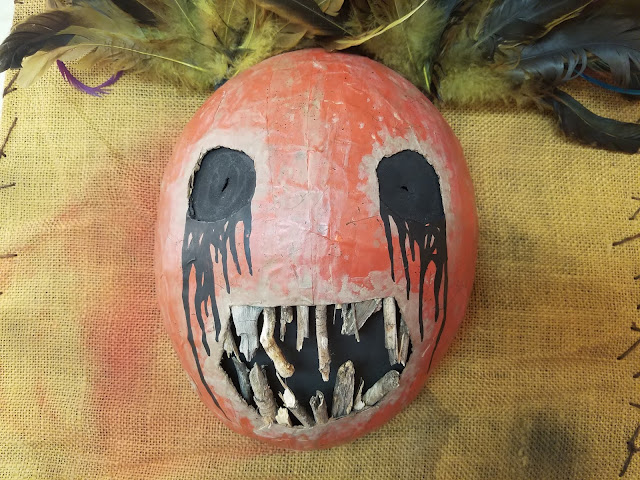
Part of 2020’s twisted carnival theme included an assortment of poster-size signs meant to resemble the attraction advertisements customary in turn-of-the-century travelling shows. Although they had the same basic attributes to maintain a uniform appearance when they were hung on the sides of the tent, I wanted each to have their own unique look. For this one, I repurposed the feathered tribal mask I made in 2018 for a theatrical troupe in an effort to both save time as well as make use of a build which no longer had a purpose.
- One 20” x 30” foam board
- One yard of burlap
- One pan large enough to soak the fabric
- One feathered tribal mask (learn how to make it here)
- One 10 oz. can of interior/exterior, fast-drying spray paint in flat black
- One 10 oz. can of interior/exterior, fast-drying spray paint in flat brown*
- One 2 oz. bottle of acrylic paint in black*
- One 2 oz. bottle of acrylic paint in brown*
- One 2 oz. bottle of acrylic paint in gray*
- One 2 oz. bottle of acrylic paint in red*
- One 2 oz. bottle of acrylic paint in white*
- One 4 oz. bottle of all-purpose tacky glue*
- Three to four yards of dark brown twine
- One package of two-inch letterboard letters
1. Pour enough water to submerge about half of the fabric into the pan, add several drops of black paint, and thoroughly mix the solution. You may want to experiment with the consistency prior to doing this: the more paint you add, the deeper/darker the wash; the less paint you add, the fainter/lighter the wash. How murky you want the colorization, of course, all depends on your chosen aesthetic. Add the fabric and allow the wash to stain portions of the cloth. The longer you allow the fabric to sit in the mixture, the darker the stain will become. Once the burlap has reached the level of grime you desire, remove it and let it dry overnight. Once fully dry, repeat the process with the red paint. For additional levels of filth, you can add washes of browns, greens, and yellows.

2. Trim the burlap to 22” x 32”, stretch it across the foam board, and glue it in place. I found it works best to glue one side to serve as an anchor and then work the fabric from there, ensuring the surface is as smooth as possible. Although I gave myself a one-inch border to work with, you may want to leave additional fabric to give you more leeway.
3. Using a darning needle, thread the twine along the outer edges of the board. Since the fabric is already attached to the foam, this will give the illusion that it is haphazardly sewn on. You want the needlework to look messy and uneven, giving the sign a disheveled appearance.
4. On a newspaper-lined surface in a well-ventilated area, dust the sign’s surface with black and brown spray paint to give it a cohesive level of age. You want to create the illusion of dirt, so a random application is best. I found that holding the can roughly twelve inches away from the sign and making quick passes produced the finest results.
5. Position the mask on the board and glue it in place. Depending on how large you plan to make the sign’s lettering, you may need to play with its placement beforehand.
6. On a newspaper-lined surface in a well-ventilated area, give the letterboard letters an even coat of black spray paint. Although I only used one coat, you may want more depending on your desired coverage. Keep in mind, though, this is the base coat and much of the paint will be covered up by other colors. Once the paint has dried, give the letters an aged patina by gently brushing brown, gray, and white paint over their surfaces. Try not to overthink your application. A random pattern is ideal.
7. Arrange the letters on the board and glue them in place. Akin to step five, it might work best to pre-position everything on the board to determine their desired placement before permanently affixing them.
8. For additional detail, do not use the letterboard letters to spell out every word or all words in full. Rather, emphasize certain words or parts of words by using red paint to write these elements. For this step, you want the wording to be haphazard. To achieve this, exaggerate curves, create sharp points, and elongate certain aspects. You could also write letters backwards and deliberately misspell words. Keep in mind that the sign needs to be readable, so try not to overdo your artistic flairs.
9. Use steel wire to create a hanging loop and attach it to the back of the sign. You can further enhance the prop with strings of bones, ears, and fingers.
*You will not use the entire bottle’s content for this project.


