$80 - $90 (based on 2015 prices)
Makes six jars
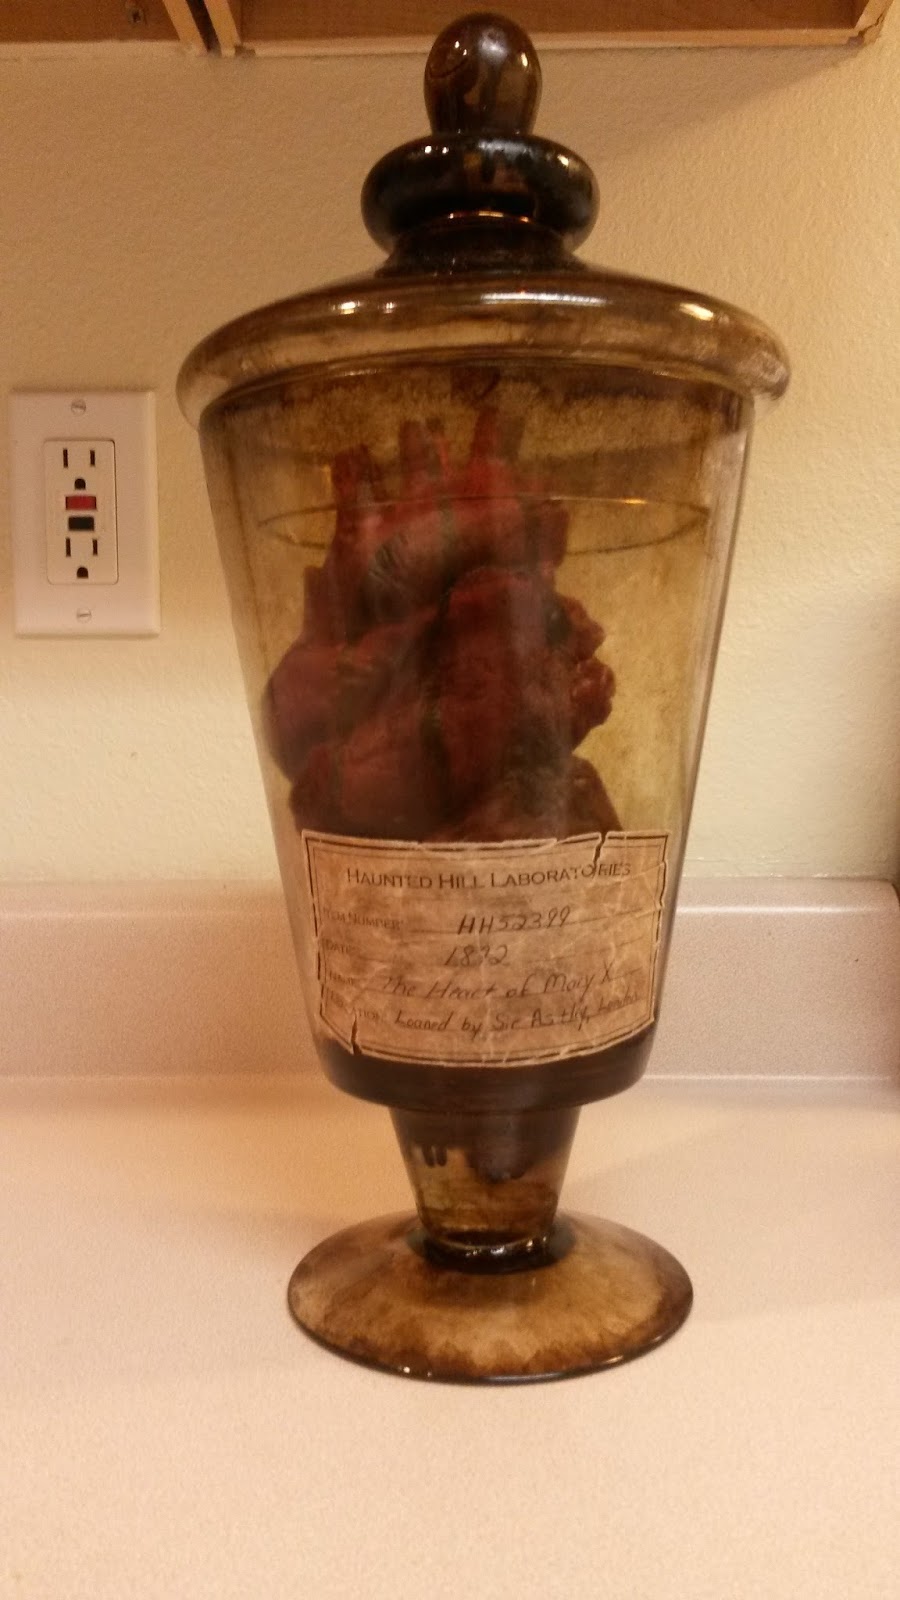
I wanted to do something with an assortment of body parts which rarely fit into my haunt’s themes. I finally settled on the idea of transforming them into jarred specimens. I used wood stain to age the glass and make the props look old and discarded. If you want a cleaner appearance, skip this step. Also, you can dramatically reduce the project’s cost by buying the jars at a second-hand store.
- Six glass jars of varying sizes (you can decrease or increase this number)
- One 8 oz. can of oil-based interior wood stain in Jacobean*
- At least four tablespoons of black tea (e.g. Darjeeling, Earl Gary, English Breakfast, etc.)
- One piece of 8” x 11.5” copy paper with specimen labels printed on it
- One pan large enough to soak the copy paper
- One 4 oz. bottle of all-purpose tacky glue*
- One 1 oz. bottle of fake blood (learn how to make your own here)
- Nine yards of white cheese cloth (if you are using fewer jars, decrease this amount; if you are using more, increase)
- Six various body parts and/or severed limbs
1. On a newspaper-lined surface in a well-ventilated area, paint the jars with the stain. I discovered that applying a thin coat and patting it with paper towels produces a hazed appearance. Likewise, brushing the rims and base with a swift downward motion creates the illusion of grime buildup.
2. Boil enough water to completely submerge the copy paper and pour it into the pan. Add the tea. The longer you allow the tea to brew, the darker the stain will become. Likewise, greater amounts of tea will produce a richer stain. I found that a combination of English and Irish Breakfast brewed for over ten minutes produces a nice, deep brown. Submerge the paper into the tea mixture and soak it until it reaches the color you desire. I soaked mine for eight hours and scattered the loose-leaf tea over the top of the paper to add spots. Remove the paper from the water and allow it to dry.

3. After the paper has dried, cut out the labels, leaving a small boarder around their edges, and give your specimens names. To roughen the labels’ appearance, use sandpaper to fray their sides and create holes. You can also crumple the paper to produce creases. Once you have achieved your desired level of distress, glue the labels to the sides of the jars. You can use olive or vegetable oil to add further stains. I discovered that applying a small amount of oil to your index finger and patting it on the paper works well.
4. On a newspaper-line surface, cut the cheese cloth into sections large enough fit crumbled at the bottom of the jars. You want the cloth to be noticeable after the specimens have been placed on top of it, so do not be conservative with the sizes of your sections. Once cut, splatter the cloth with blood, creating drops and smudges.
5. Ball up the bloodied cloth and place it inside the jar’s base. You may have to play with its arrangement before placing the specimen on top. After the cloth is situated, add the specimen, positioning it so that it is prominently displayed.
*You will not use the entire bottle’s content for this project.


No comments:
Post a Comment