
$5 - $10 (based on 2020 prices)
Makes one display
Makes one display
Among the last builds for the laboratory theme was a series of small cloches containing a single specimen – an ear, an eye, and teeth – which served as small details placed among the larger towers of equipment. Featured here is the eye version.
- One plastic cloche with detachable base (roughly six inches tall)
- One 10 oz. can of interior/exterior, fast-drying spray paint in flat black*
- One 10 oz. can of interior/exterior, fast-drying spray paint in metallic silver*
- One 8 oz. can of oil-based interior wood stain in Jacobean*
- One small, white ping pong ball (1 3/8” in diameter)
- One 2 oz. bottle of acrylic paint in flat brown*
- One 0.44 oz. bottle of clear nail polish
- Two to three feet of red yarn
- One 3/16” wooden dowel
- One glass doll eye

2. On a newspaper-lined surface in a well-ventilated area, build up layers of black and metallic silver spray paint to give the base and dowel the look of steel. It works best to apply a base coat of black followed by sliver, working in quick bursts to allow parts of the black to remain visible. You can also touch up portions with additional blasts of black if the silver becomes too heavy.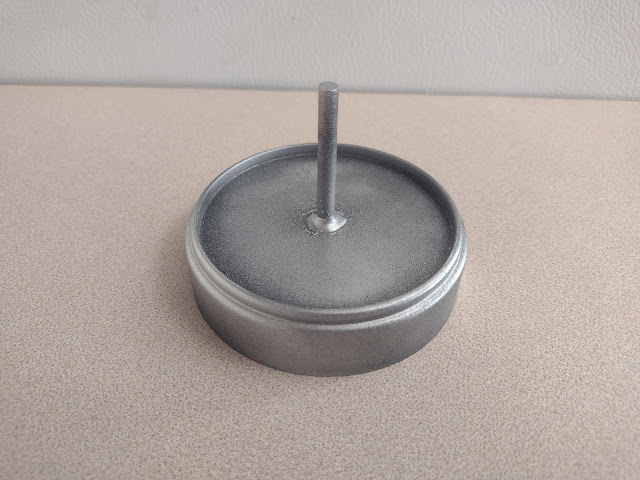

3. Once the spray paint dries, create a wash of brown paint and use it to add a level of grime to the prop, allowing the liquid to settle in the crevices.

4. Cut a two-inch section from the yarn and fray the ends. These will serve as the veins for the eyeball. Apply a light layer of glue to the ping pong ball and, using a needle or other finely tipped object, spread the yarn strands across it. How bloodshot you plan to make the prop all depends on how thinly you separate the strands: a thorough division will produce a finer appearance; thicker clusters will create a more inflamed looked.

5. After the glue has dried, adhere the glass doll eye to the center of the ball and coat the entire thing with one or two layers of clear nail polish. To make this process easier, make a small stand out of an upturned paper cup or plate.

6. Once the nail polish has dried, cut ten strands of yarn in varying lengths and glue them to the back of the eyeball to form the optic nerve. Although this may look goofy now, the effect will be much more impressive after you apply the clear nail polish in step eight.

7. Position the eye on the top of the dowel and glue it in place. Depending on the height of the cloche, you may need to play with the eye’s placement or shorten the dowel so it properly fits under the enclosure. 

8. Wrap the yarn around the dowel, using the needle or fine-tipped object from step four to spread the strands outward along the base. Once you have achieved your desired look, coat the yarn in clear nail polish to give it a glossy appearance and permanently seal the strands in place. You can also use a glossy decoupage medium for this process if the fumes from the nail polish become too overpowering.

9. On a newspaper-lined surface in a well-ventilated area, stain the cloche. Start by applying a thin coat and patting it with paper towels to produce a hazed appearance. Then, brush the edges to create the illusion of grime buildup. You want to refrain from making the coverage too thick, though, because it can obscure the eye inside. 

10. After the stain has dried, reattached the cloche to its base. For additional detail, you an embellish the prop with a specimen tag or biohazard label to cater it to your haunt’s theme.

*You will not use the entire bottle’s content for this project.
No comments:
Post a Comment