Friday, March 28, 2025

Art, Dreams, and the Supernatural: A Mini-Essay

     From Henry Fuseli’s The Nightmare (1781) and Francisco Goya’s El sueño de la razon produce monstrous (1799) to the illustrations in The Dreamer’s Sure Guide (1830) and John Fitzgerald’s The Stuff That Dreams Are Made Of (1860), visual artists during the late eighteenth and early nineteenth centuries began to explore the origin of dreams. As Nicola Brown highlights, much of these works drew upon a similar theme – “dreams are neither one thing nor the other: they are both physical and supernatural, material and spiritual.”[1] Indeed, their art parallels the era’s growing debate on the true nature of dreams and emphasizes, akin to much of the conversation occurring at that time, the perception that the supernatural played a central role in the dream process.[2] This debate, though, was not unique to just this specific time period. In fact, many ancient civilizations maintained that dreams opened a doorway to the supernatural and became a way to reveal a person’s fate. In certain regions of European, it was believed that a dream which occurred three nights in a row was destined to come true. Likewise, in some early Asian cultures, beliefs upheld that dreams revealed the opposite of what would occur in real life, with a wedding leading to a funeral or a death leading to birth.[3]

Works Referenced

Brown, Nicola. “What is the Stuff that Dreams are Made of?” The Victorian Supernatural. Ed. Nicola Brown, Carolyn Burdett, and Pamela Thurschell. Cambridge: Cambridge University Press, 2004.151-172.

Pickering, David. Dictionary of Superstition. London: Cassell, 1995.
____________________
[1] Brown, 151.
[2] Brown, 151-152.
[3] Pickering, 87-77.

Friday, March 21, 2025

Macabre Lamp

$30 - $40 (based on 2023 prices)
Makes one lamp

In 2023, I was commissioned by a local theater to serve as a consultant and prop builder for their production of The Haunting of Hill House, which was based on Shirley Jackson’s novel. Being a fan of the books since I was a teenager, I jumped at the opportunity and spent several months creating a collection of items to decorate both the house depicted on the stage and the cemetery created in the lobby to greet patrons before they entered the theater. For this prop, I fashioned a decorative lamp to adorn one of the tables in the Hill House set. To keep the cost down, I bought the lamp stand and shade at a second-hand store and used a set of winged skeletons I purchased on clearance the prior year.
  • One twenty-four-inch base for a table-top lamp
  • Two eighteen-inch winged skeletons
  • One 10 oz. can of interior/exterior, fast-drying spray paint in flat black*
  • One 2 oz. bottle of acrylic paint in flat orange*
  • One 2 oz. bottle of acrylic paint in flat turquoise*
  • One 2 oz. bottle of acrylic paint in metallic copper*
  • Two to three Halloween-themed paper napkins
  • One 4 oz. bottle of decoupage medium
  • One 10” x 12” lamp shade
  • Two to three yards of black ribbon
  • Two to three yards of black fringe tassel trim
1. After removing any decorative elements from the lamp base, thoroughly wash and dry the item. If there is any sticker residue, use rubbing alcohol to remove it (soak a paper towel in the solution, let it sit over the area for a few minutes, and wipe away the remaining glue).
2. Separate the arms and legs from the skeletons and cut their joints. Then, arrange the figures on the lamp’s base. By cutting the joints, you can position them into poses that are more natural, allowing them to hug the post. Once you have achieved your desired look, glue the skeletons in place. I used hot glue, but you can use superglue for a sturdier hold.
3. Cover the electrical cord in a plastic bag and use painter’s tape to cover the light socket to prevent paint from ruining the wiring. Following this, give the prop an even coat of black spray paint. Since this will become the base for the aged patina, you will only need one to two coats because much of it will be covered by the other hues.
4. Starting with a stippling of copper paint, build up layers of orange and turquoise to give the lamp the look of aged metal. How heavy you apply the patina depends on your aesthetic: you can go heavy for an extremely weathered look or light for a softer touch of age.
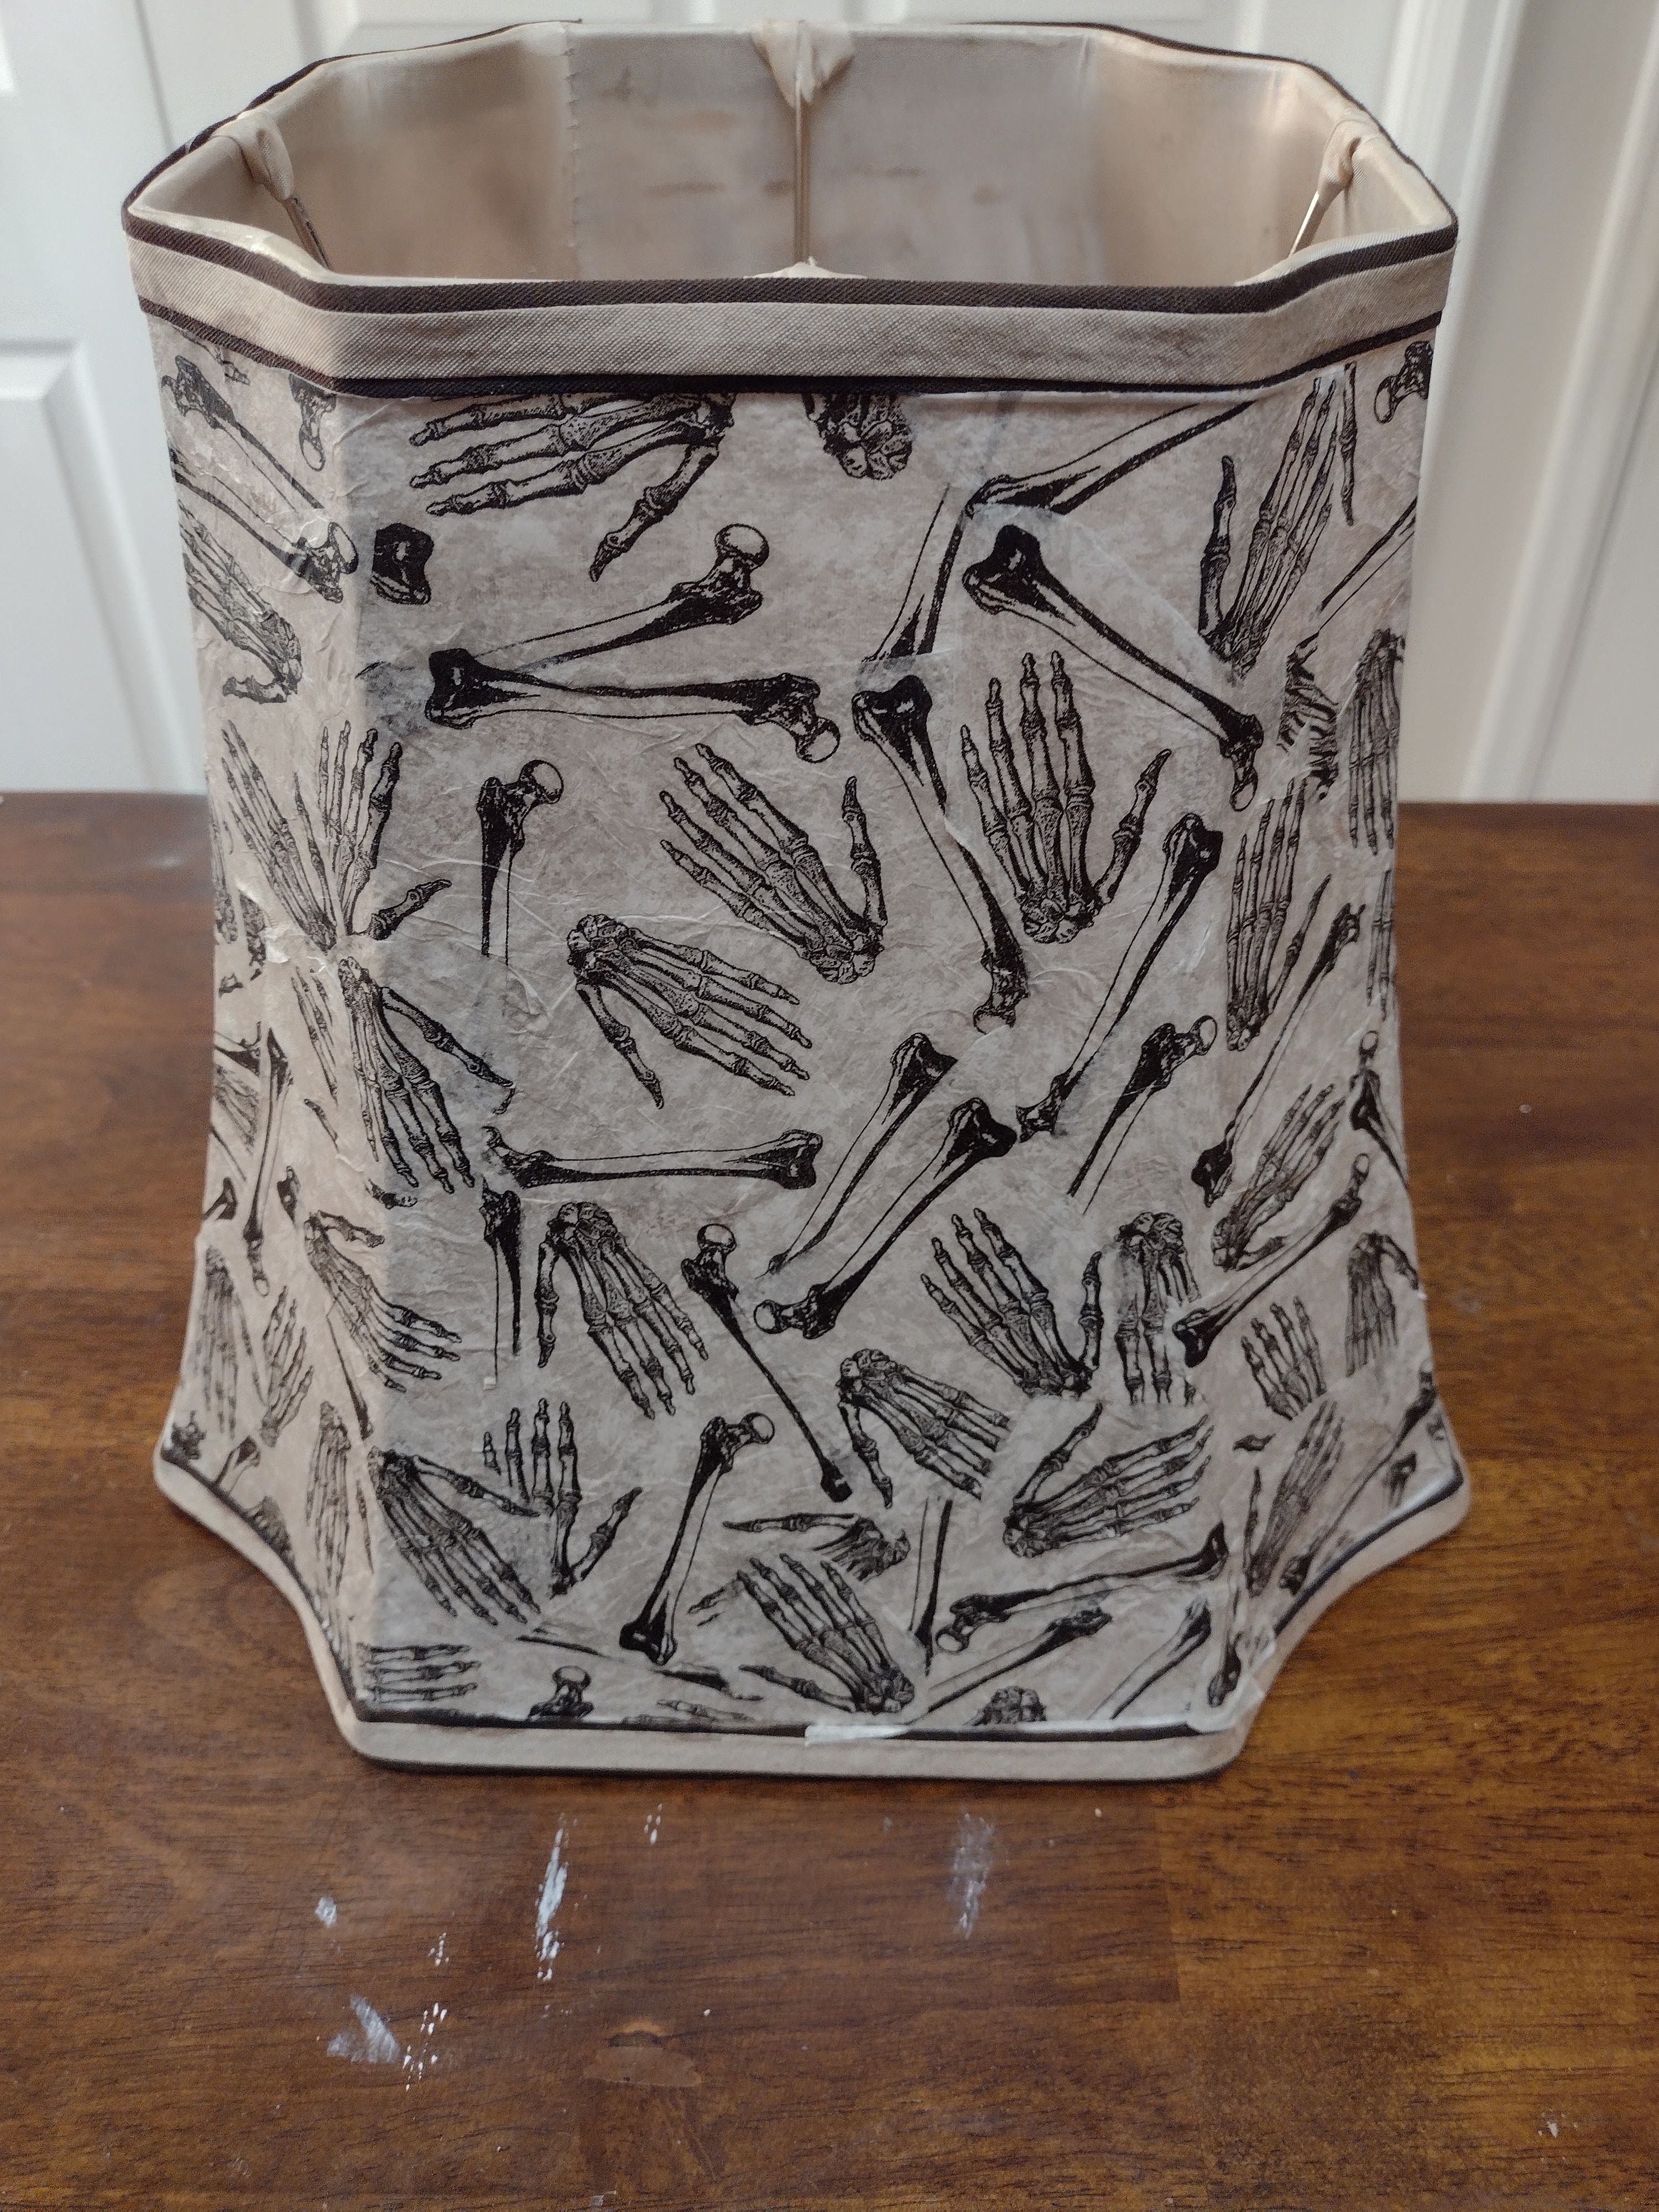
5. Cut or tear apart the napkins. For the best translucency, you want single-ply paper. If you cannot find one-ply paper napkins, simply separate the plies of multi-ply sheets. You can either isolate distinct images (as I did) or use random sections.
6. Cover the exterior surface of the shade with the cuttings, moving in stages to make this procedure manageable: apply a layer of decoupage medium to one section, press the paper down until it sticks, and repeat the process. For the best translucency, try not to overlap the sections because thicker layers will prevent the light from showing through. Once the decoupage medium dries, apply a final coat to serve as a sealer, guaranteeing your coverage is even and thin to achieve the best translucency.
7. Starting at the back of the shade, adhere black ribbon along the top and bottom borders. Then, glue the tassel trim to the bottom portion of the ribbons. I chose black for both to give the shade a uniform appearance; however, you can use two different colors – such as black and gray – for more contrast.
8. Attach the shade to the lamp stand and add a lightbulb. You can embellish the prop more by adding details like a swarm of insects crawling across the stand or bloody handprints inside the shade that appear whenever the light is turned on.
*You will not use the entire bottle’s content for this project.

Friday, March 14, 2025

"The Night Wind" (A Poem)

Known more for his humor, Eugene Field dips into darker themes with his poem “The Night Wind.” In the work, the narrator recounts a legend told to him by his mother when he was a child. In the myth, the wind calls out sinners with its whistling howl. In doing so, Field personifies the wind as a spectral figure who inflicts the consequences of wrongdoings.

Have you ever heard the wind go “Yooooo”?
‘T is a pitiful sound to hear!
It seems to chill you through and through
With a strange and speechless fear.
‘T is the voice of the night that broods outside
When folk should be asleep,
And many and many’s the time I’ve cried
To the darkness brooding far and wide
Over the land and the deep:
Whom do you want, O lonely night,
That you wail the long hours through?”
And the night would say in its ghostly way:
“Yoooooooo!
Yoooooooo!
Yoooooooo!”

My mother told me long ago
(When I was a little tad)
That when the night went wailing so,
Somebody had been bad;
And then, when I was snug in bed,
Whither I had been sent,
With the blankets pulled up round my head,
I’d think of what my mother’d said,
And wonder what boy she meant!
And “Who’s been bad to-day?” I’d ask
Of the wind that hoarsely blew,
And the voice would say in its meaningful way:
“Yoooooooo!
Yoooooooo!
Yoooooooo!”

That this was true I must allow –
You’ll not believe it, though!
Yes, though I’m quite a model now,
I was not always so.
And if you doubt what things I say,
Suppose you make the test;
Suppose, when you've been bad some day
And up to bed are sent away
From mother and the rest –
Suppose you ask, “Who has been bad?”
And then you’ll hear what’s true;
For the wind will moan in its ruefulest tone:
“Yoooooooo!
Yoooooooo!
Yoooooooo!”[1]

Works Referenced

Field, Eugene. “The Night Wind.” Love-Songs of Childhood. New York: Charles Scribner’s Sons, 1897. 6-8.
____________________
[1] Field, 6-8.

Friday, March 7, 2025

Severed Eye Cloche

$5 - $10 (based on 2020 prices)
Makes one display

Among the last builds for the laboratory theme was a series of small cloches containing a single specimen – an ear, an eye, and teeth – which served as small details placed among the larger towers of equipment. Featured here is the eye version.
  • One plastic cloche with detachable base (roughly six inches tall)
  • One 10 oz. can of interior/exterior, fast-drying spray paint in flat black*
  • One 10 oz. can of interior/exterior, fast-drying spray paint in metallic silver*
  • One 8 oz. can of oil-based interior wood stain in Jacobean*
  • One small, white ping pong ball (1 3/8” in diameter)
  • One 2 oz. bottle of acrylic paint in flat brown*
  • One 0.44 oz. bottle of clear nail polish
  • Two to three feet of red yarn
  • One 3/16” wooden dowel
  • One glass doll eye
1. Cut the wooden dowel into a two-inch section. Depending on the height of the cloche, you may need to adjust this measurement. Then, use a 7/32 bit to drill a hole into the base’s center and glue the dowel in the opening.
2. On a newspaper-lined surface in a well-ventilated area, build up layers of black and metallic silver spray paint to give the base and dowel the look of steel. It works best to apply a base coat of black followed by sliver, working in quick bursts to allow parts of the black to remain visible. You can also touch up portions with additional blasts of black if the silver becomes too heavy.
3. Once the spray paint dries, create a wash of brown paint and use it to add a level of grime to the prop, allowing the liquid to settle in the crevices.
4. Cut a two-inch section from the yarn and fray the ends. These will serve as the veins for the eyeball. Apply a light layer of glue to the ping pong ball and, using a needle or other finely tipped object, spread the yarn strands across it. How bloodshot you plan to make the prop all depends on how thinly you separate the strands: a thorough division will produce a finer appearance; thicker clusters will create a more inflamed looked.
5. After the glue has dried, adhere the glass doll eye to the center of the ball and coat the entire thing with one or two layers of clear nail polish. To make this process easier, make a small stand out of an upturned paper cup or plate.
6. Once the nail polish has dried, cut ten strands of yarn in varying lengths and glue them to the back of the eyeball to form the optic nerve. Although this may look goofy now, the effect will be much more impressive after you apply the clear nail polish in step eight.
7. Position the eye on the top of the dowel and glue it in place. Depending on the height of the cloche, you may need to play with the eye’s placement or shorten the dowel so it properly fits under the enclosure. 
8. Wrap the yarn around the dowel, using the needle or fine-tipped object from step four to spread the strands outward along the base. Once you have achieved your desired look, coat the yarn in clear nail polish to give it a glossy appearance and permanently seal the strands in place. You can also use a glossy decoupage medium for this process if the fumes from the nail polish become too overpowering.
9. On a newspaper-lined surface in a well-ventilated area, stain the cloche. Start by applying a thin coat and patting it with paper towels to produce a hazed appearance. Then, brush the edges to create the illusion of grime buildup. You want to refrain from making the coverage too thick, though, because it can obscure the eye inside. 
10. After the stain has dried, reattached the cloche to its base. For additional detail, you an embellish the prop with a specimen tag or biohazard label to cater it to your haunt’s theme.
*You will not use the entire bottle’s content for this project.