
$40 - $50 (based on 2020 prices)
Makes one device
2020’s mad scientist haunt was a massive undertaking, with the laboratory needing several large pieces of equipment to truly sell the theme. To create a unified set, I decided to use similar elements in all of the pieces: copper and silver pipes and joints, lights fashioned out of Christmas ornaments, and steel-colored bases. For this version, I repurposed an old cookie jar and LED light to make a hypnotizing device the scare-actor could use to control the minds of guests.
- One 12” x 24” board of foam insulation
- One 10 oz. can of interior/exterior, fast-drying spray paint in flat black
- One 10 oz. can of interior/exterior, fast-drying spray paint in metallic copper
- One 10 oz. can of interior/exterior, fast-drying spray paint in metallic silver
- One 4 oz. bottle of clear, all-purpose tacky glue gel*
- A random assortment of bolts, caps, rollers, and screws
- One eighteen-inch critter tube
- Five metal spickets
- One nine-inch metal cookie jar (the lid is not required)
- One plastic, eight-inch frosted light fixture with a three-inch fitter
- One battery-powered LED light
- Two clear plastic Christmas ornaments (two inches in diameter)
- One clear plastic Christmas ornament (four inches in diameter)
- One 2 oz. bottle of acrylic paint in metallic silver*
- Thirteen feet of 1/4” clear plastic tubing
1. On a newspaper-lined surface in a well-ventilated area, build up layers of black and metallic silver spray paint to give the foam board the look of steel. I found it works best to apply a base coat of black to the entire prop and then add the sliver, working in quick bursts to allow parts of the black to remain visible. You can also touch up portions with additional blasts of black if the silver becomes too heavy.

2. Detail the board with the assortment of bolts and screws, applying a small dab of glue to the bottoms of their heads and pushing them into the foam. Your arrangement is entirely based on your chosen aesthetic, so you can apply as many or as little as you like.

3. On a newspaper-lined surface in a well-ventilated area, give the critter tube two even coats of metallic copper spray paint. You can always vary the color to cater the prop to your haunt’s distinct color scheme.

4. Once the paint has dried, use a 5/16 bit to drill four holes into the tube: two at the base and two toward the top. Then, screw a spicket into each hole. For added security, you can coat the threads with glue beforehand.

5. Position the tube on the board and attach it with hot glue. You may need to use a collection of sturdy objects to help support the tube while the glue fully dries.

6. On a newspaper-lined surface in a well-ventilated area, give the cookie jar two even coats of metallic copper spray paint to match the tube and, once the paint has dried, use a 5/16 bit to drill two holes into the container. As with step three, you can use an alternate color for this item to adhere to your haunt’s color pallet. After this, screw the last spicket into the holes, covering the threads with glue for additional support.

7. Using a pair of sharp clippers or scissors, cut a three-inch hole in the bottom of the jar large enough to accommodate the light fixture’s fitter. Because the metal will be sharp, it is best to wear safety gloves during this process.

8. Insert the fitter of the light fixture into the hole and glue it in place. It is best to purchase a plastic version of this item to prevent it from breaking during the assembly or while in use inside the haunt.

9. Determine where the cookie jar will sit on the board and mark its center. Then, place the LED light on this spot and trace its outline. With a sharp knife, cut out the hole, insert the light into its opening, and glue the item in place. You want to be able to access the battery compartment and on-off switch from the bottom of the prop.

10. Position the jar in front of the tube and glue it in place. You want to leave enough room between the container and the spickets to accommodate the tubing, so do not place them too close.

11. Cut the tops off of the Christmas ornaments and, on a newspaper-lined surface in a well-ventilated area, give them a coat of metallic copper spray paint. Once this has dried, accent their tips with metallic silver paint, cut two small holes on either side, and insert screws into the openings. Then, glue the larger ornament to the top of the light fixture and the smaller versions on either side of the jar, ensuring there is enough space for the tubing.

12. Cut the tubing into six twenty-four-inch sections, glue them to the four spickets on the tube and the two smaller Christmas ornaments on either side of the jar, and then run them up into the larger Christmas ornament on the top of the light fixture. You may need to trim the tubing if it is too long to prevent the excess from bunching up inside the prop.
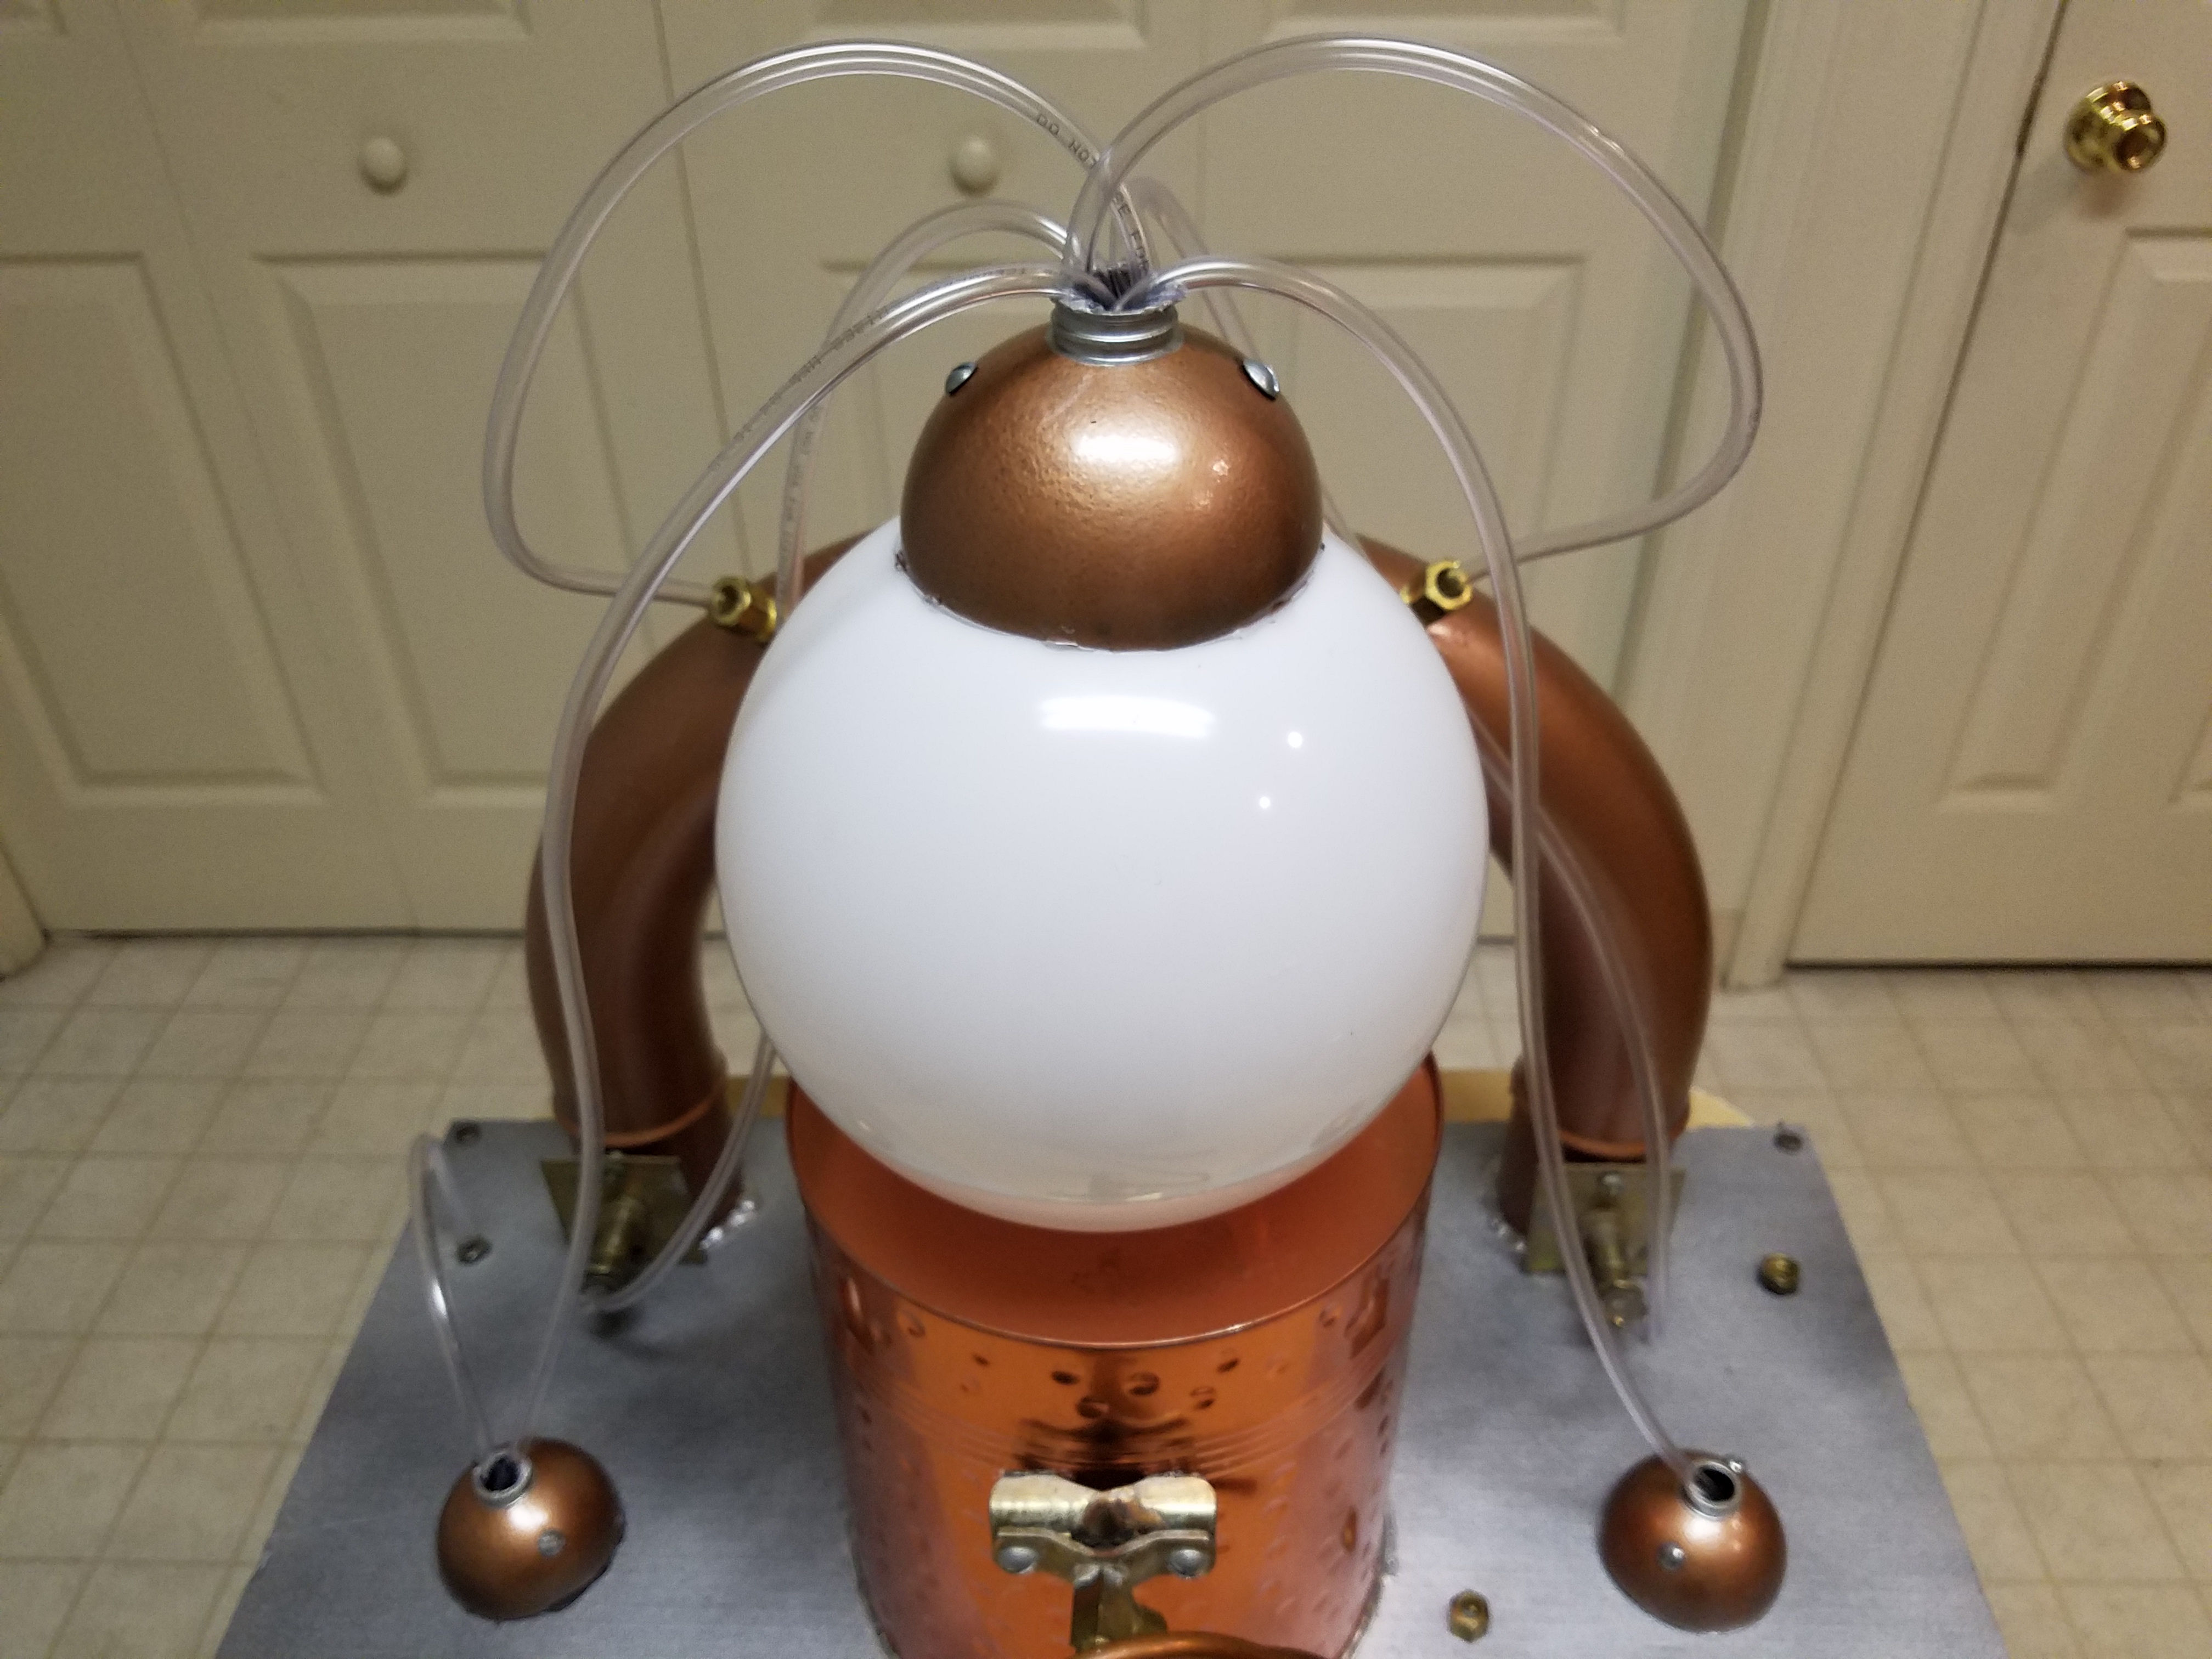
13. Glue a bolt in the space between the critter tube and the small Christmas ornaments, cut two six-inch sections of tubing, and run them between the items, gluing them in place. As with step twelve, you might need to trim the tubing if it is too long.

14. The prop can be enhanced with additional details to cater it toward your haunt’s needs, like swarms of cockroaches crawling across the board or green slime filling the tubes.

*You will not use the entire bottle’s content for this project.
No comments:
Post a Comment