In 2022, I entered five props into the fine arts competition at the Colorado State Fair, where the industrial monster lost the People’s Choice Award by only three votes. The following year, I entered five more props to the fine arts competition and this wreath to the holiday wreath competition, where it won second place. Although I catered it to a witchcraft theme, you can substitute the items for an alternate scheme.
- One twelve-inch grapevine wreath
- One set of orange LED micro-lights (roughly sixteen feet long)
- Four or five four-foot garlands of fall leaves (roughly thirty-six leaves per garland)
- Hot glue gun and glue sticks
- One twelve-inch thatch broom
- One wooden crow decal (roughly four inches in diameter)
- Six artificial orange dahlias in varying sizes
- Four small plastic pumpkins
- One sheet of copy paper with potion ingredients printed on it
- One sheet of cream-colored cardstock
- At least four tablespoons of dark roasted coffee grounds
- One pan large enough to soak the cardstock and copy paper
- One 4 oz. bottle of all-purpose tacky glue*
- One small plastic snake
2. Separate the leaves from their garlands. Although you could do this while you glue them to the wreath, I found that performing this step beforehand made the following process much easier. Plus, it gives you a clear idea of exactly how many leaves you have. Then, line the inner and outer edges of the wreath with the leaves, staggering their placement so foliage with the same hues and sizes are not clustered together. Do not use all of the leaves, though (you want to reserve some for step eight).
3. Position the thatch broom and crow decal on the front of the wreath and, once you have determined their location, glue them in place. How and where you position them is entirely up to your chosen aesthetic.
4. Fill the large gaps in the front of the wreath with the dahlias. As with step two, you want to arrange them so that flowers of the same dimensions are not placed together. Then, accent the wreath with the small pumpkins.
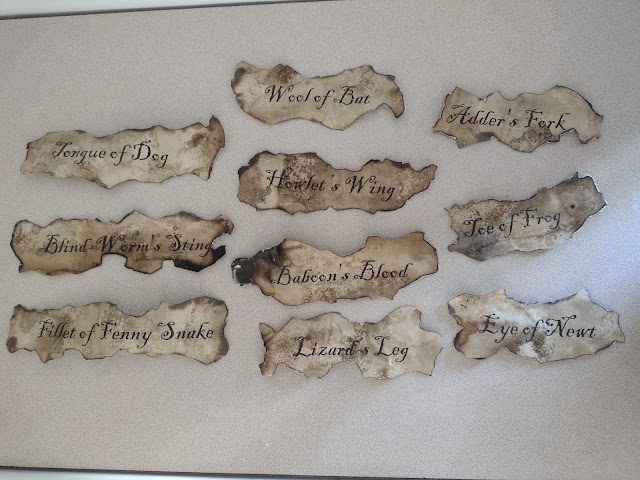
5. Glue the copy paper to the cardstock. Once you have done this, boil about twelve cups of water and add the coffee. The longer you allow the coffee to brew, the darker the stain will become. Likewise, greater amounts of coffee will produce a richer stain. Since I wanted uneven spots rather than a unified discoloration, I placed the cardstock on a baking sheet, splashed coffee and grounds onto the surface, allowed the liquid to sit for a few minutes, and then moved it to a space to dry.
6. After the cardstock dries, haphazardly cut out the ingredients. You do not want perfect edges, but jagged and uneven lines. For additional visual interest, use a lighter to burn the edges (do this in a well-ventilated area and near either a sink or pan of water).
7. Weave the ingredients through the foliage and glue them in place. You want them to be readable, so do not cover too much of their wordage with the flowers and leaves.
8. Use the remaining leaves to fill in any gaps which remain on the front of the wreath and give it extra girth. As with steps two and four, vary the color patterns so that leaves with the same hues and shapes are not concentrated in one area.
9. Accent the broom with a small snake, using superglue for a sturdier hold. Akin to the crow decal, you can use an alternate item, such as a spider or bat, to cater the prop to your haunt’s needs.


No comments:
Post a Comment