$15 - $20 (based on 2019 prices)
Makes one frame
- One 10” x 13” wooden frame
- One yard of burlap
- One 4 oz. bottle of all-purpose tacky glue*
- One 10 oz. can of interior/exterior, fast-drying spray paint in flat black*
- One 10 oz. can of interior/exterior, fast-drying spray paint in flat brown*
- Four wooden spools
- Three to four yards of twine
- One latex mask
- One 0.3 fluid ounce bottle of red food coloring*
- One 4 oz. bottle of clear, all-purpose tacky glue gel*
1. Remove the backing and glass from the frame. I deliberately selected an old wooden version with plenty of dents and scratches because I liked the aesthetic. For an alternate appearance, consider utilizing the techniques outlined in the instructions for the framed insect specimens or the haunted portraits to create an aged patina that complements your theme.
2. Cut the burlap into a square large enough to amply cover the backing. I cut the fabric into a 12” x 15” piece, which gave me extra fabric to allow for any mistakes. Once the cloth is sized, stretch it across the backing and glue it in place. I found it works best to glue one side to serve as an anchor and then work the fabric from there, ensuring the surface is as smooth as possible. After the glue has dried, trim the excess burlap around the edges.
3. To add age and distress, dust the fabric with a light coat of black and brown spray paint. To give the appearance of dirt, hold the can over twelve inches away from the surface and make quick flicking motions. You can also apply a flecking of black paint and smears of brown paint to enhance the weathered appearance.
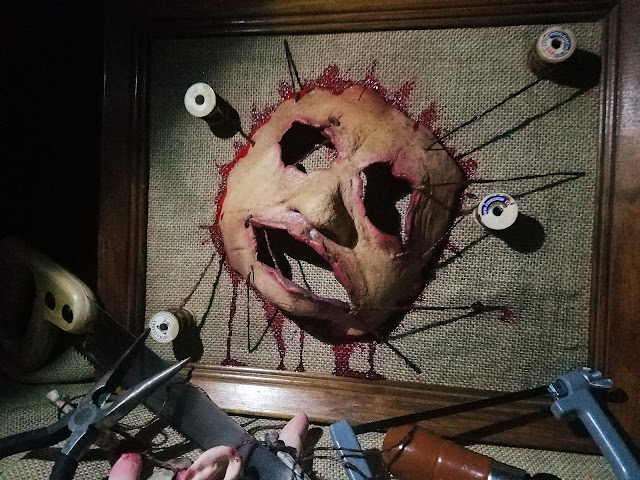
4. Arrange the spools on the backing and glue them in place. Because you want to leave ample room for the face, it may prove beneficial to pre-position everything on the board to determine their desired placement before permanently affixing them. Also, for a sturdier hold, consider using superglue.
5. Cut twine into four two-foot sections and wrap them around the spools, leaving a twelve-inch strand free to sew into the mask. To help the thread remain in place, coat the spools with glue first. Although I gave myself a foot of excess to work with, you may want additional inches to give you more leeway.
6. Cut the elastic band off the mask and, for added detail, trim the edges to give it a jagged and uneven look as though it had been haphazardly cut off. Then, position the item on the backing and glue it in place. Like the spools, you may want to use superglue to ensure a stronger bond.
7. Thread the twine through the mask. You want to give the illusion that it is lashed to the backing with the strands. Do not overthink your process (a chaotic web of strings will only enhance the creepiness). I found a darning needle works best, since the latex is too thick for a regular needle.
8. In a plastic container (because the food coloring will stain, use something disposable or that you won’t mind dying), pour in your desired amount of clear glue gel and slowly add red food coloring to the solution until it achieves the sanguine hue you desire. To give the blood further density, add blue food coloring and mix well.
9. On a newspaper-lined surface, apply the blood glue to the prop and allow it to fully dry. You can use an old spoon or plastic utensil to strategically dripple the liquid along chosen areas (e.g. around the edges of the mask) or pour it randomly for a gory mess.
10. Reattach the backing to the frame. If you plan to display the prop outside in windy conditions, consider gluing the backing in place for additional support. You can also embellish the prop further with clusters of insects crawling across its surface.
*You will not use the entire bottle’s content for this project.


No comments:
Post a Comment