$10 - $15 (based on 2015 prices)
Makes one doll
Creepy dolls are always a nice addition to several yard-haunt themes, especially since many people find them unnerving. For this version, I crackle painted a second-hand doll and dressed her in a weathered flour sack. She looked particularly spooky sitting on the voodoo alter in 2015’s haunt and will look right at home draped over a cluster of pumpkins in 2016’s haunt.
- One twelve-inch doll with vinyl limbs and head
- One 2 oz. bottle of acrylic paint in flat black*
- One 8 oz. bottle of wood glue*
- One 2 oz. bottle of acrylic paint in flesh tone*
- One 2 oz. bottle of acrylic paint in flat brown*
- One 5 lbs. flour sack
- At least four tablespoons of dark roasted coffee grounds
- One pan large enough to soak the flour sack
- One to two yards of light brown twine
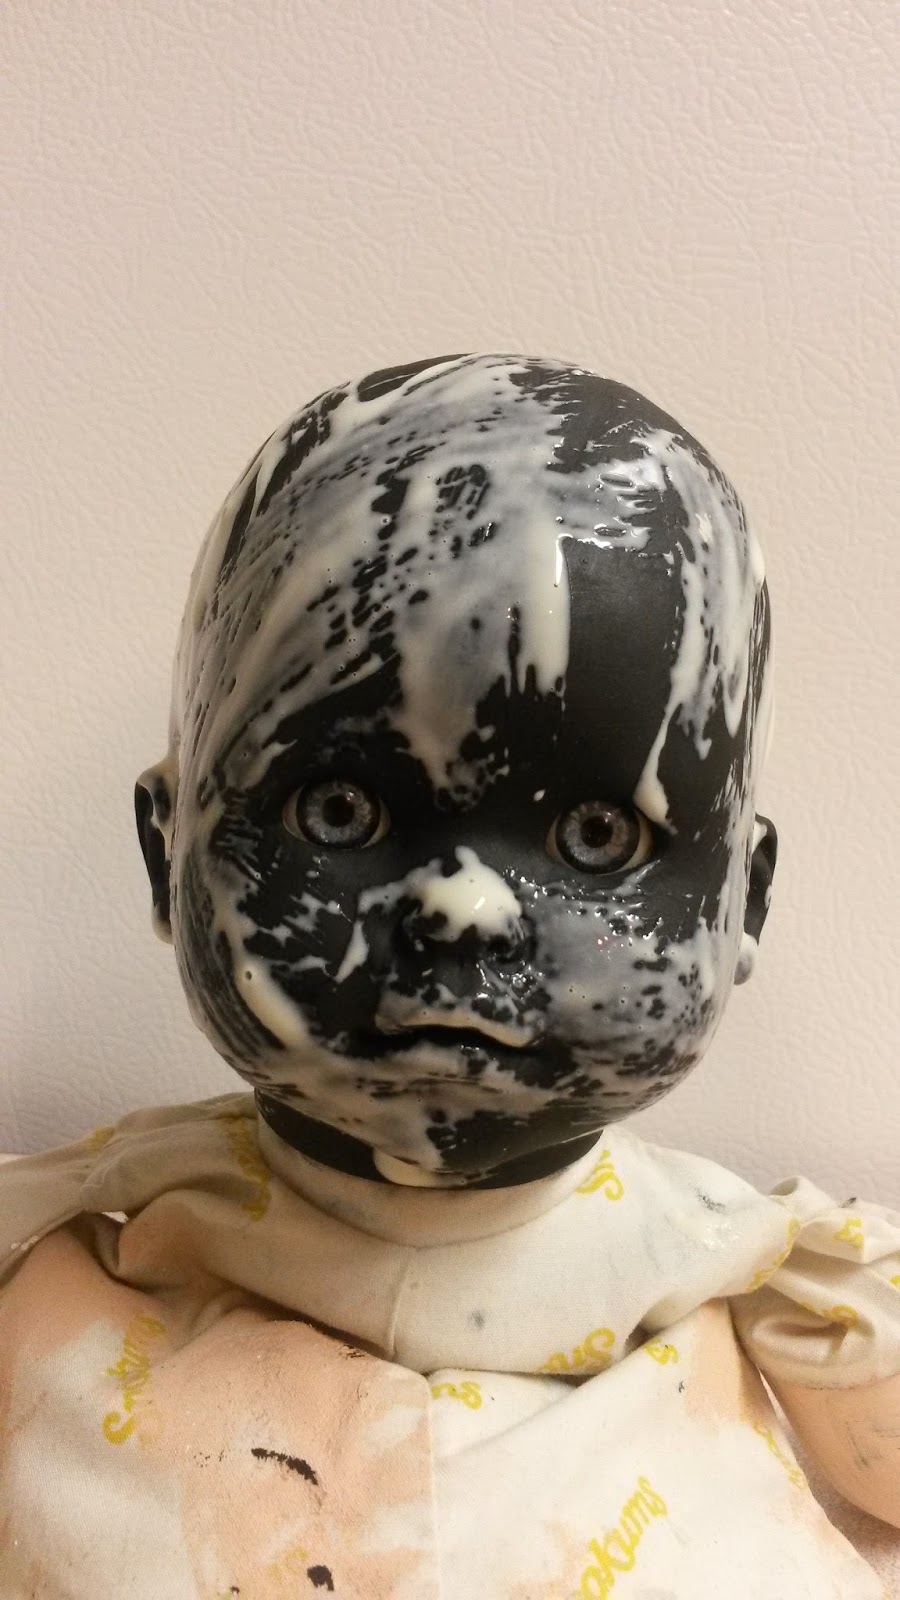
1. Remove all of the doll’s clothes and, on a newspaper-lined surface, paint its limbs and head black. Although I only used one coat, you may want more depending on your desired coverage. Keep in mind, though, that this is the base coat for the crackle paint and much of it will be covered up by the second layer. While I chose black, you can use a different color to tailor the prop for your specific needs.
2. Once the paint has dried, use a thick brush to apply a smattering of wood glue to the prop. Try not to over think your application (a random pattern produces the best results). Also, it may be easier to work with one limb at a time rather than attempting to glue and paint the entire doll at once.
3. Let the glue sit for a minute to become tacky and then cover the doll with the flesh tone paint. Here, too, I only used one coat; however, you may want more. As the glue and paint dry, they will form cracks, making the base coat visible.
4. Once the glue and paint have fully dried, brush a light coat of brown paint onto the doll to simulate dirt. During this process, try to focus on areas where dust and grime would normally accumulate: in the lines between fingers and toes, along the creases of elbows and knees, and inside the ears and mouth.
5. Boil enough water to completely submerge the flour sack and pour it into the pan. Add the coffee. The longer you allow the coffee to brew, the darker the stain will become. Likewise, greater amounts of coffee will produce a richer stain. Submerge the sack in the coffee mixture and soak it until it reaches the color you desire. I soaked mine for four days and scattered the coffee grounds over the top of the fabric to add spots. Remove the sack from the water and allow it to dry.
6. Once the flour sack has dried, cut a hole along the bottom seam and two along the sides large enough for the doll’s head and arms to fit through. Using a darning needle, thread the twine along the outer edges of the sack (do not sew up the three holes). You want the needlework to look messy and uneven, giving the outfit a disheveled appearance.
7. Dress the doll in the sack. You can add further distress by shredding parts of the fabric or smudging it with brown paint.
*You will not use the entire bottle’s content for this project.


No comments:
Post a Comment